Quickstart (On-Premise)
BladePipe On-Premise offers two local deployment editions: Community (free) and Enterprise. Both editions allow you to keep BladePipe and all your data securely within your own network environment.
Follow this quickstart to create your first DataJob and perform database synchronization using BladePipe On-Premise in just a few steps.
Step 1: Install BladePipe
Deploy BladePipe by following the instructions in Install All-In-One (Docker).
Alternatively, you can deploy BladePipe using the Kubernetes or Binary methods.
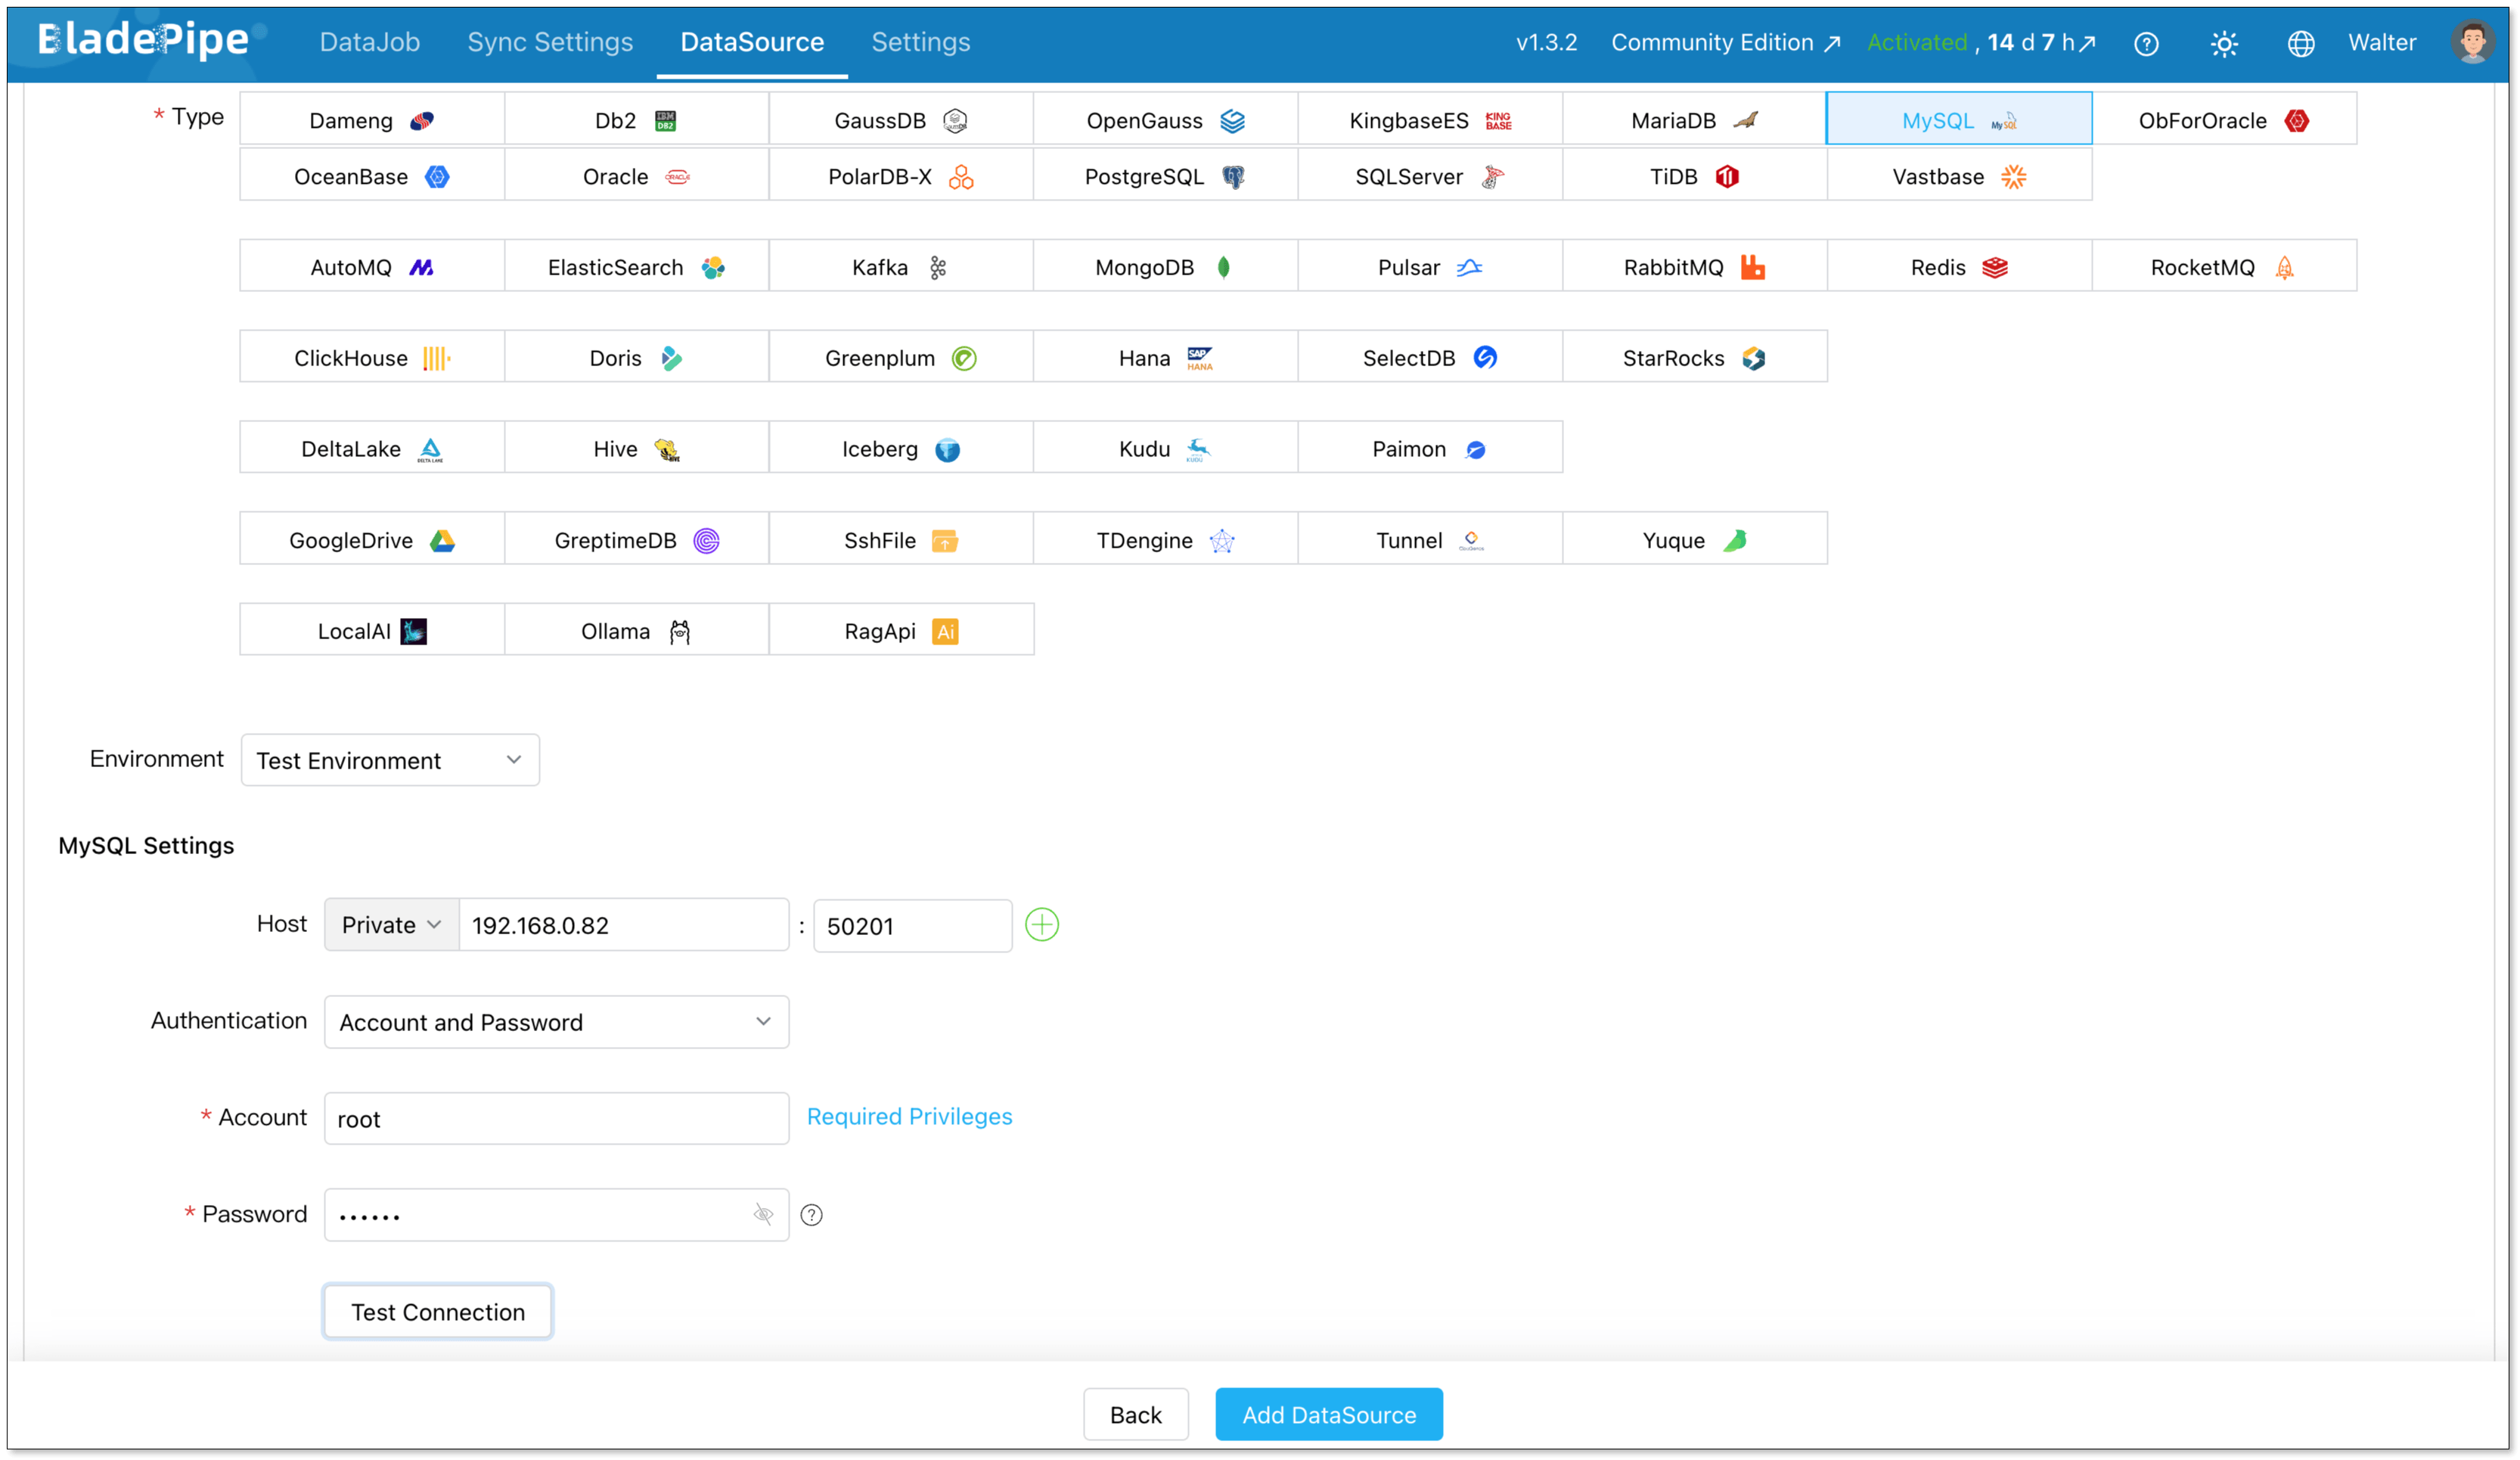
Step 2: Add a DataSource
-
In the top navigation bar, click DataSource.
-
Click Add DataSource.
-
Configure the following information:
- Deployment: Choose Self Maintenance or a cloud provider.
- Type: Select your database type.
- Host: Enter the IP Address and port necessary to connect to your DataSource.
- Account & Password: Enter the username and password.
-
Click Test Connection to verify your database connection.
-
Click Add DataSource.
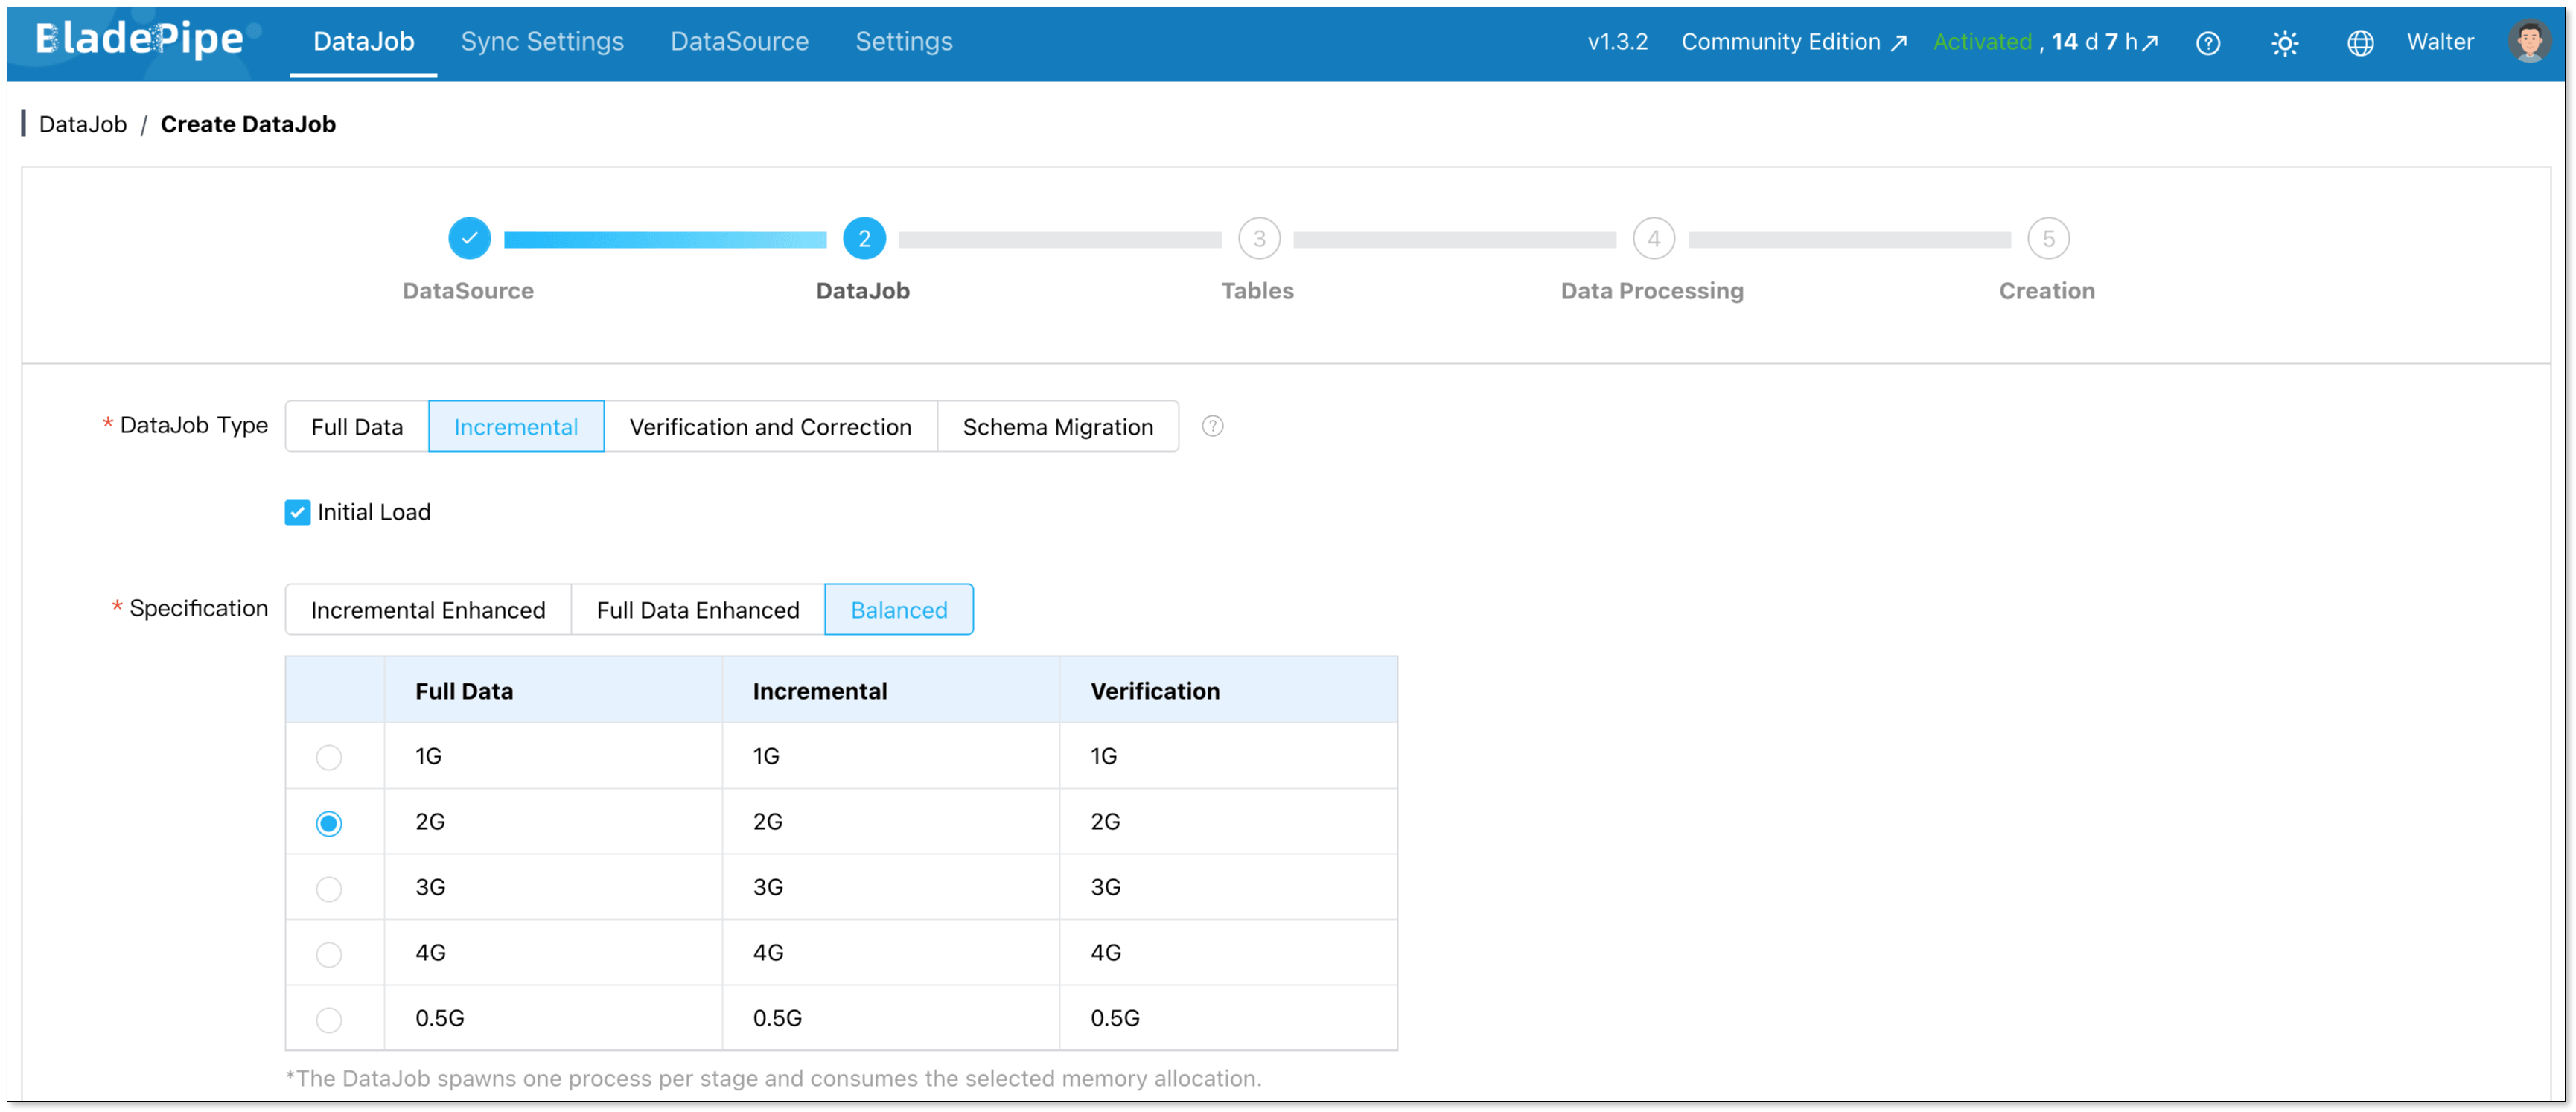
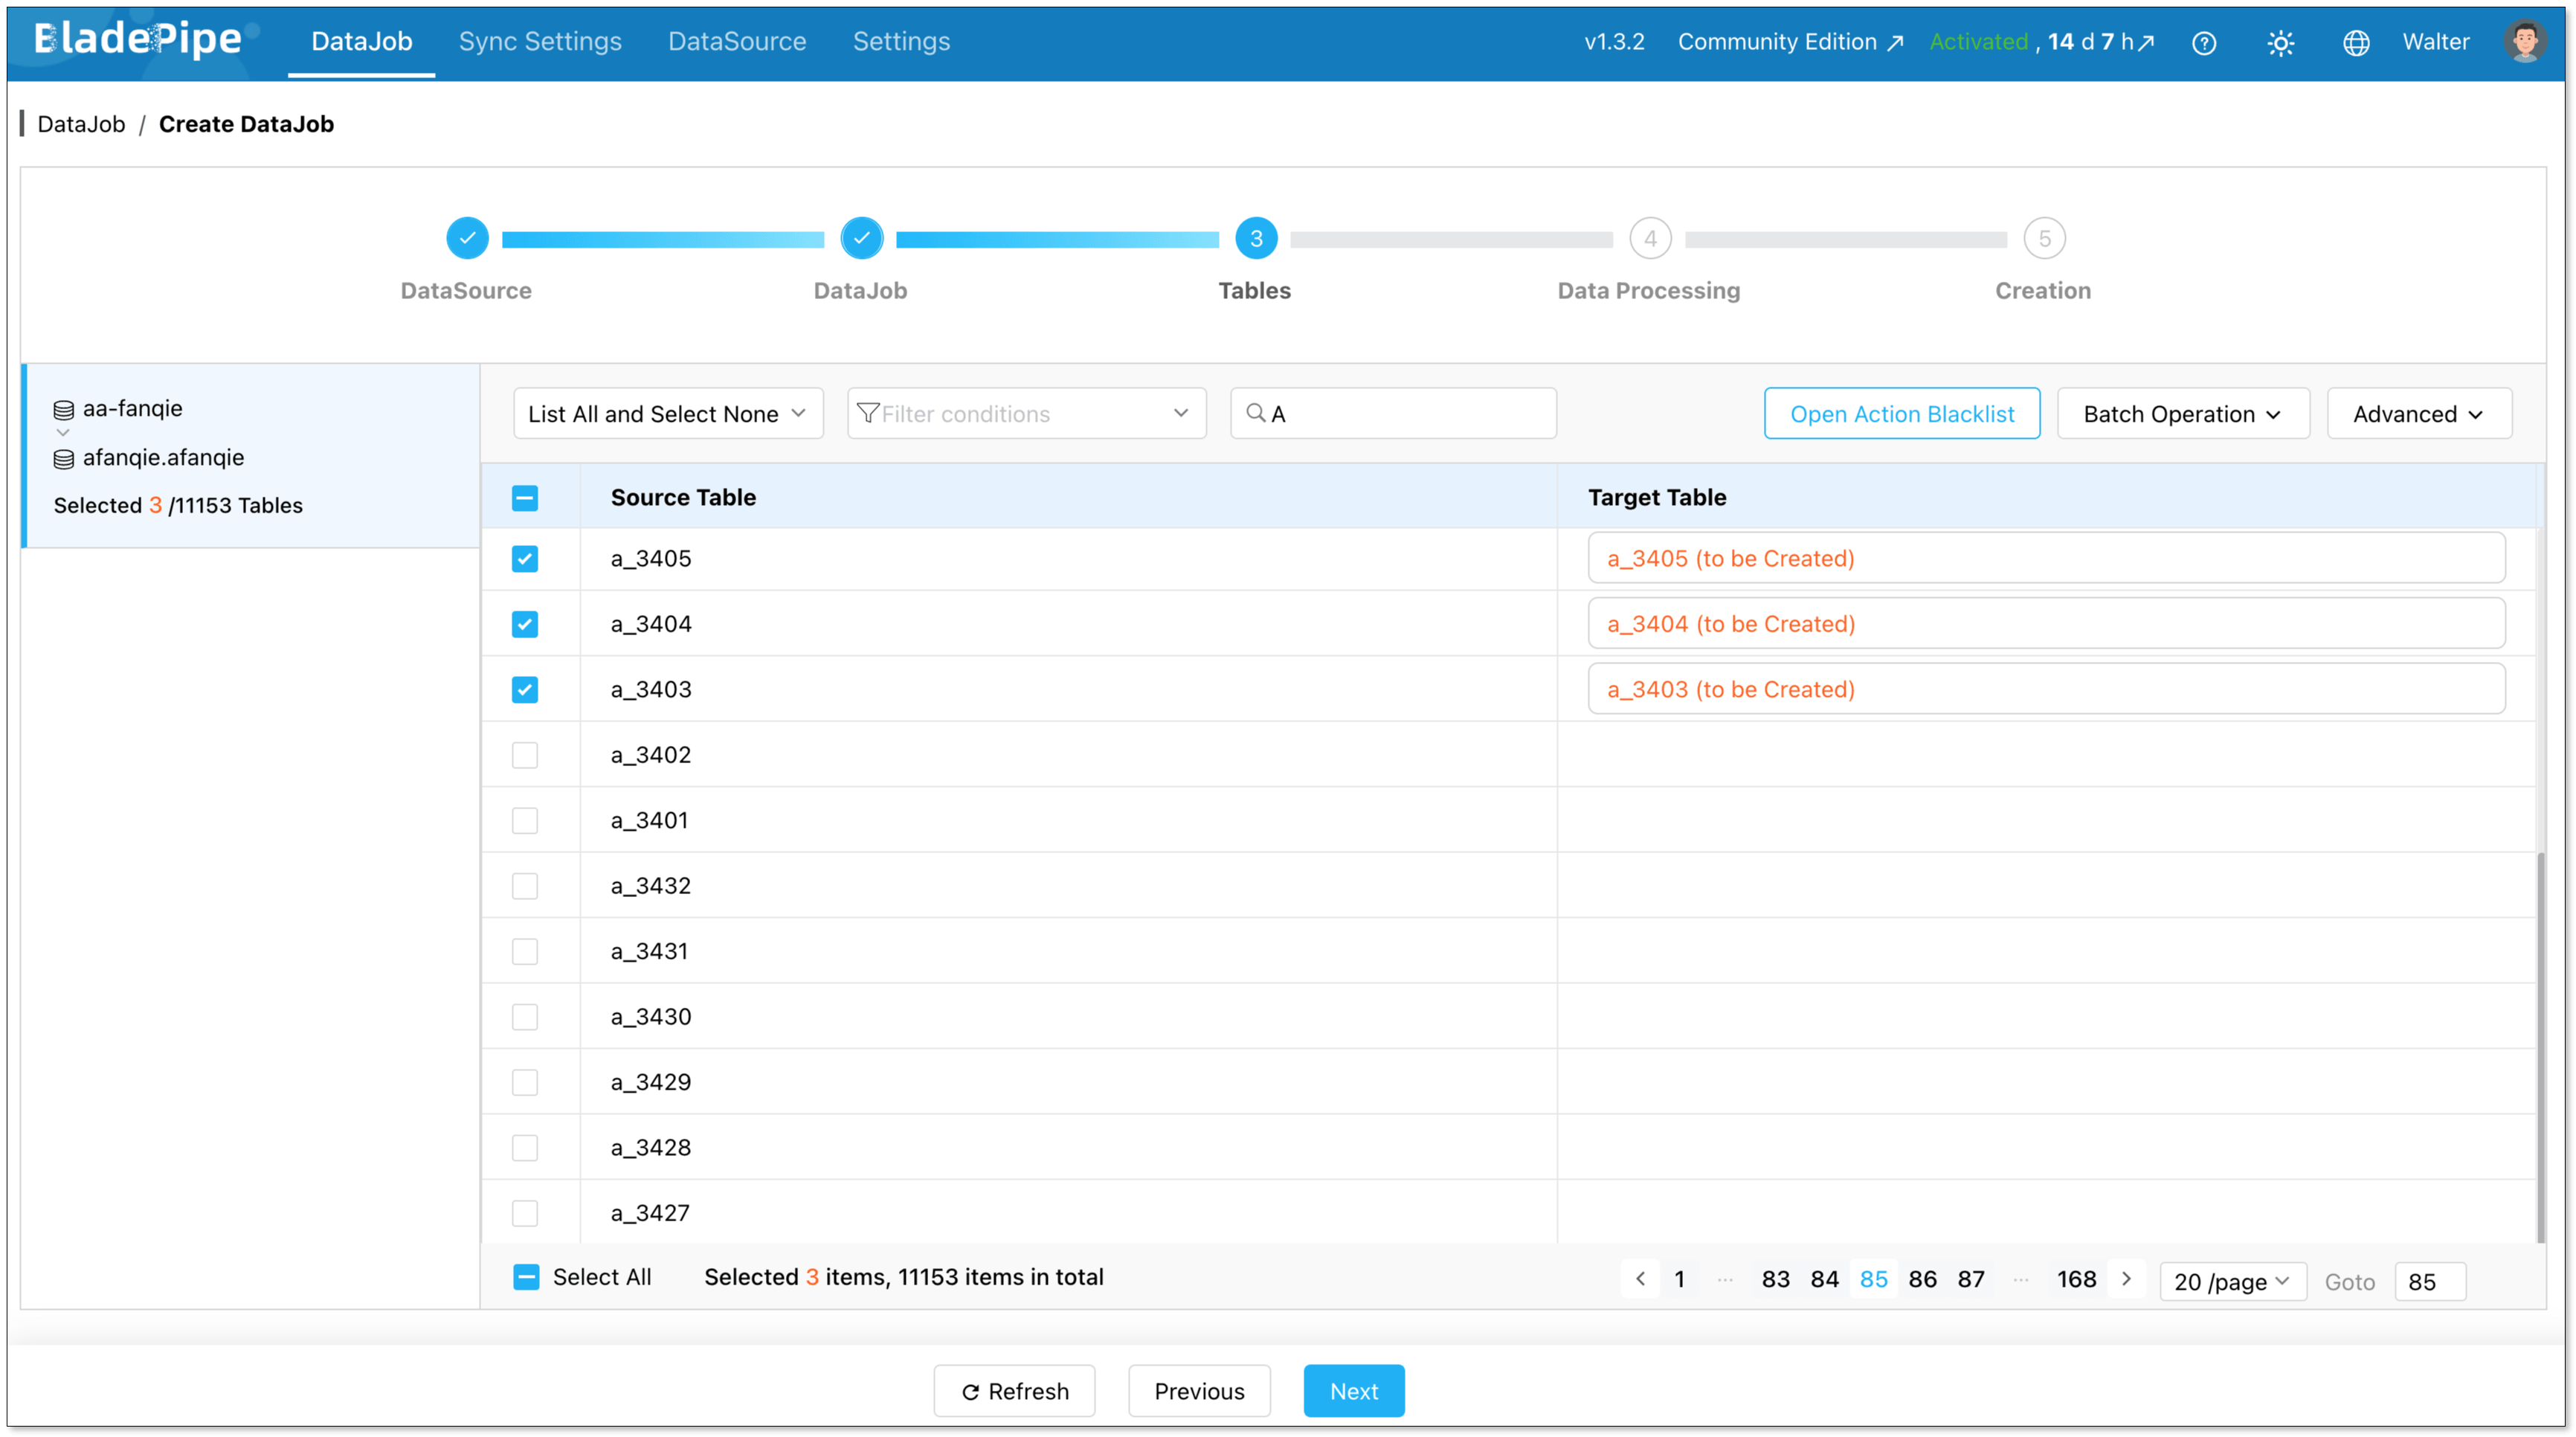
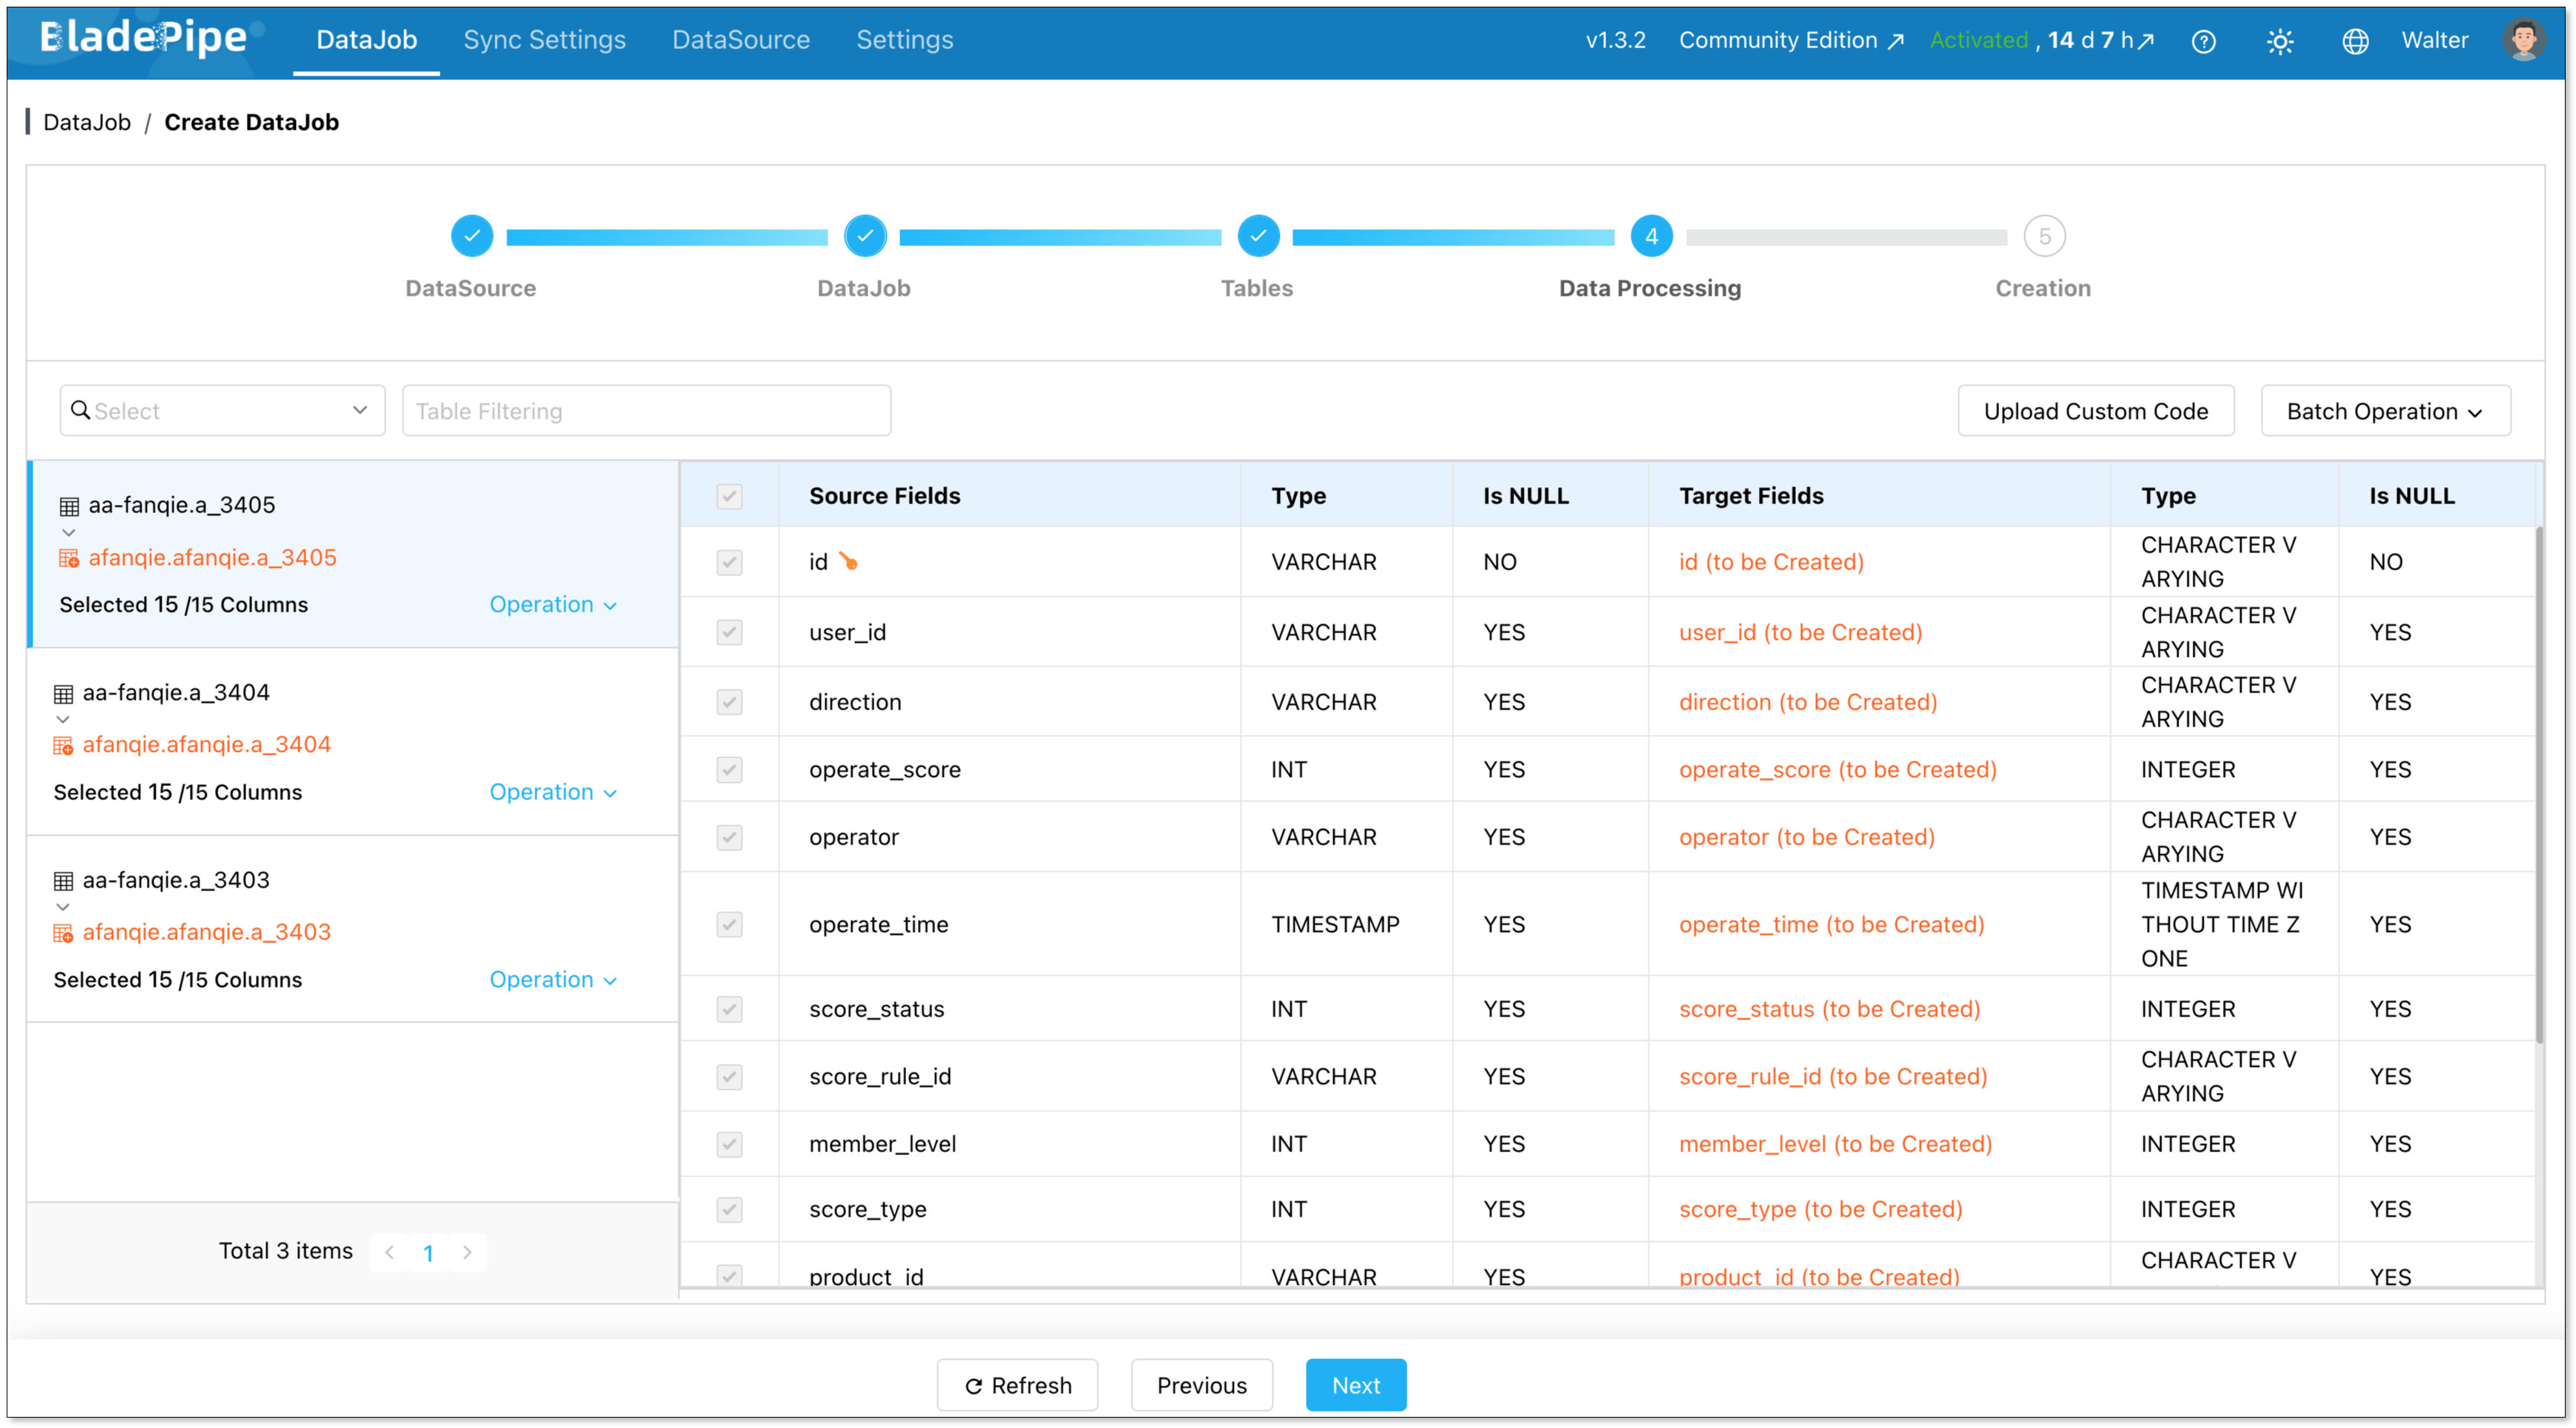
Step 3: Create a DataJob
-
In the top navigation bar, click DataJob.
-
Click Create DataJob.
-
Select your added MySQL instance as both the Source and Target, and click Test Connection.
-
Select the databases to be synchronized, and click Next.

-
Choose Incremental as the DataJob type, and select Initial Load. Click Next.
-
Select the tables you want to sync, and click Next.
-
Select all required columns, and click Next.
-
Click Create DataJob.
-
Navigate to the DataJob list page to monitor the progress of your DataJob.

Step 4: Verify the Data
- Perform insert, update, and delete operations in your source database.
- Verify that the changes dynamically replicate to the target database and ensure data consistency.