Quickstart (Managed)
BladePipe Cloud includes two modes: Managed and BYOC. Managed is a cloud-hosted SaaS service, where both the Console and the Worker are fully managed by BladePipe. You only need to operate through the web interface. No deployment or maintenance is required.
This guide walks you through the process of quickly creating a data synchronization task.
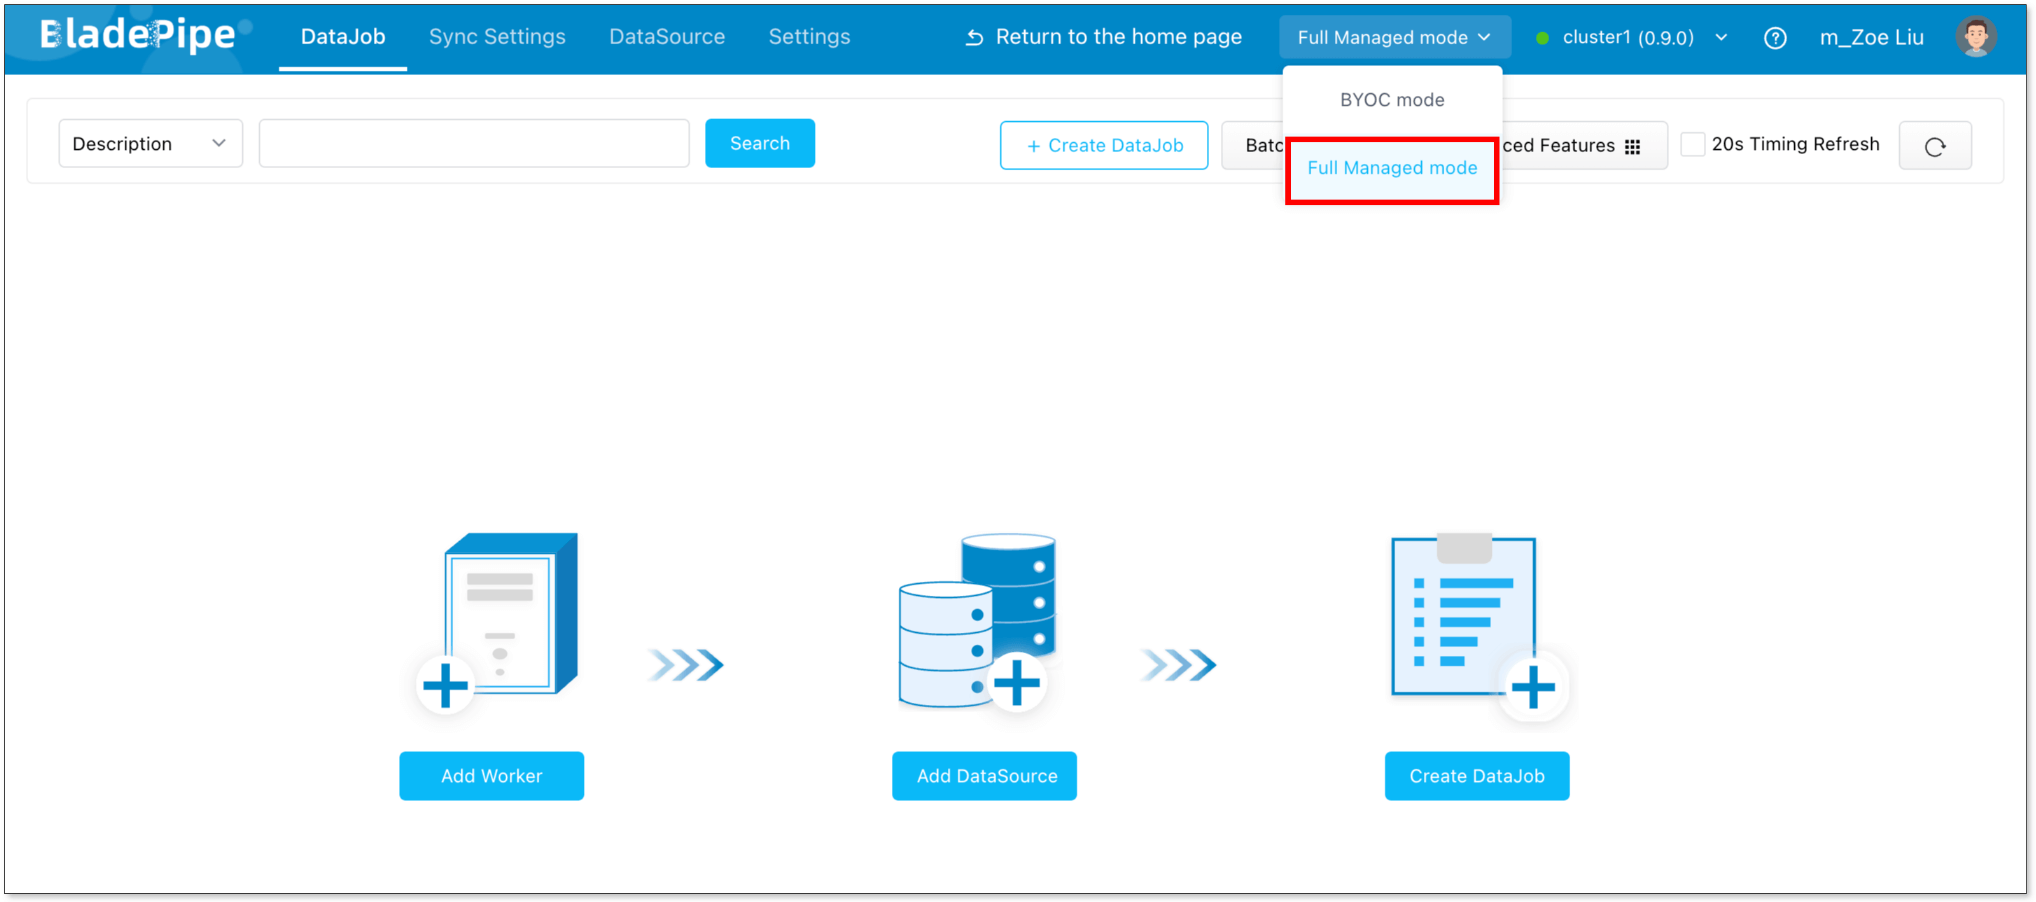
Step 1: Switch to Fully Managed Mode
- Log in to the BladePipe SaaS Platform.
- In the top-right corner, switch the mode to Fully Managed mode.
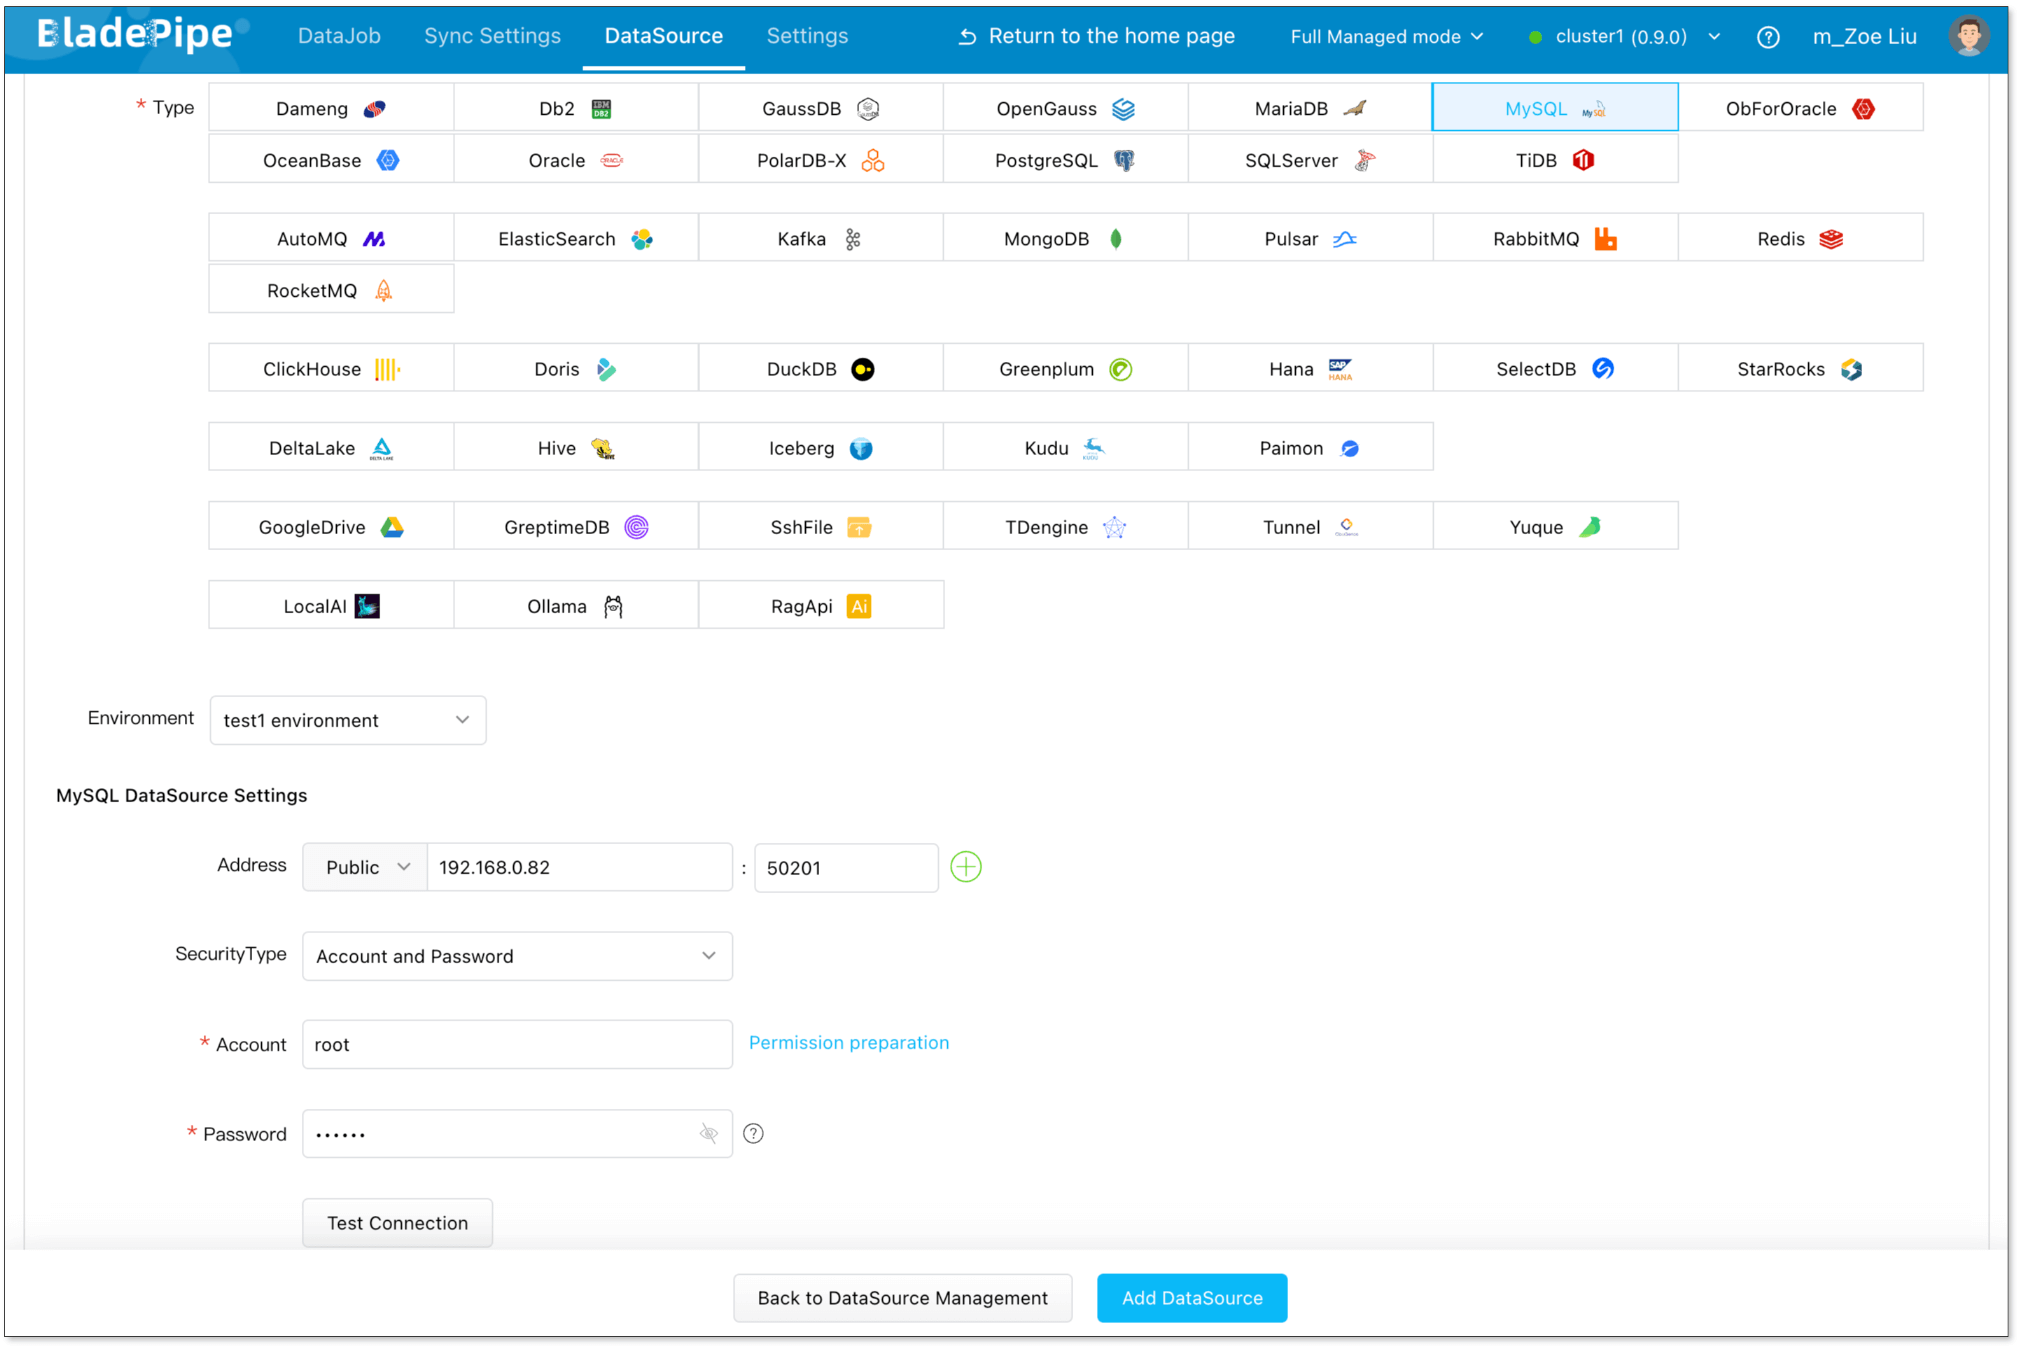
Step 2: Add DataSources
- Connect BladePipe to your data sources in one of the following ways:
- Add a data source using SSH tunneling.
- Enable public access for your data sources, then go to Sync Settings > Sync Worker > Machine IP List to get the worker’s IP and add it to your whitelist.
- Connect via a Private Link provided by your cloud provider.
- Go back to the BladePipe SaaS platform, navigate to DataSource > Add DataSource. Fill in the required connection details to add your data sources.
Step 3: Create a DataJob
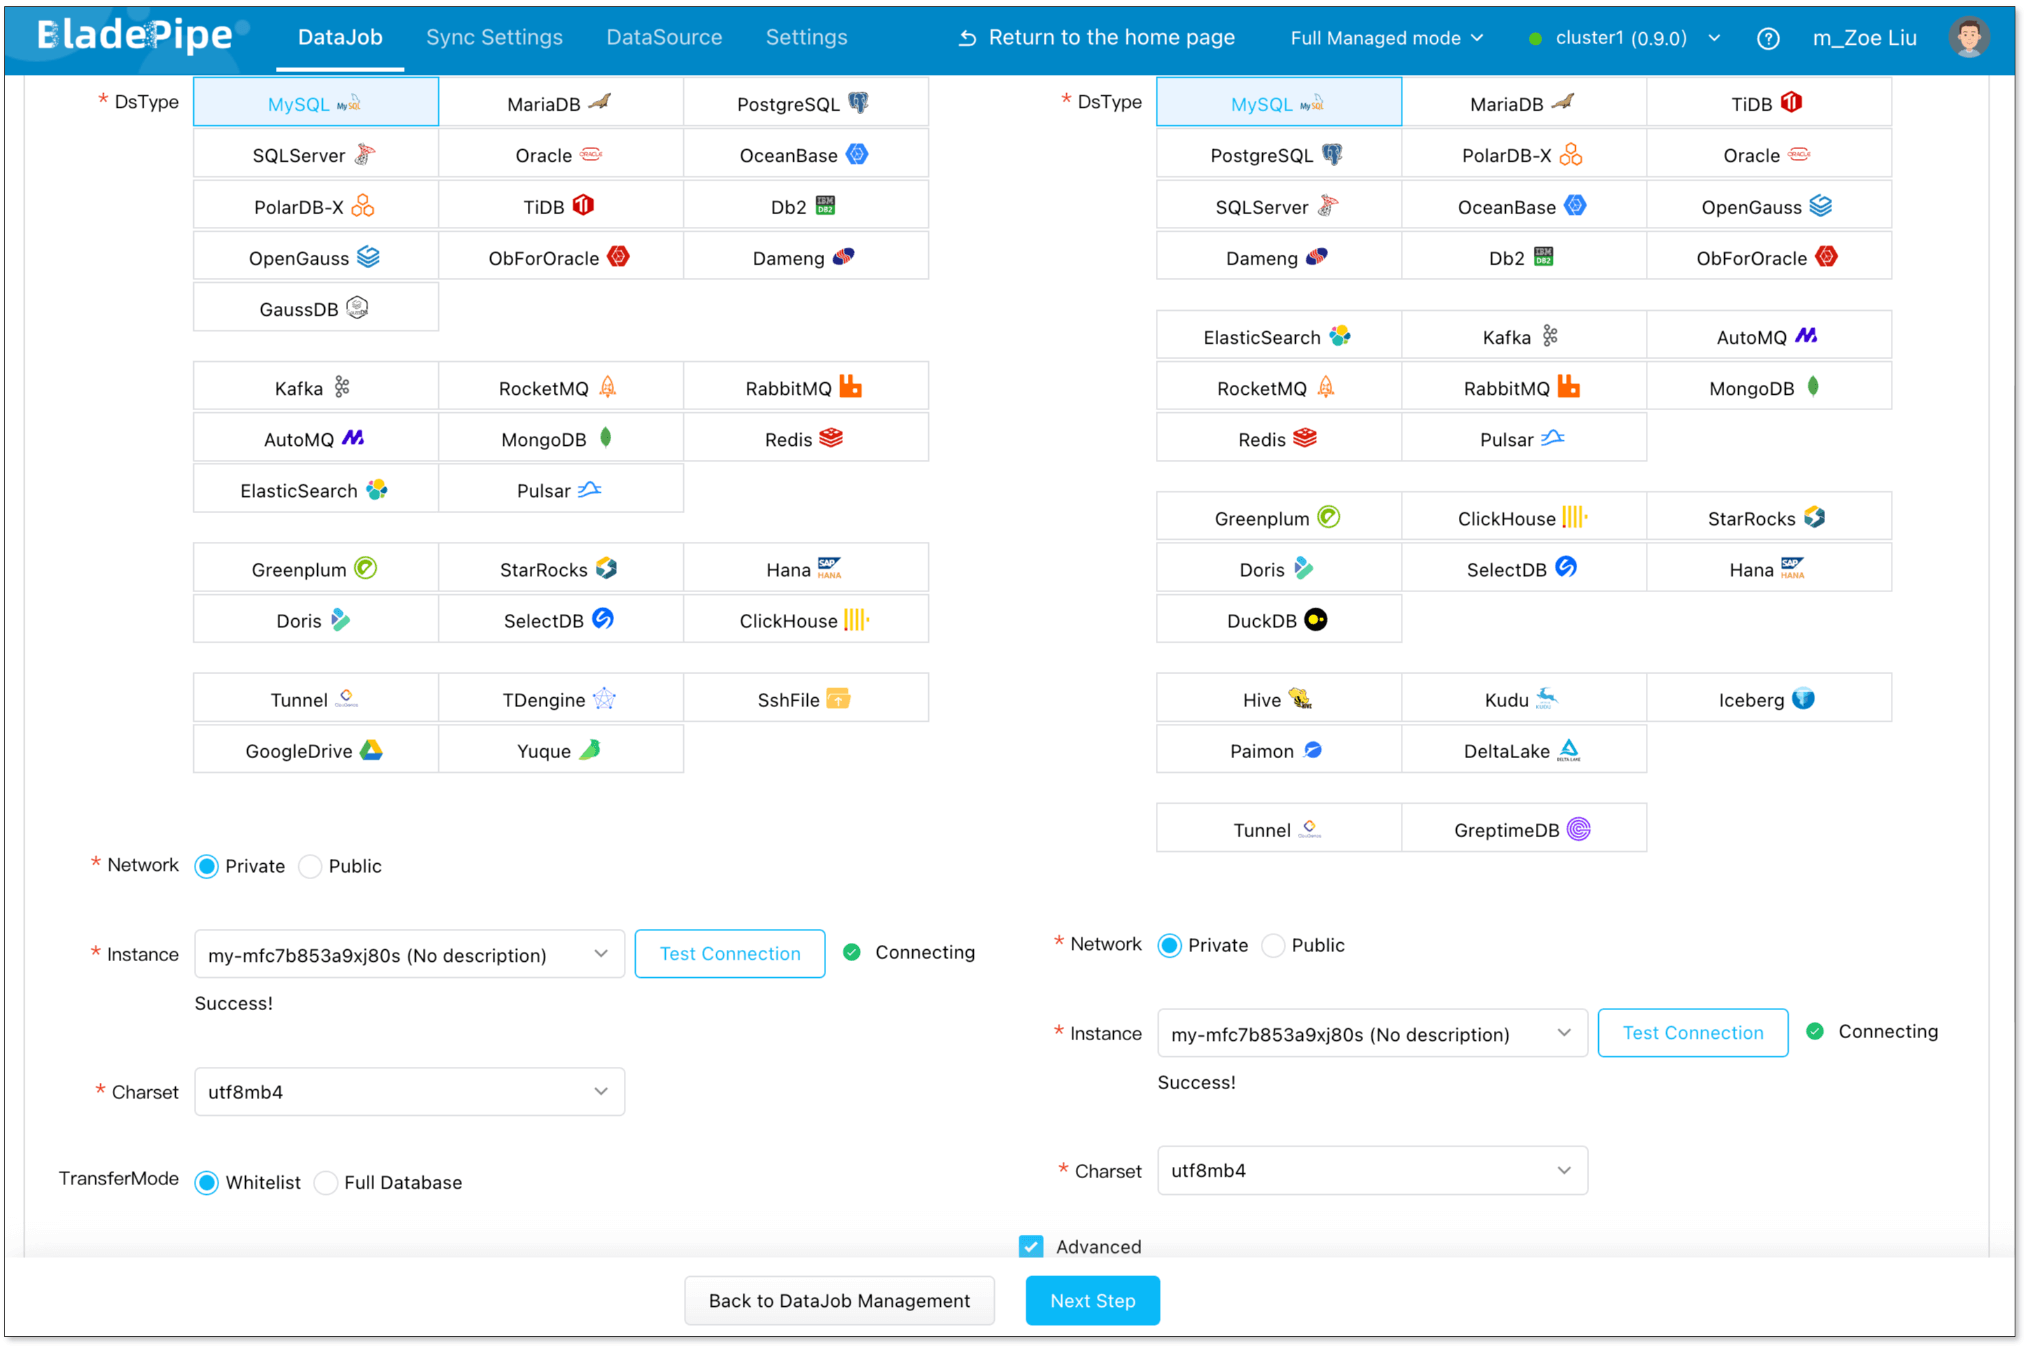
- Go to DataJob > Create DataJob.
- Choose the added DataSources as your Source and Target DataSources, and click Test Connection. Then click Next Step.
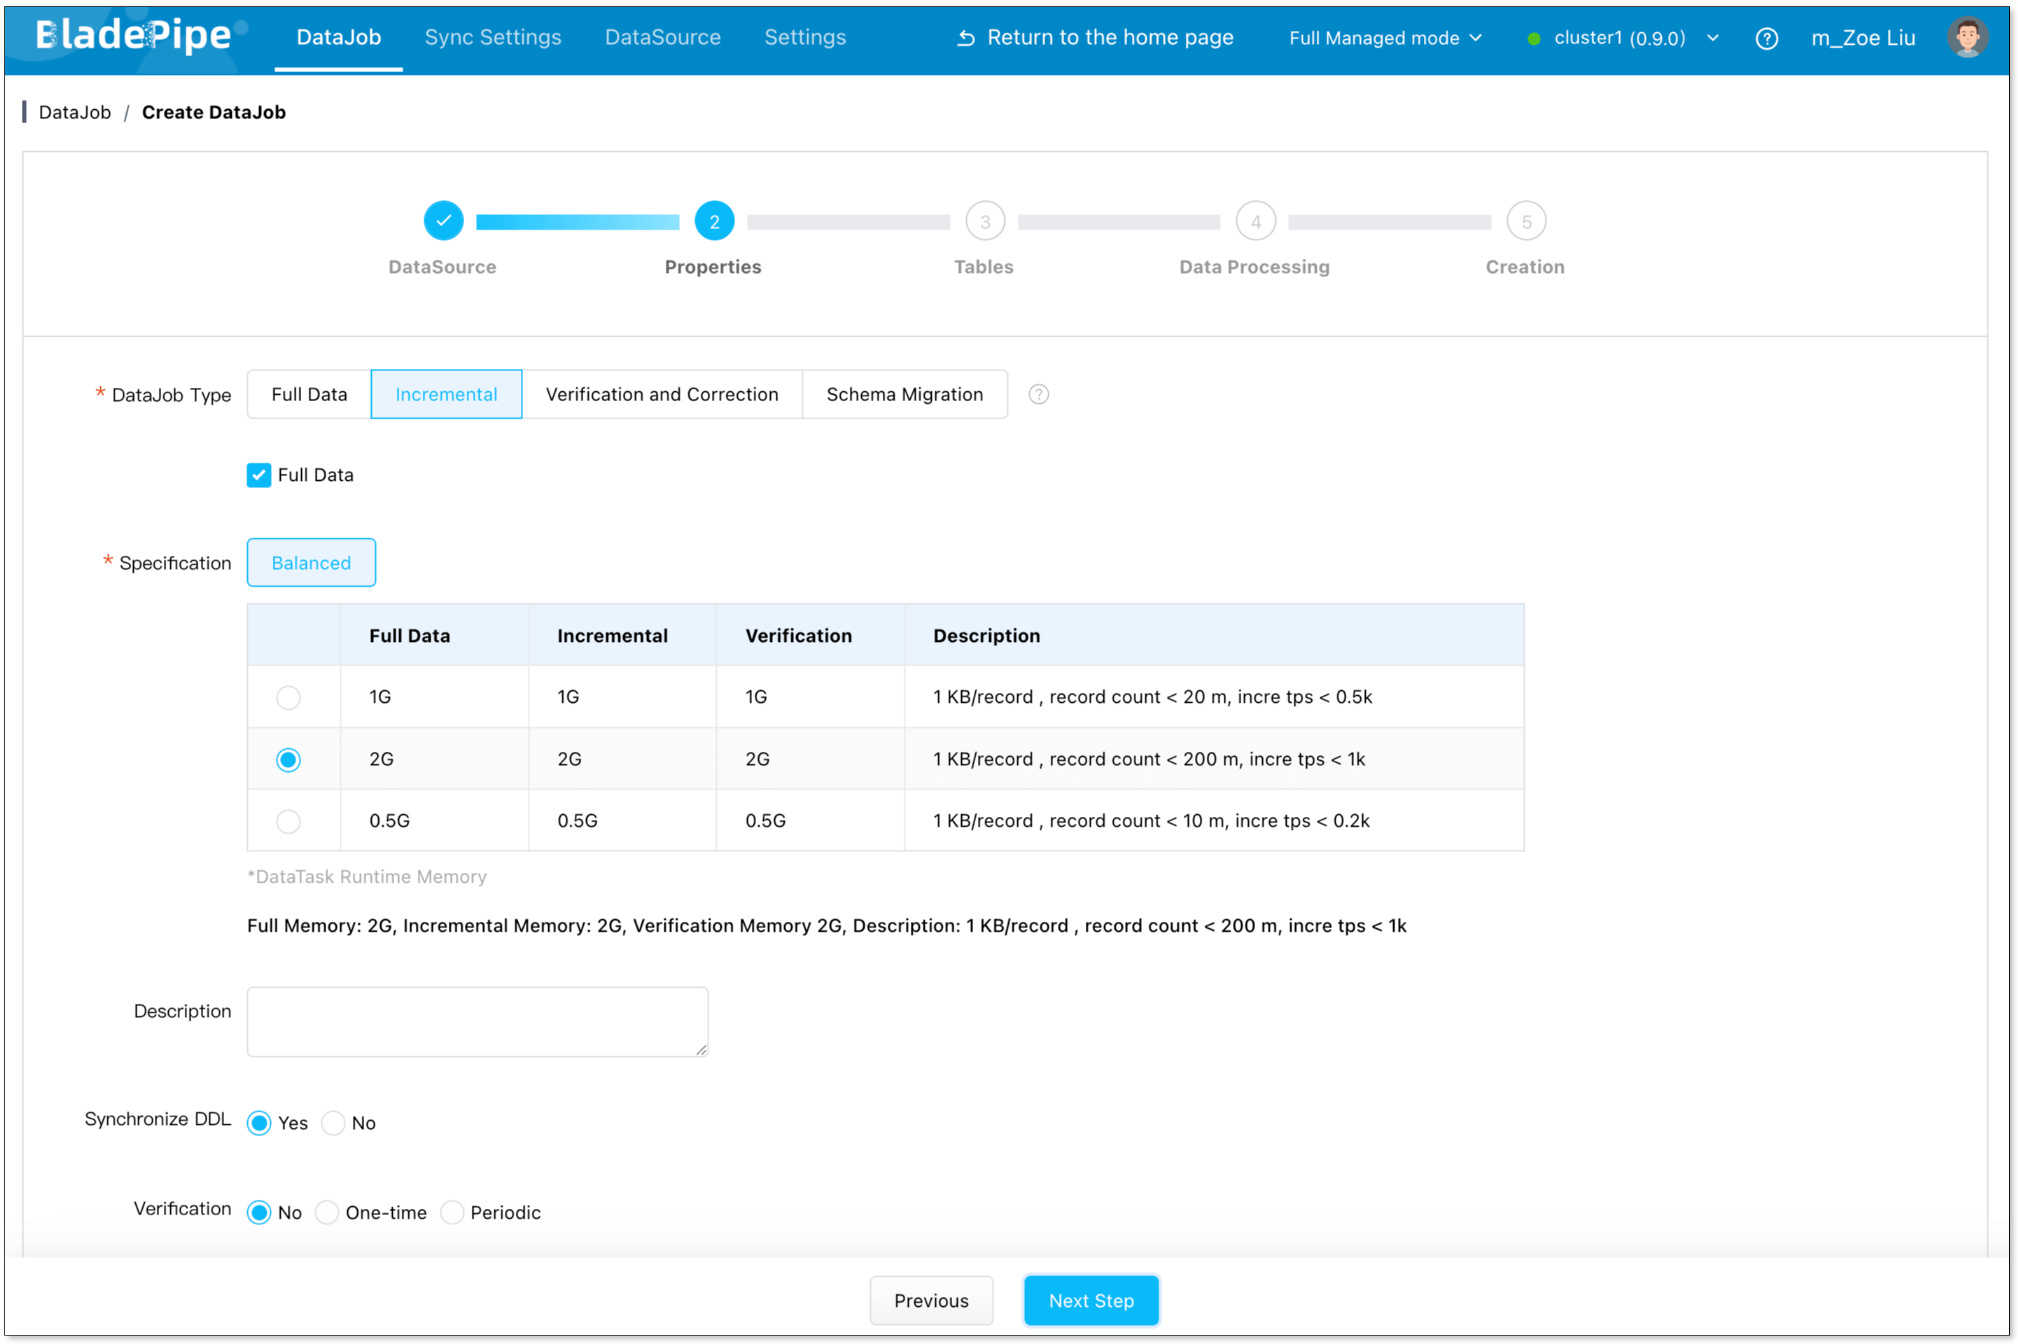
- Choose Incremental as the DataJob type, and select Full Data. Then click Next Step.
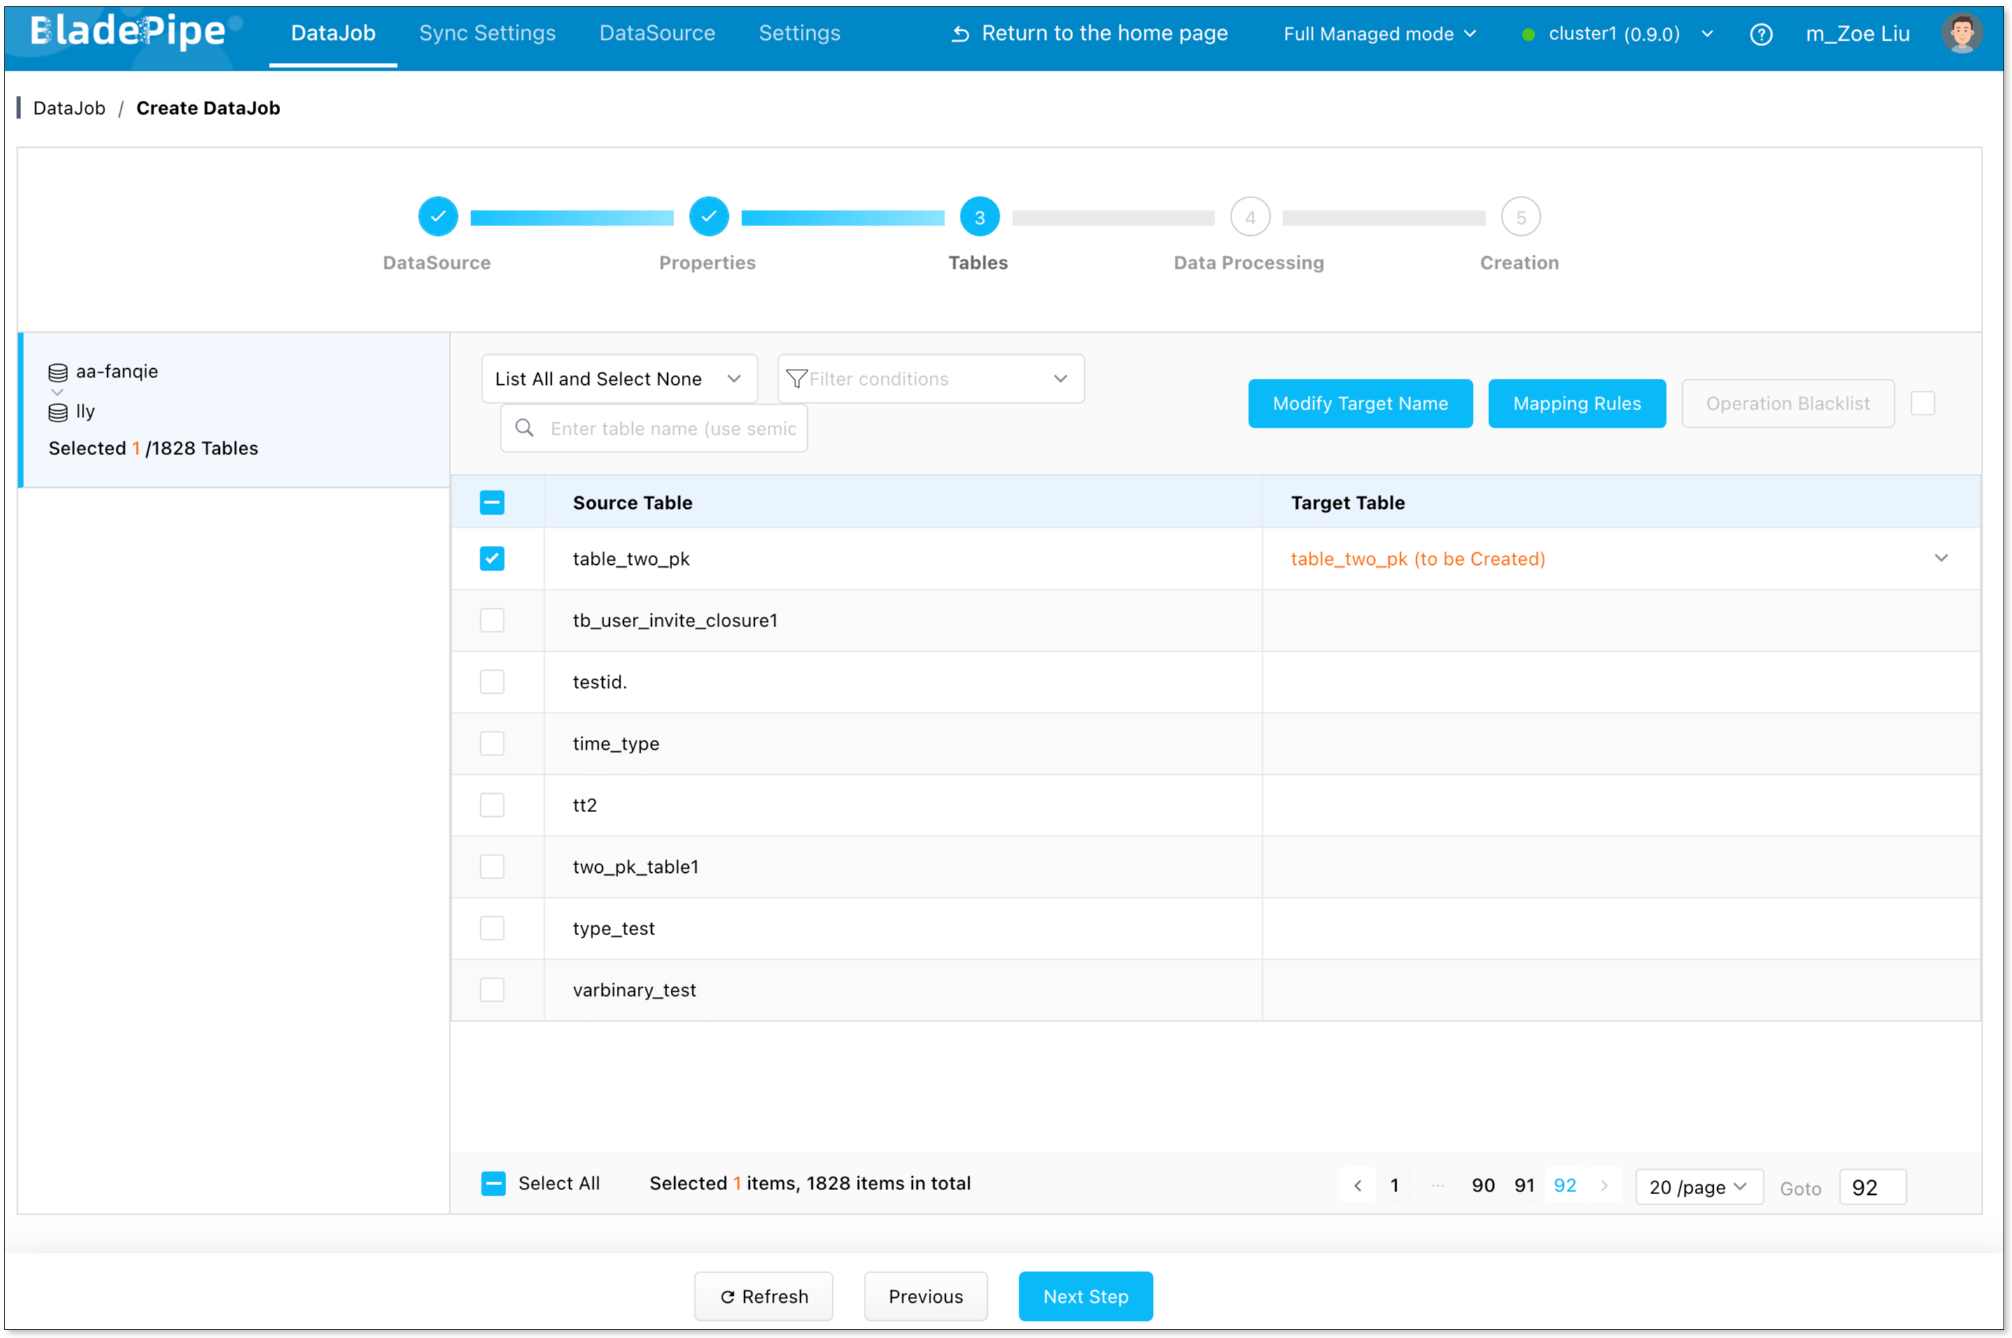
- Choose the tables you want to sync, then click Next Step.
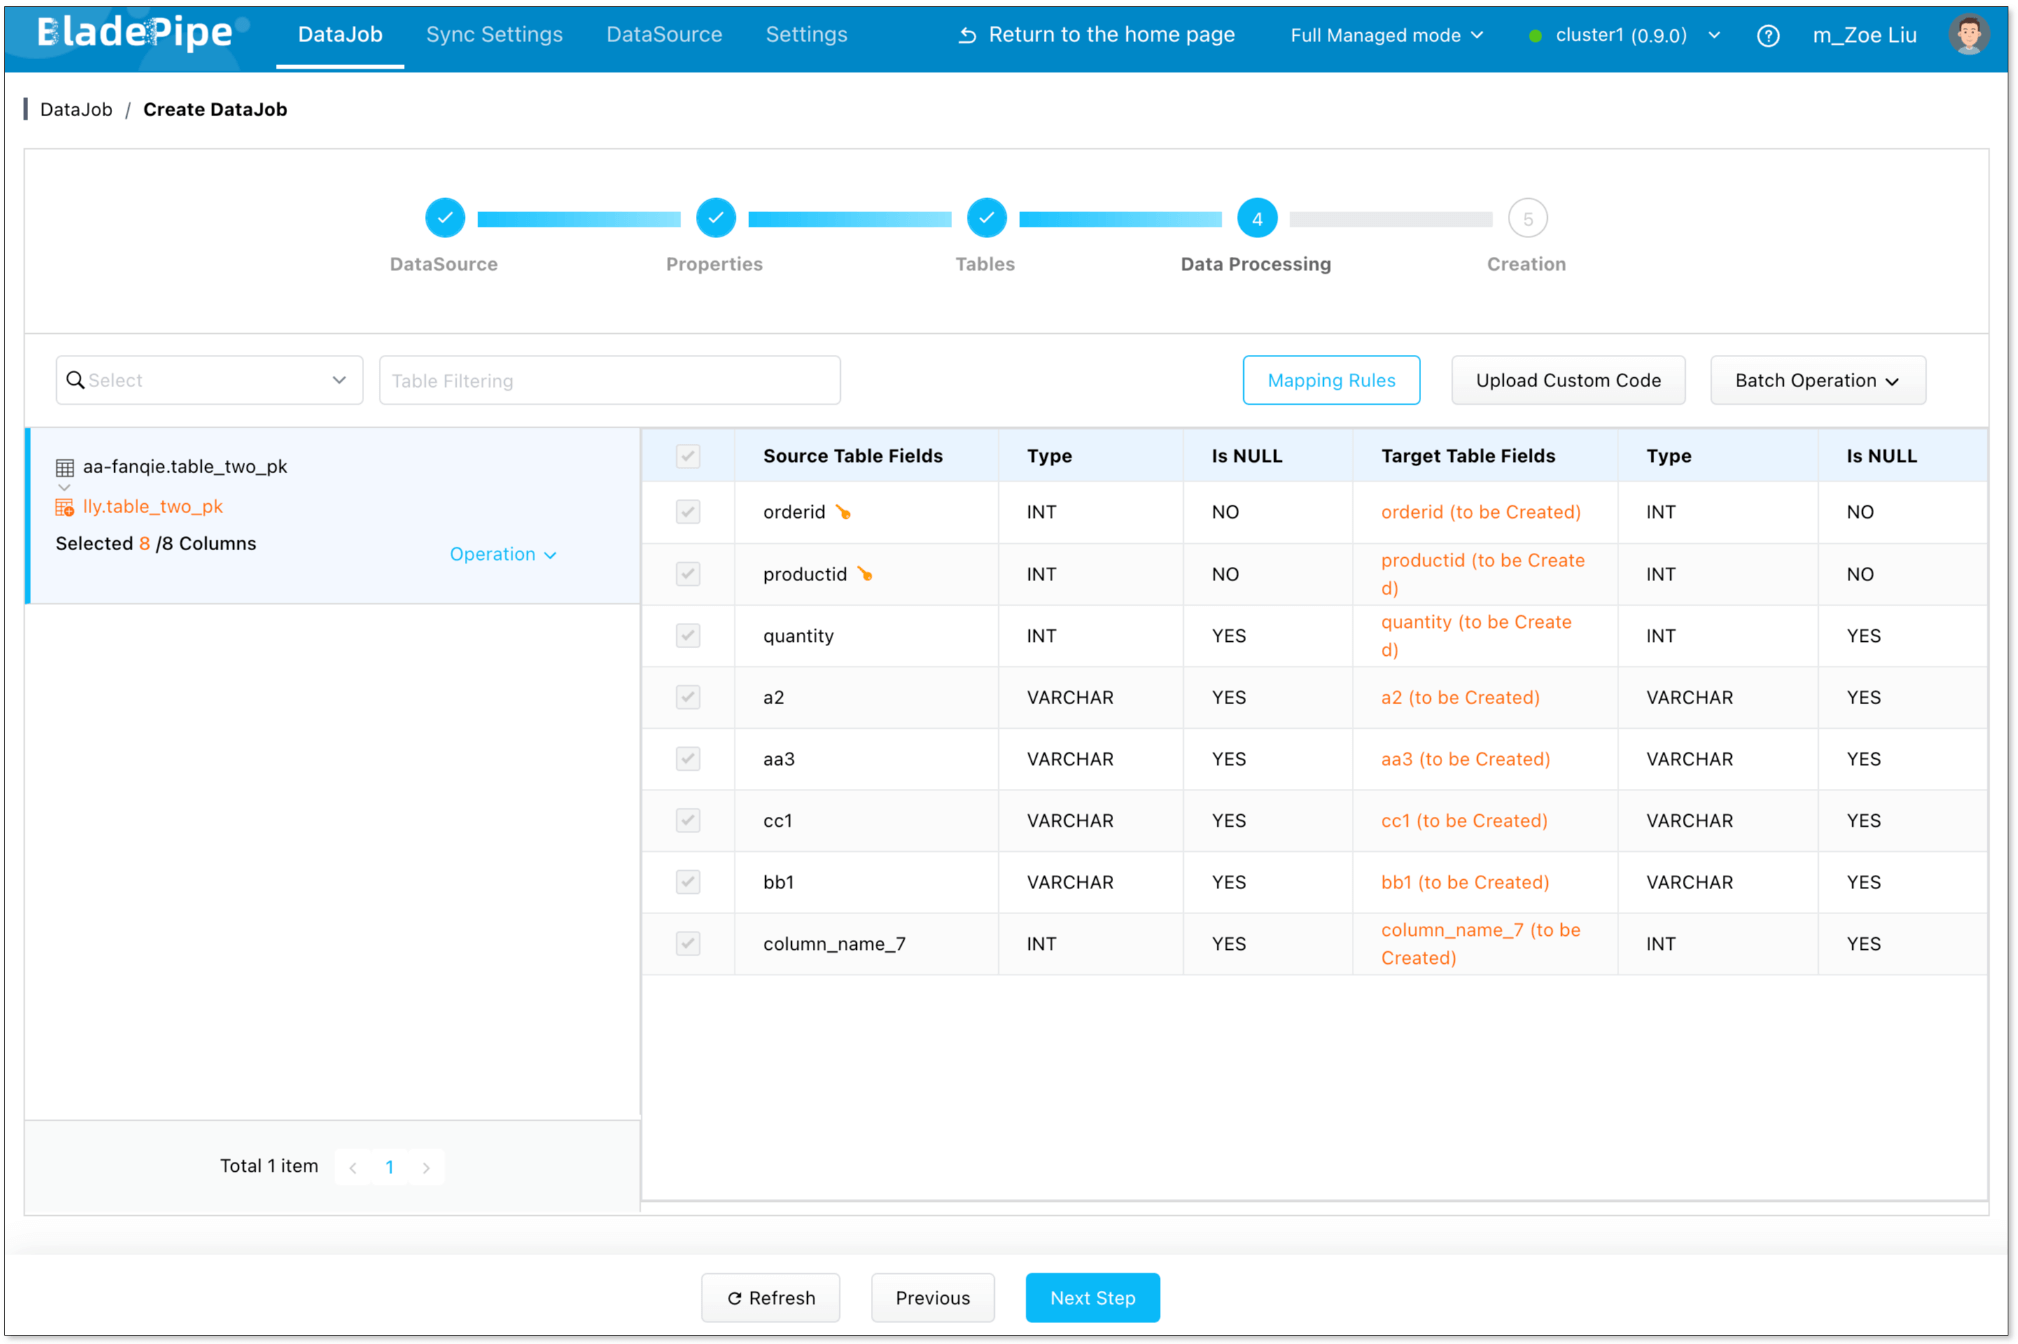
- Select all columns, then click Next Step.
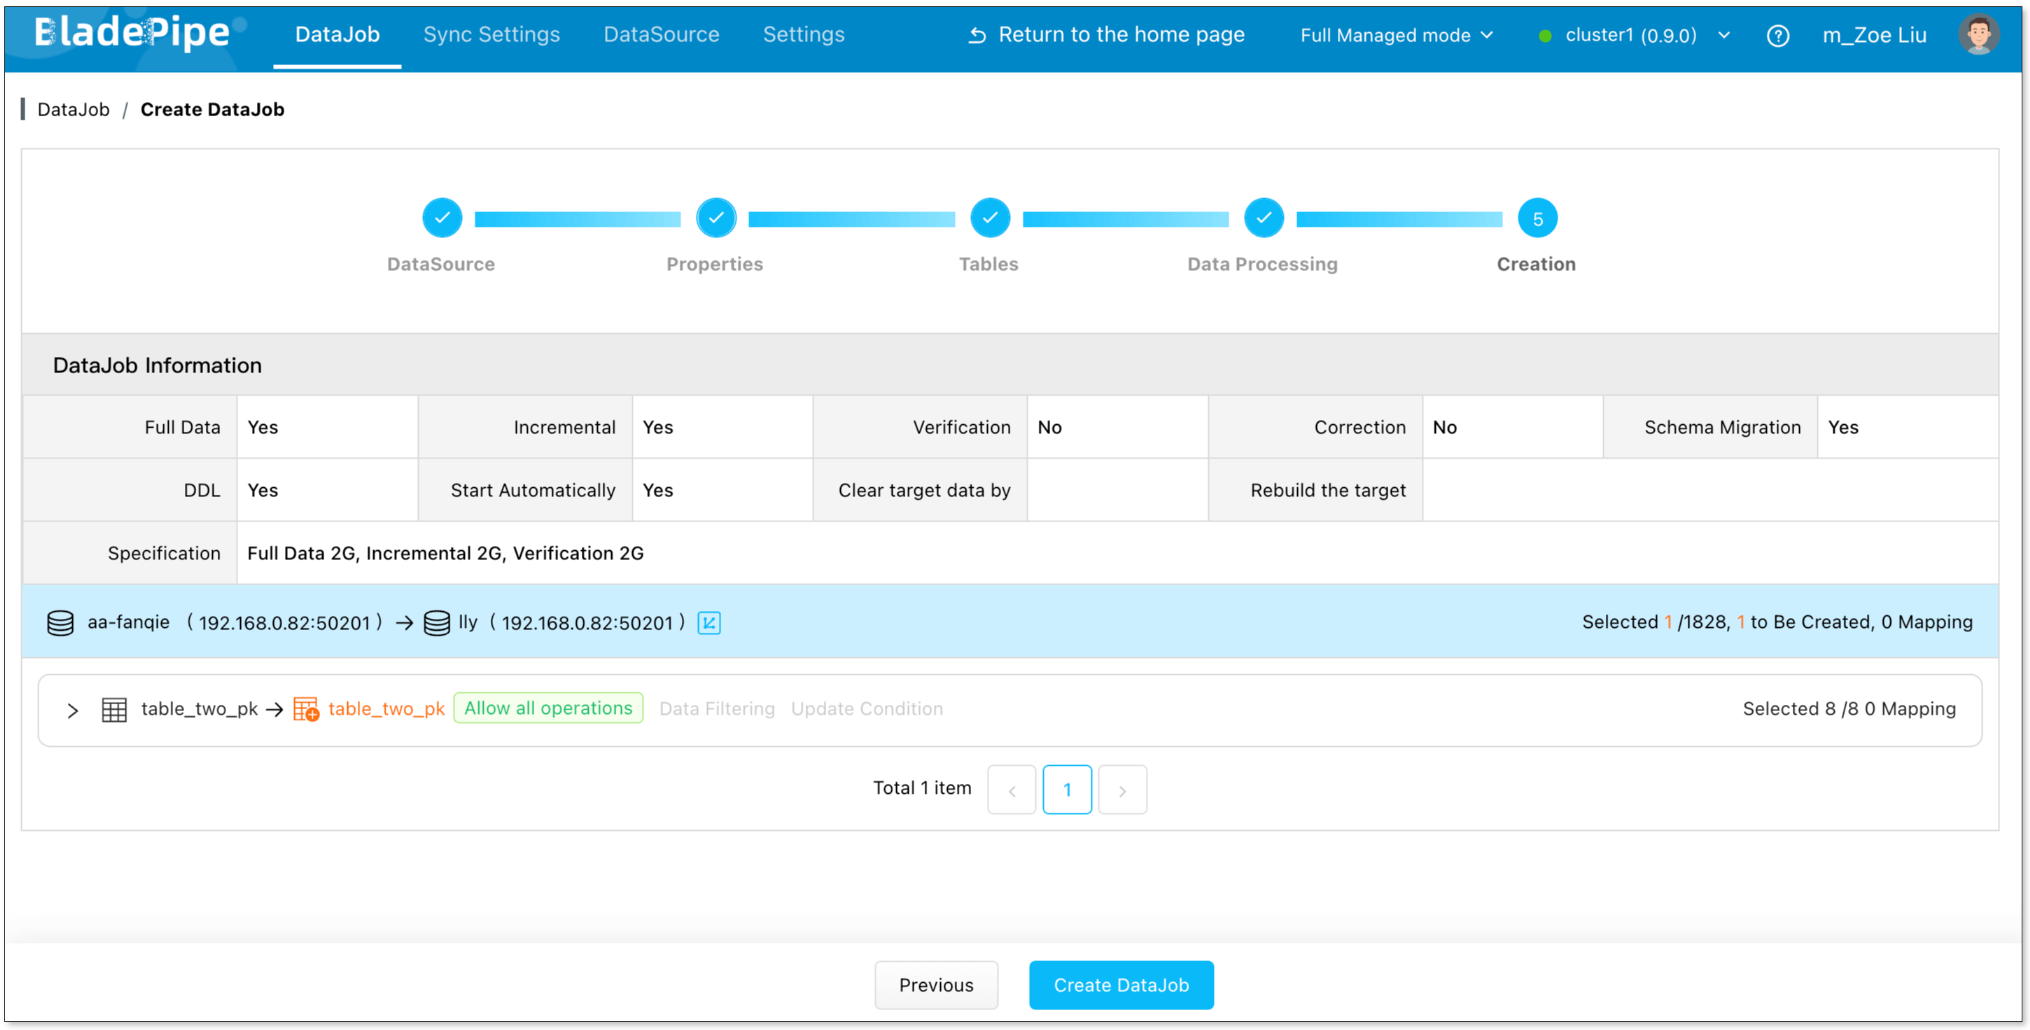
- Review the DataJob configuration and click Create DataJob.
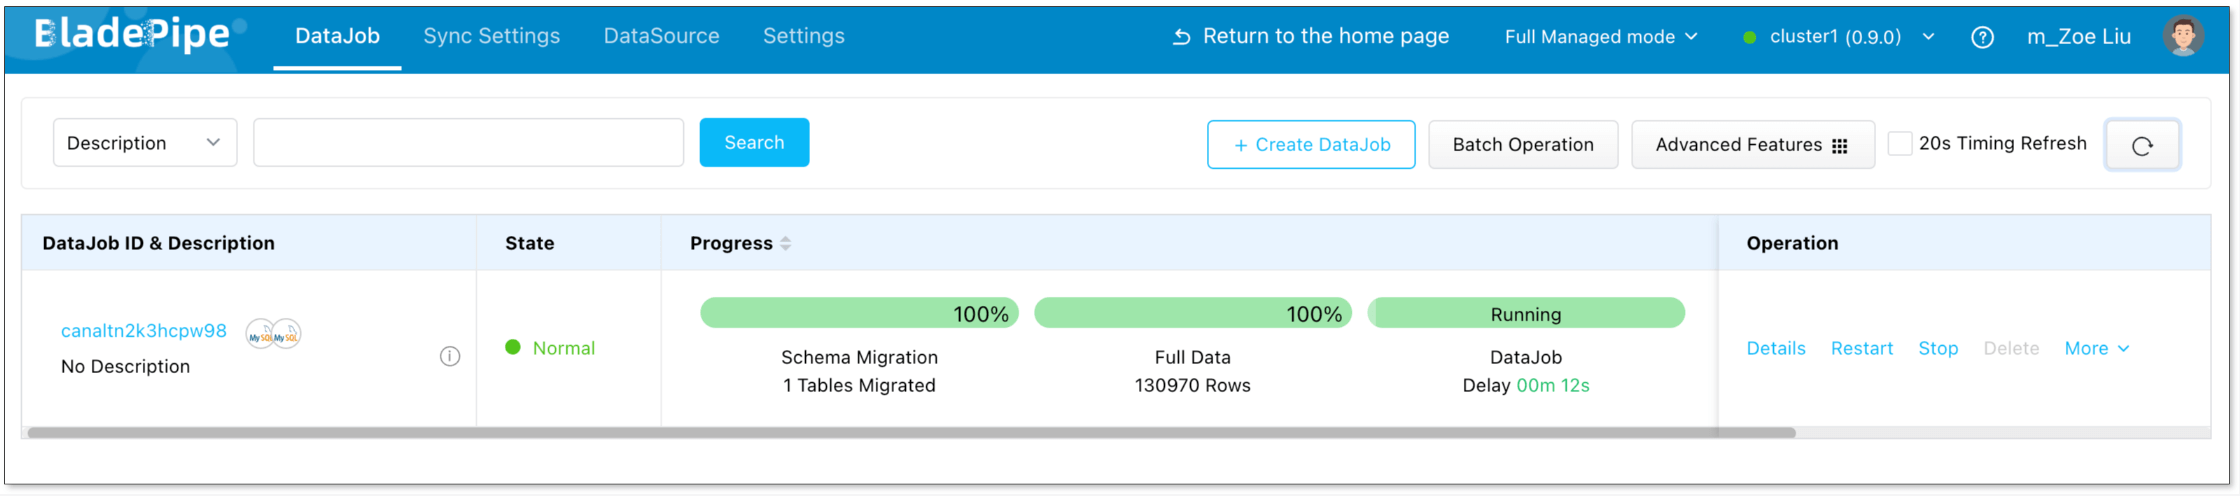
- Go to the DataJob list page to check the progress of the DataJob.
Step 4: Verify the Data
- Insert, update, and delete data in the source database.
- Check whether the data in the target database is consistent with the data in the source.