Quickstart (BYOC)
BladePipe Cloud offers two modes: SaaS Managed and BYOC.
The BYOC mode allows you to easily deploy BladePipe on your own cloud infrastructure. Follow this quickstart to configure your self-managed DataSource and create a DataJob for database replication in just a few steps.
Step 1: Install BladePipe
To deploy a BladePipe Worker on your infrastructure, follow the instructions in Install Worker (Docker) or Install Worker (Binary).
Step 2: Add a DataSource
-
In the top navigation bar, click DataSource.
-
Click Add DataSource.
-
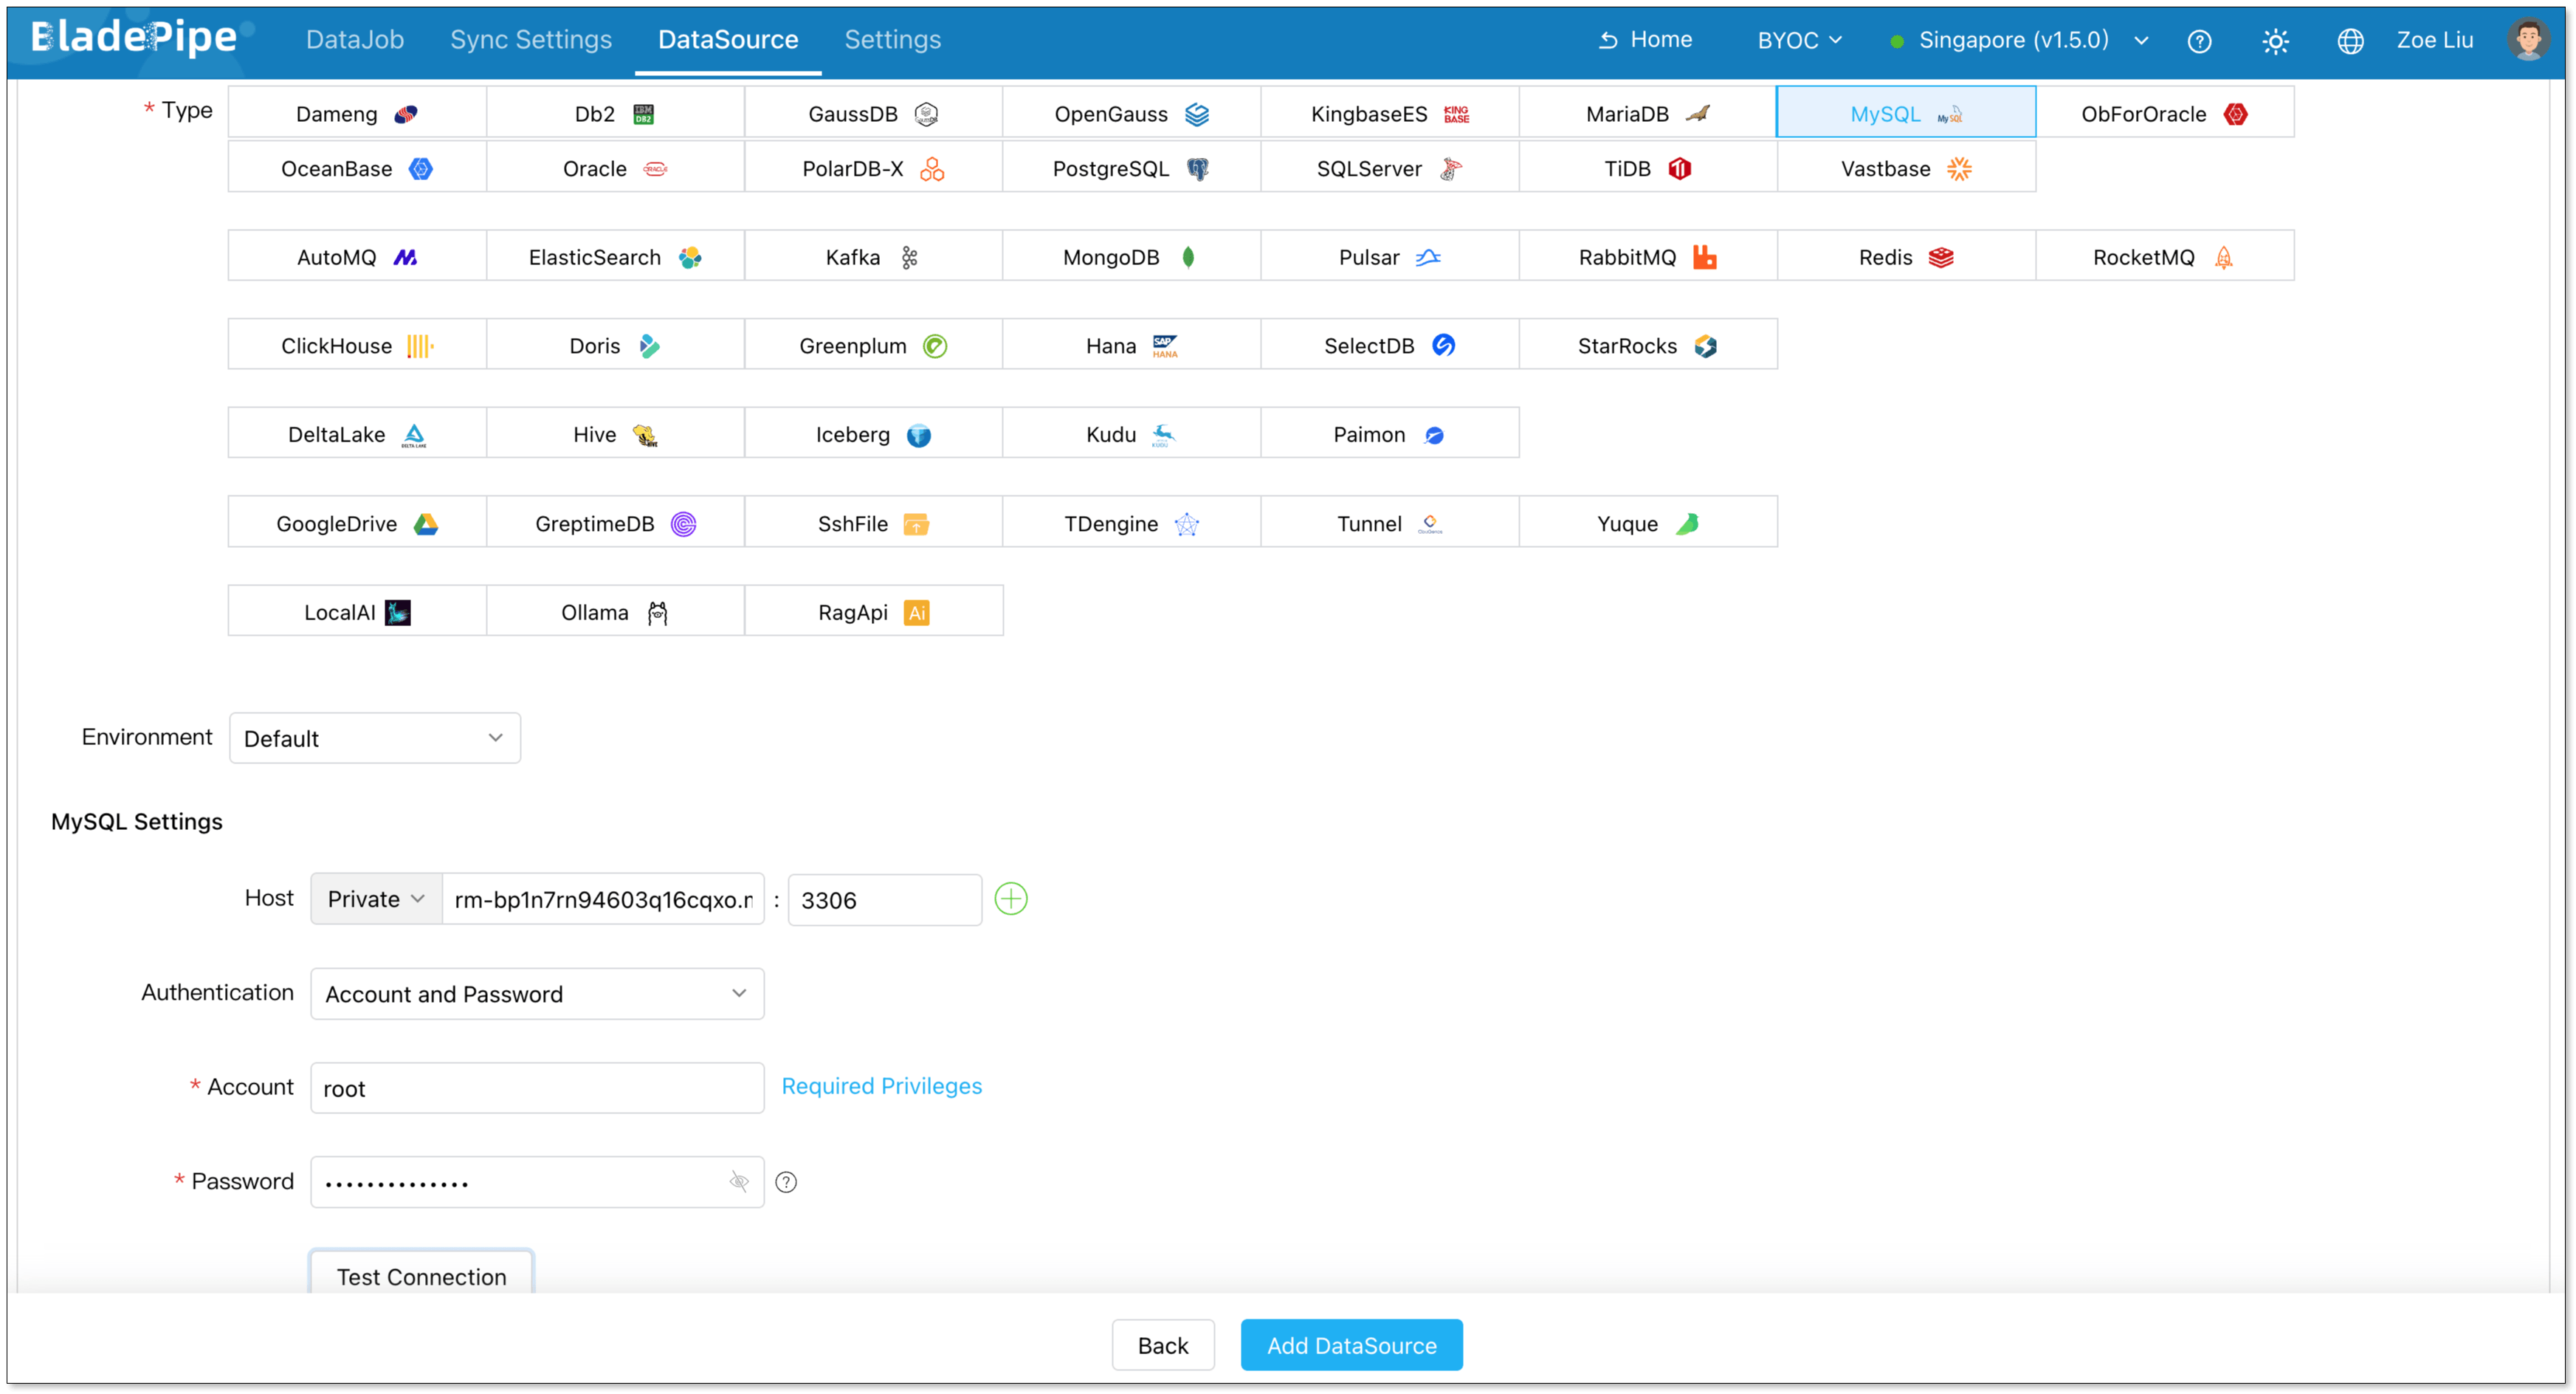
Configure the following information:
- Deployment: Choose Self Maintenance or a cloud provider.
- Type: Select your database type.
- Host: Enter the IP Address and port necessary to connect to your DataSource.
- Account & Password: Enter the username and password.
-
Click Test Connection to verify your database connection.
-
Click Add DataSource.
Step 3: Payment (Optional)
-
Add a payment card:
- Navigate to Settings > Payment.
- Click Add New Card.
- Enter your card information and save.
-
Subscribe to BladePipe:
- Navigate to Settings > Payment.
- Select an existing card.
- Click Subscribe.
info- New users automatically receive a BladePipe voucher, allowing you to skip this step.
- Once your voucher is depleted, active DataJobs will be suspended within 24 hours. To prevent any interruptions to your data integration pipelines, add a payment card and subscribe to the BladePipe service before the voucher expires.
Step 4: Create a DataJob
-
In the top navigation bar, click DataJob.
-
Click Create DataJob.
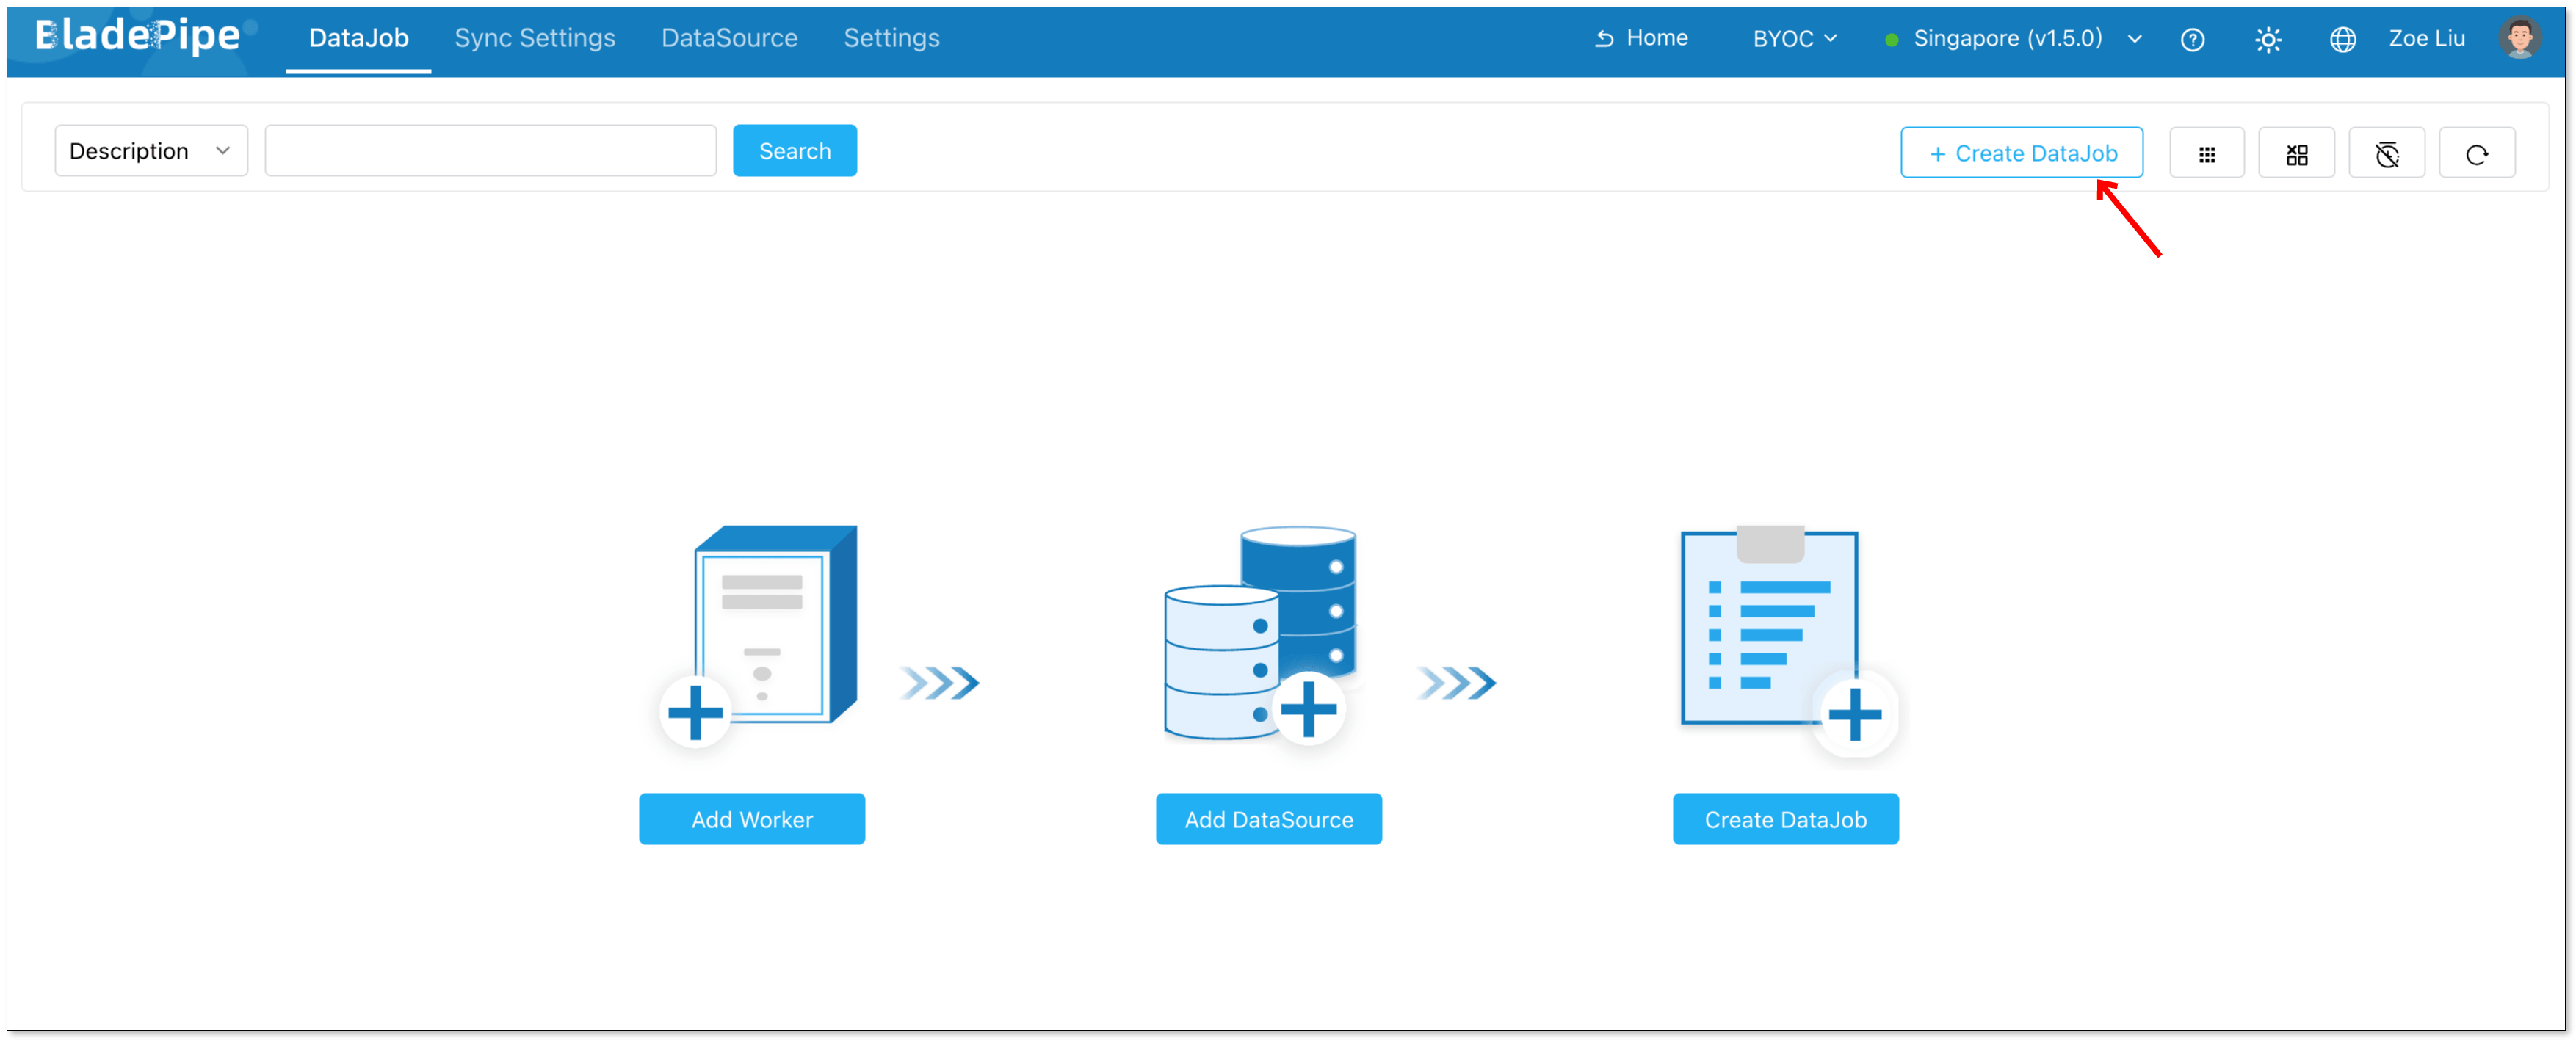
-
Select your added instances as the Source and Target, click Test Connection, and then click Next.
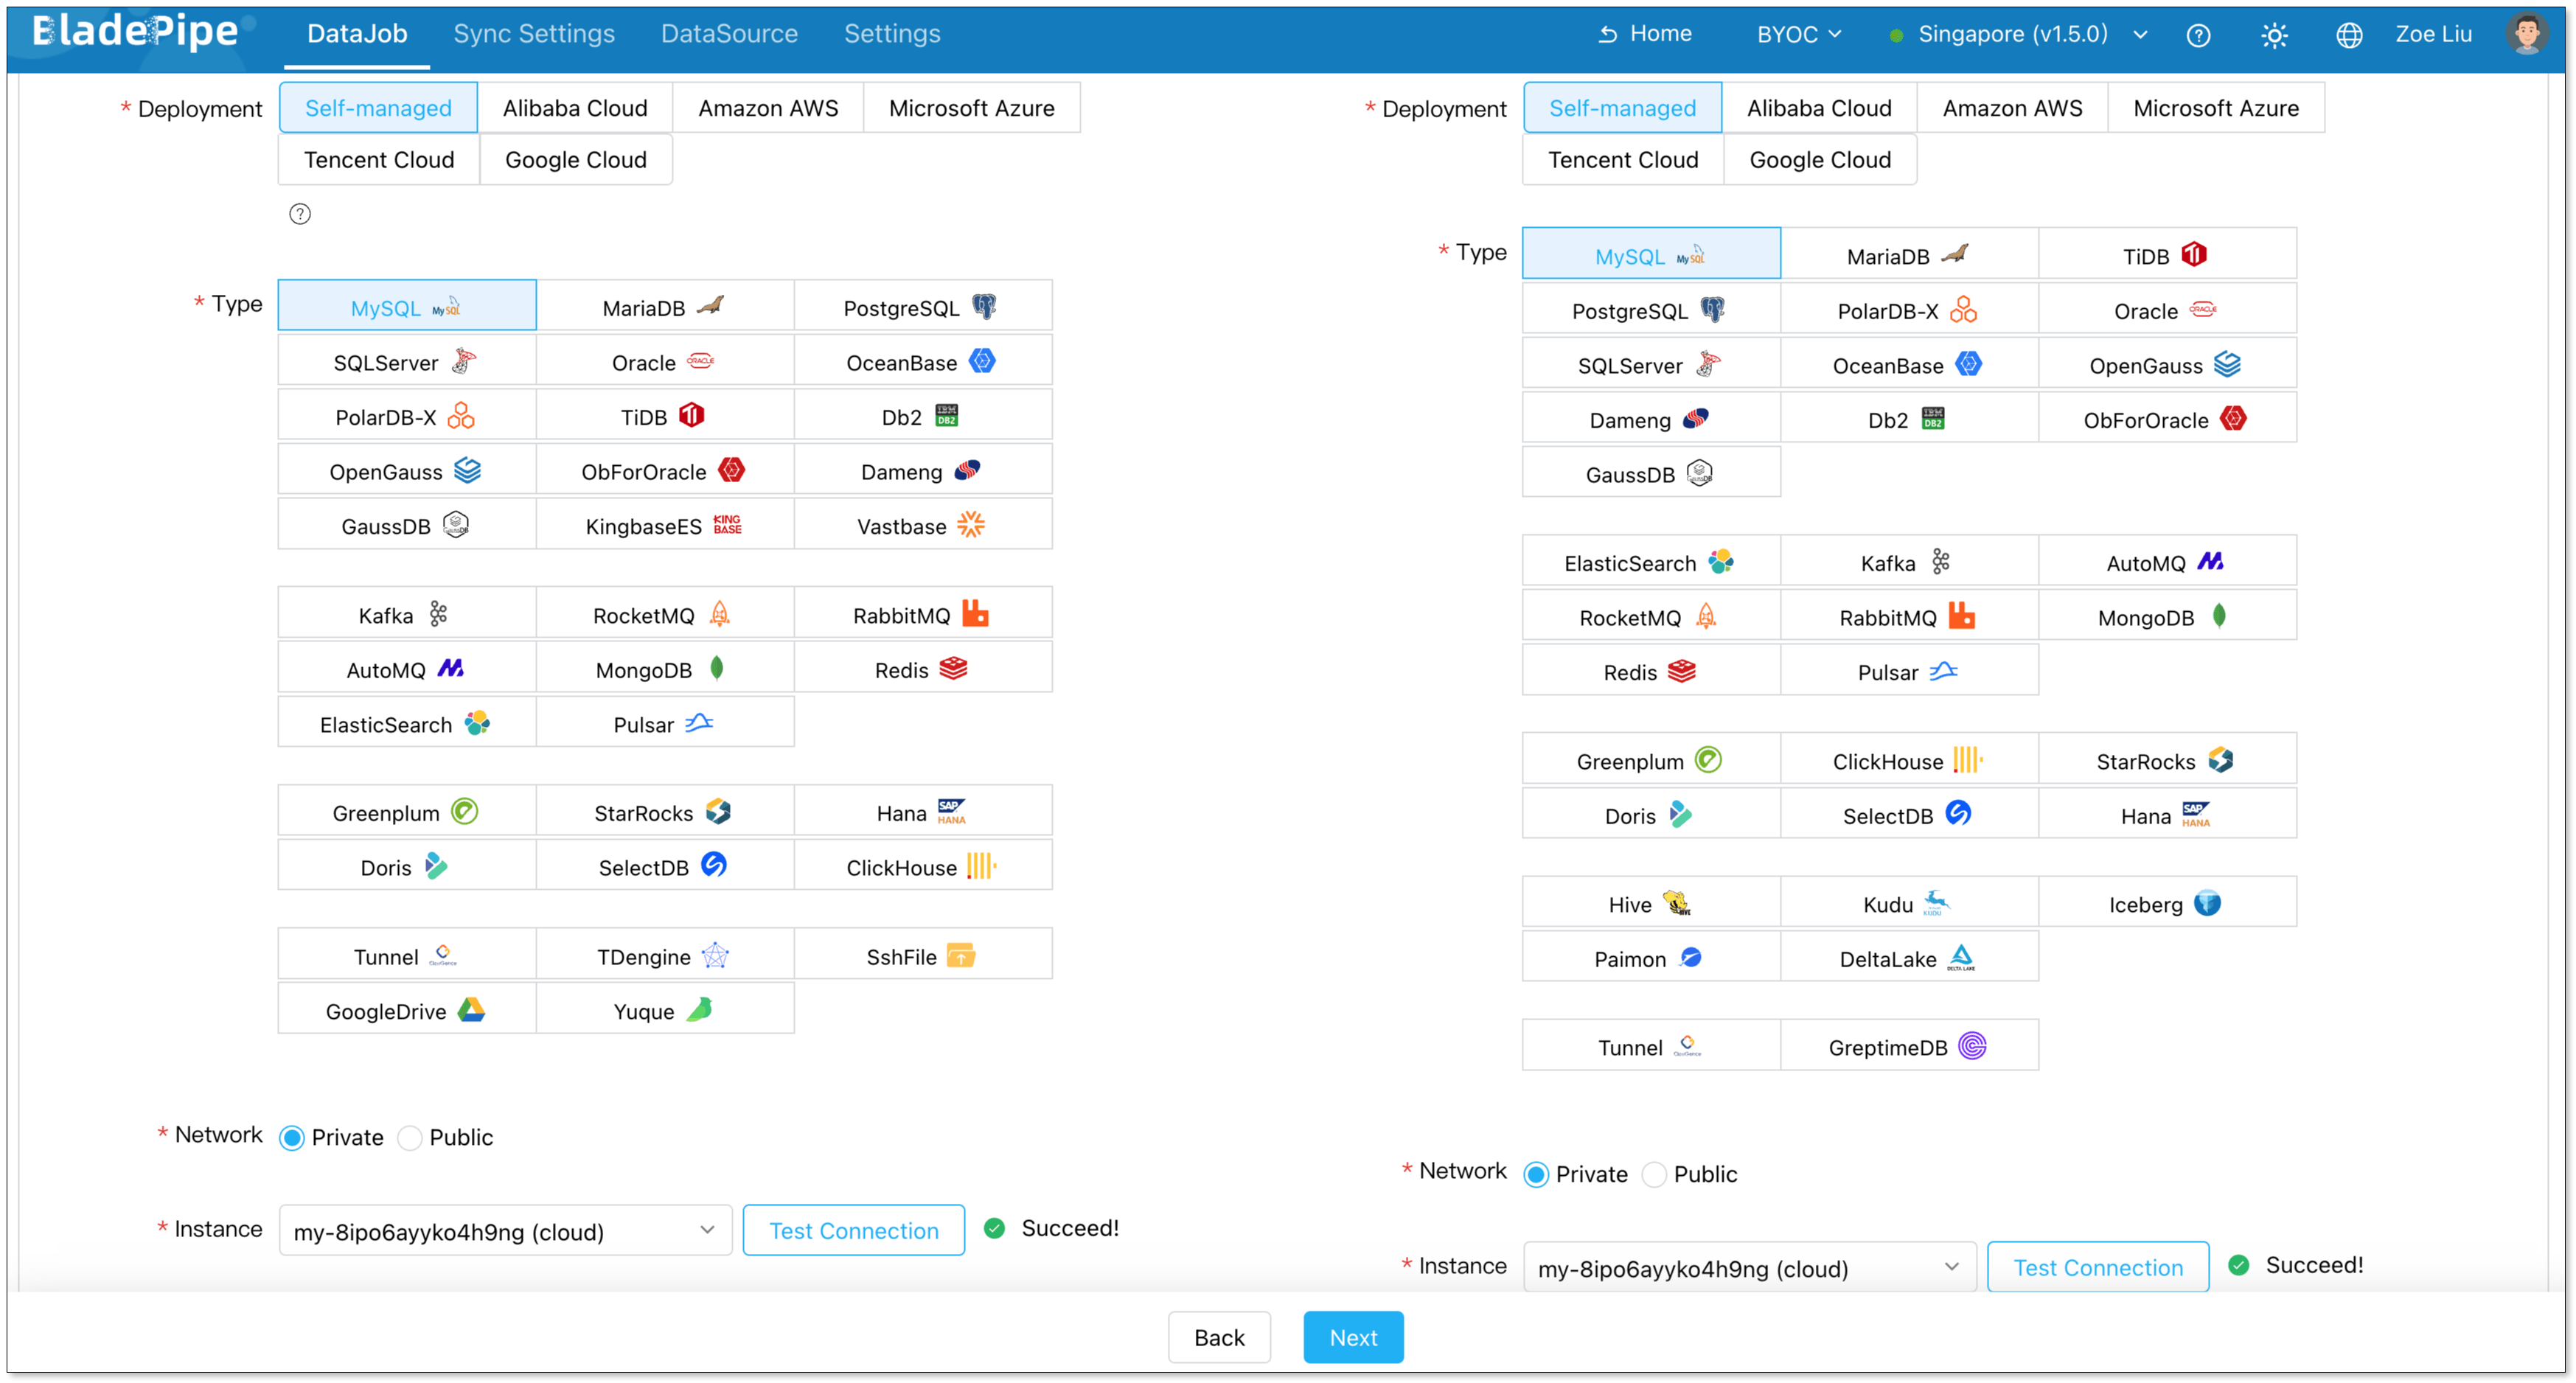
-
Choose Incremental as the DataJob type, and select Initial Load. Click Next.
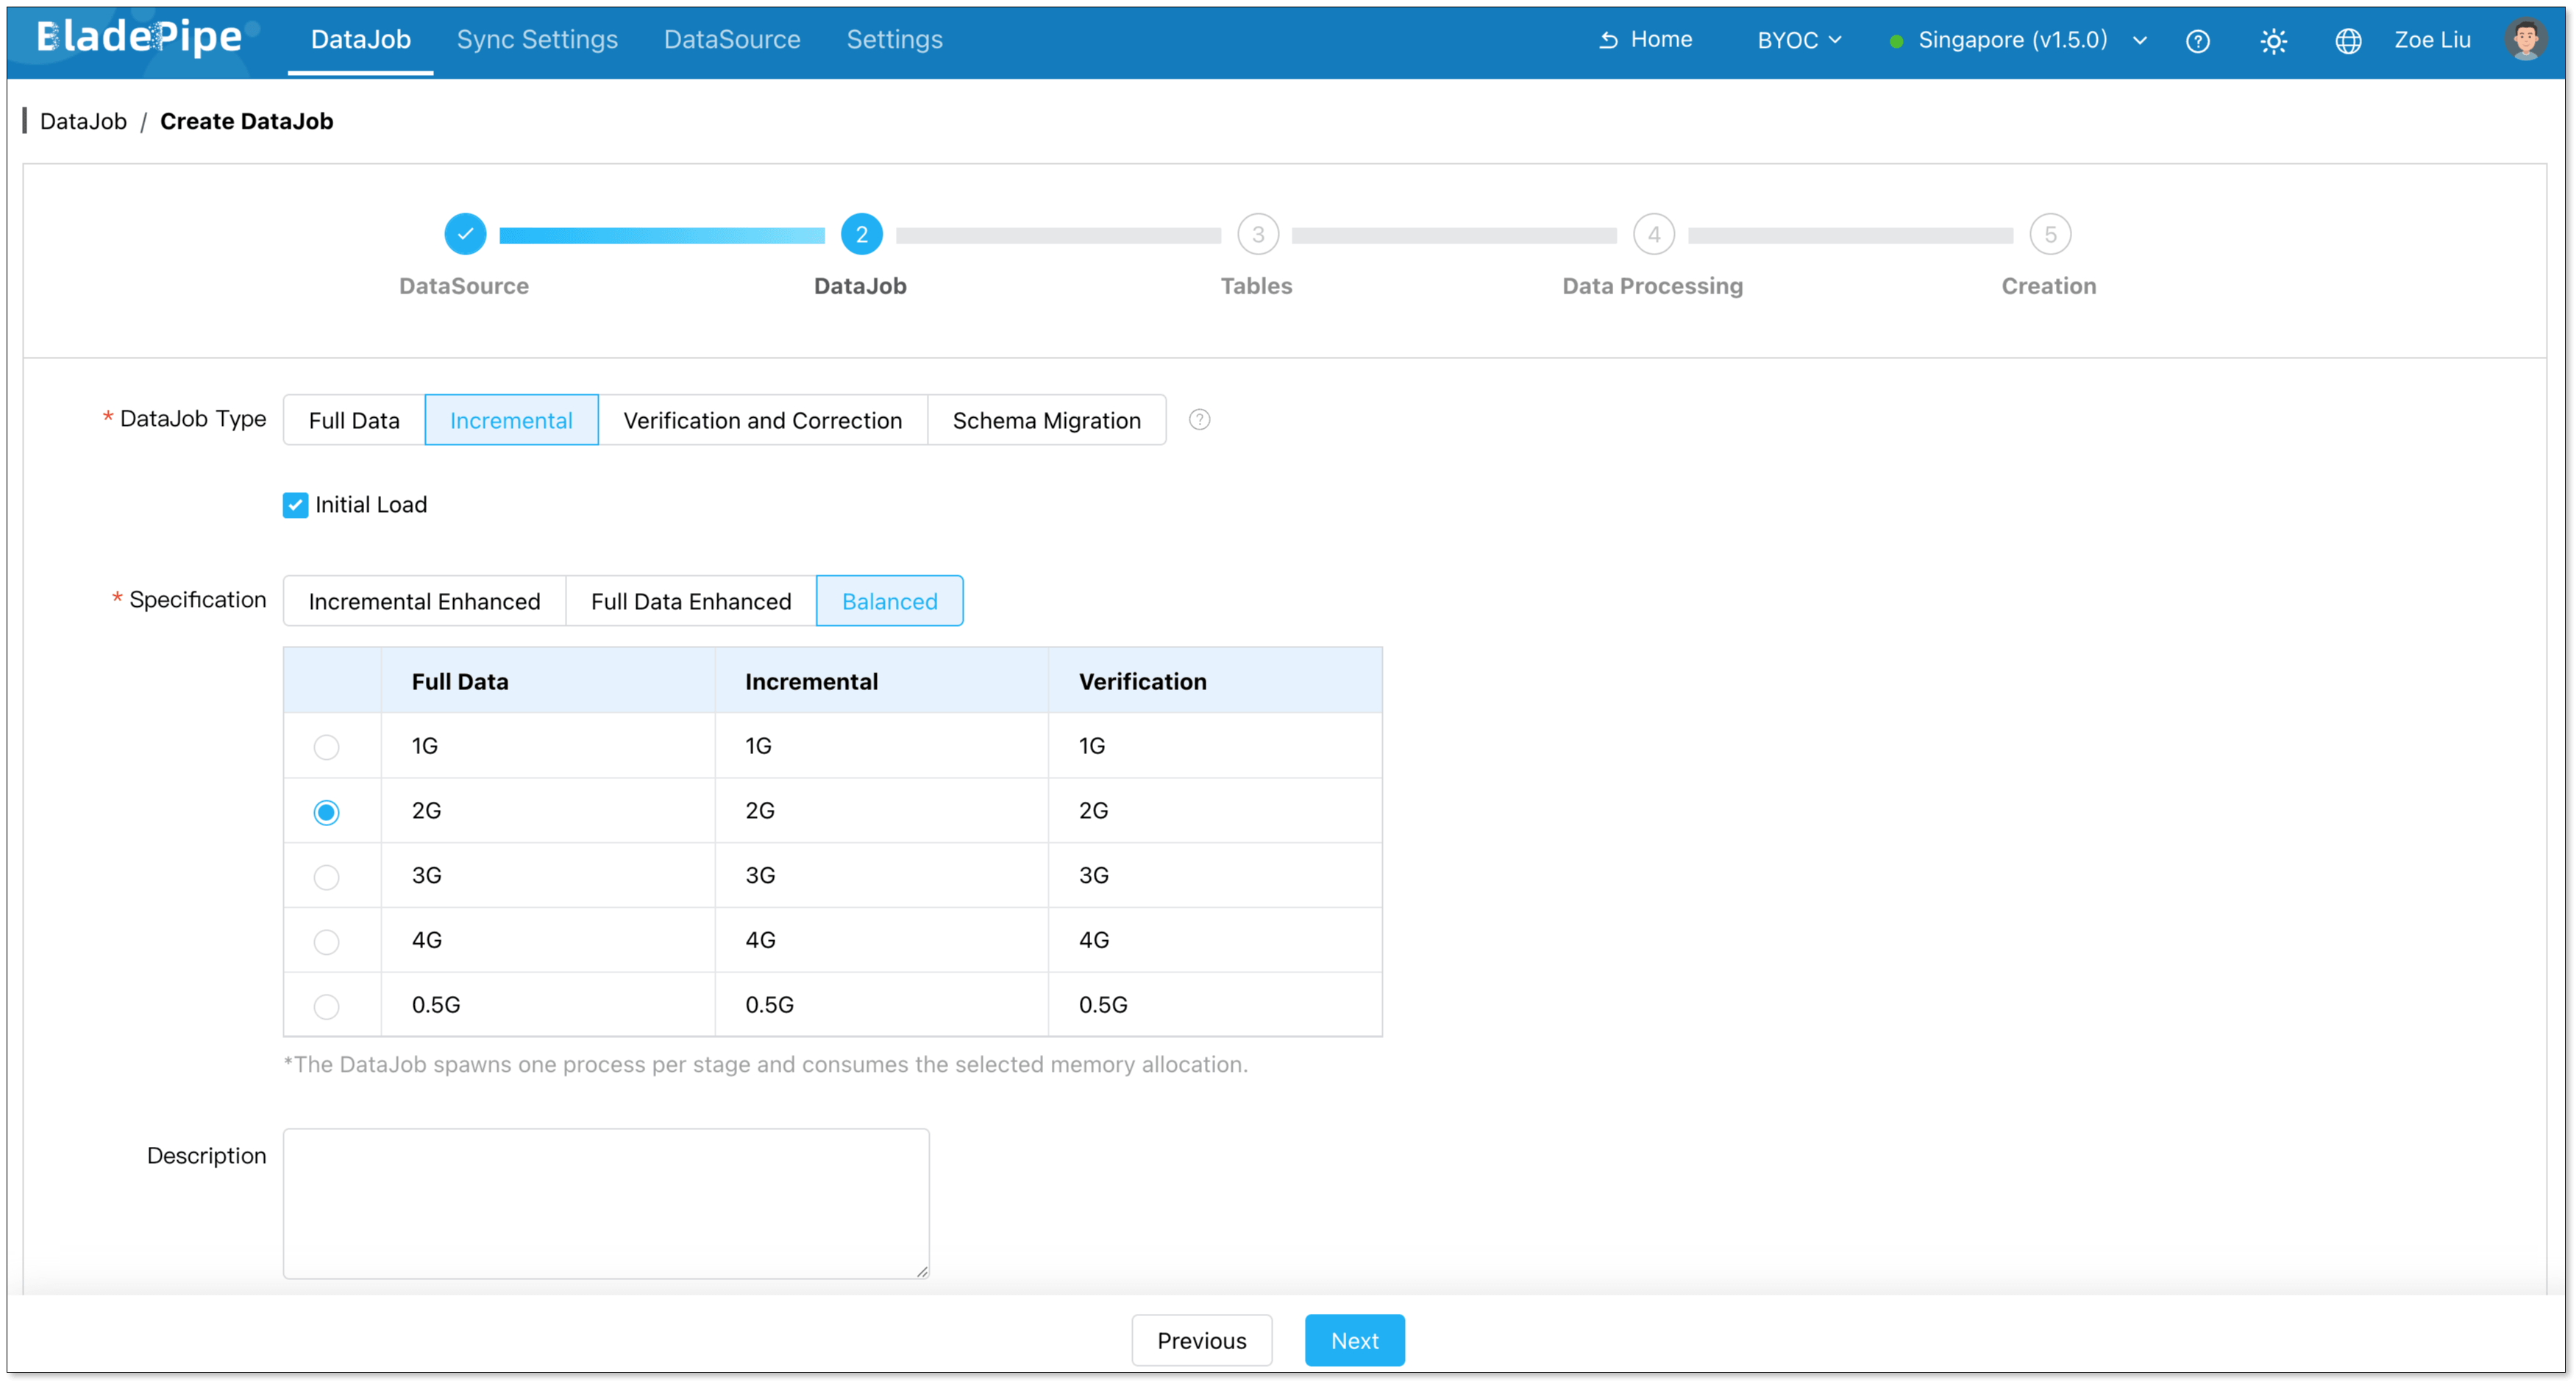
-
Select the tables you want to sync, and click Next.
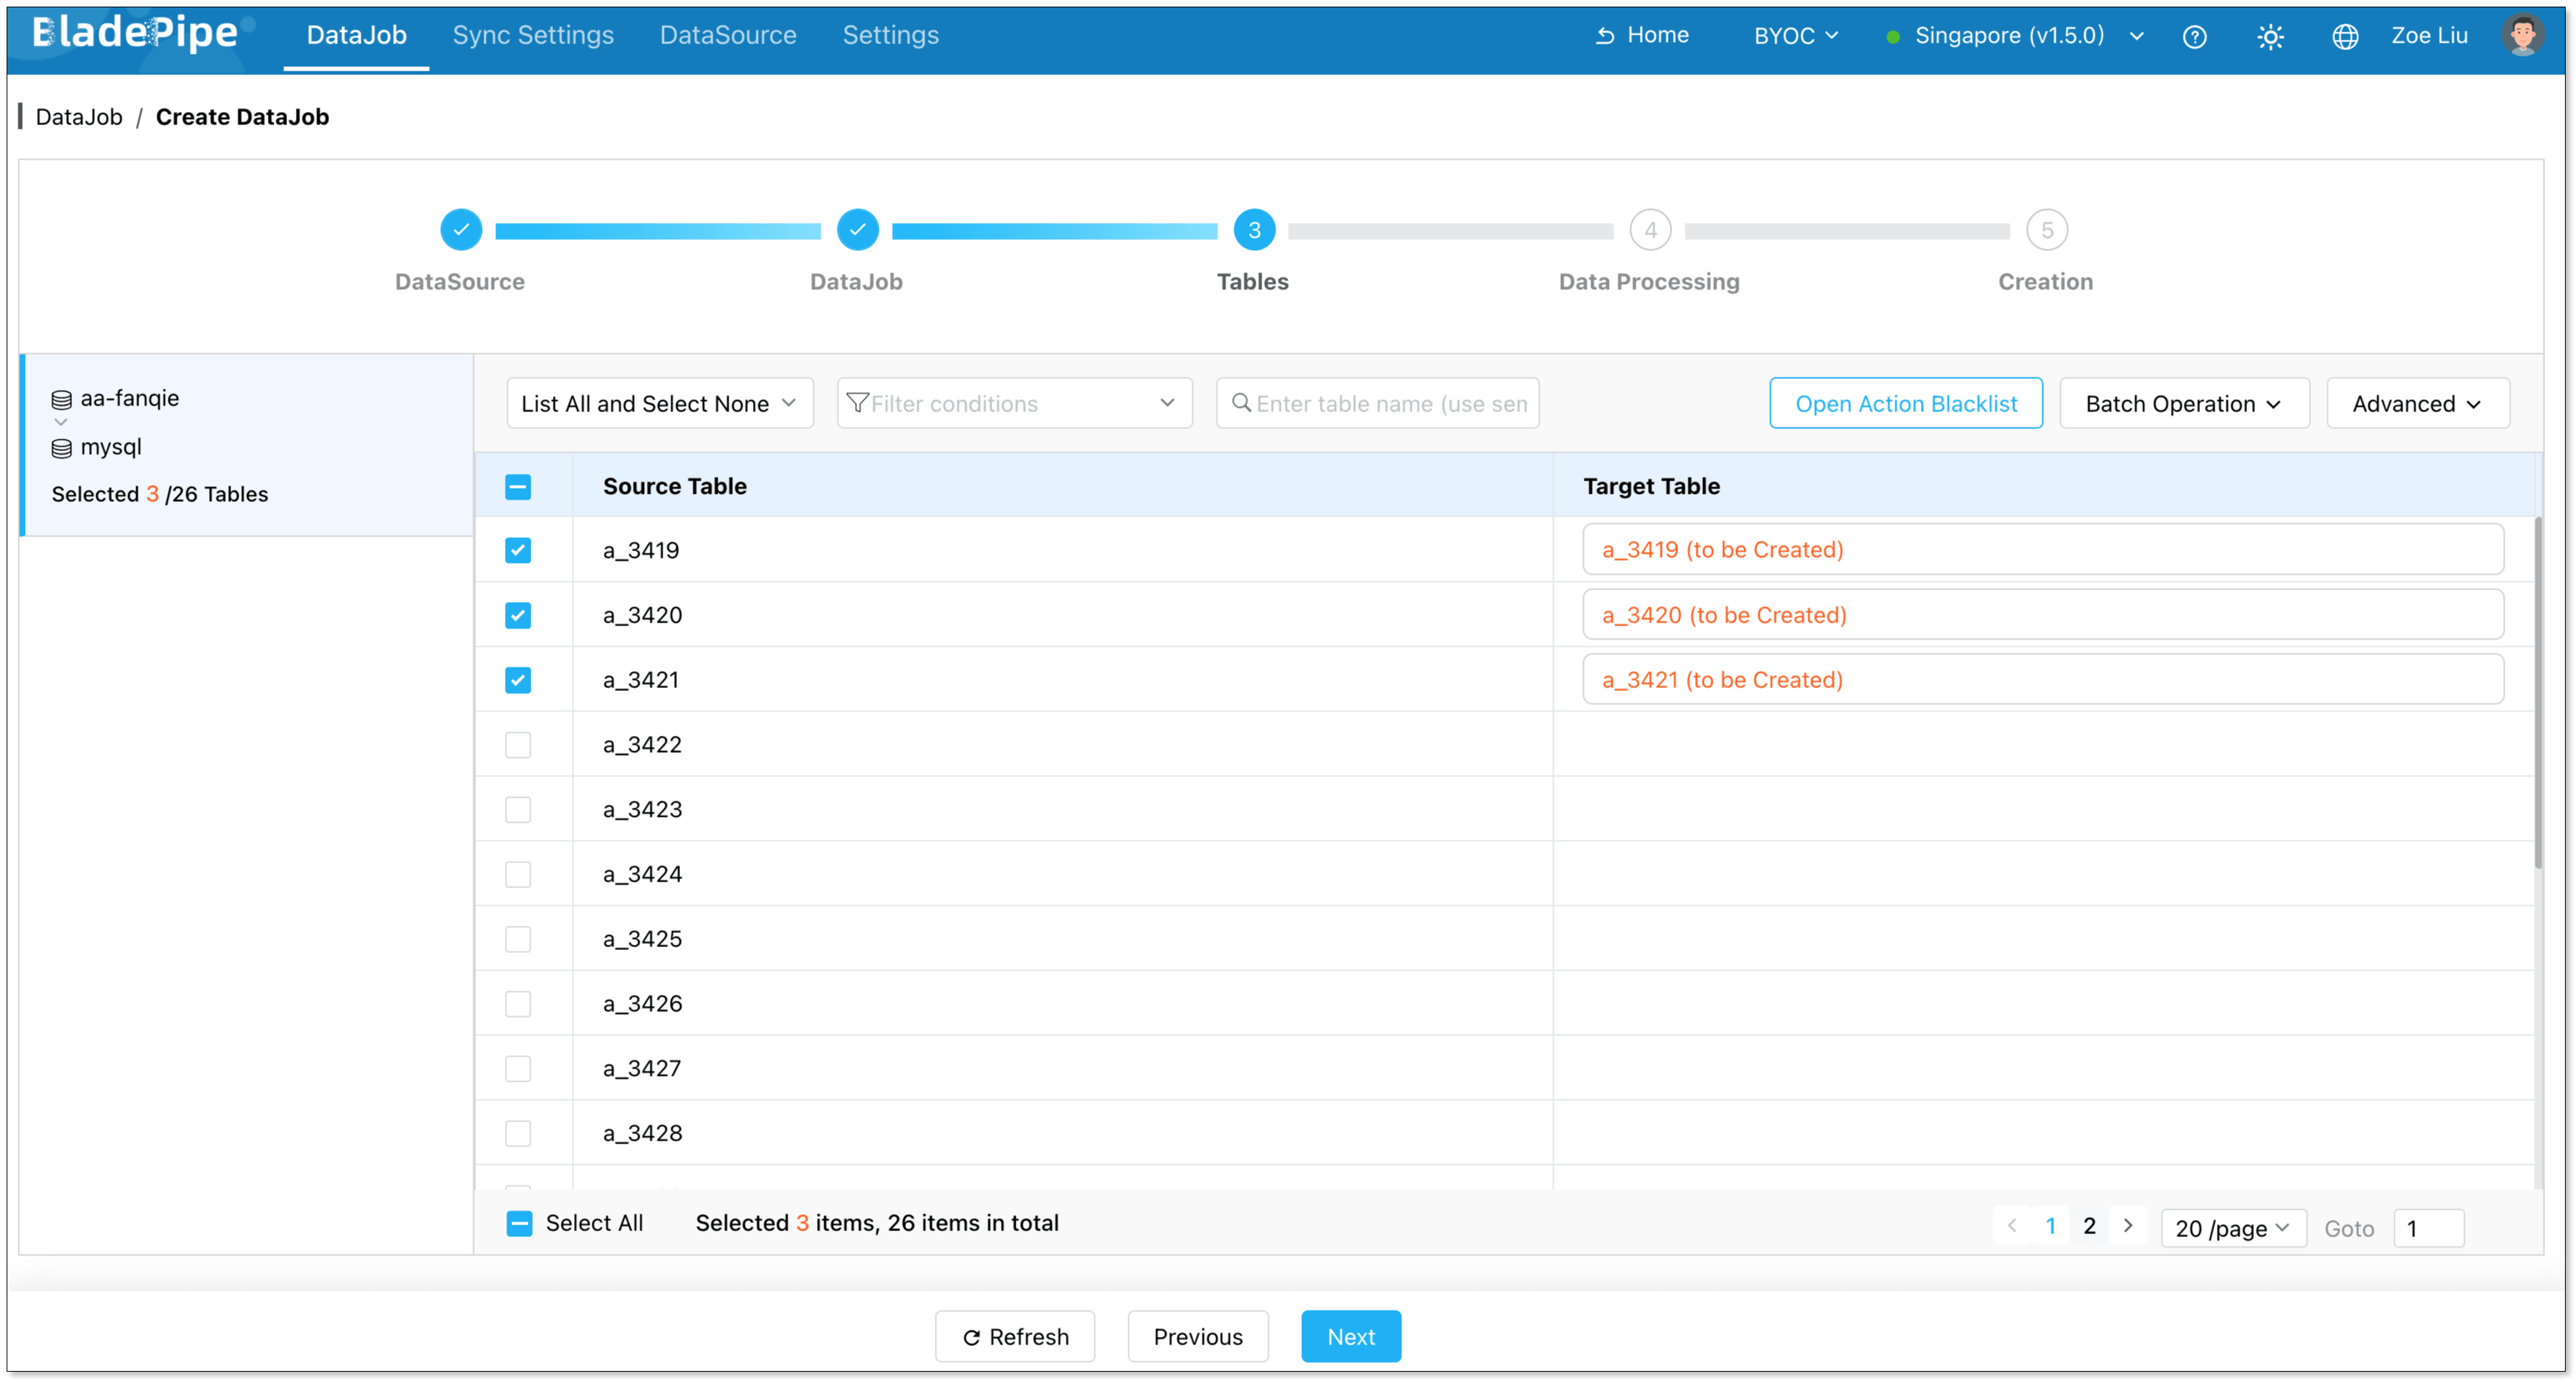
-
Select all required columns, and click Next.
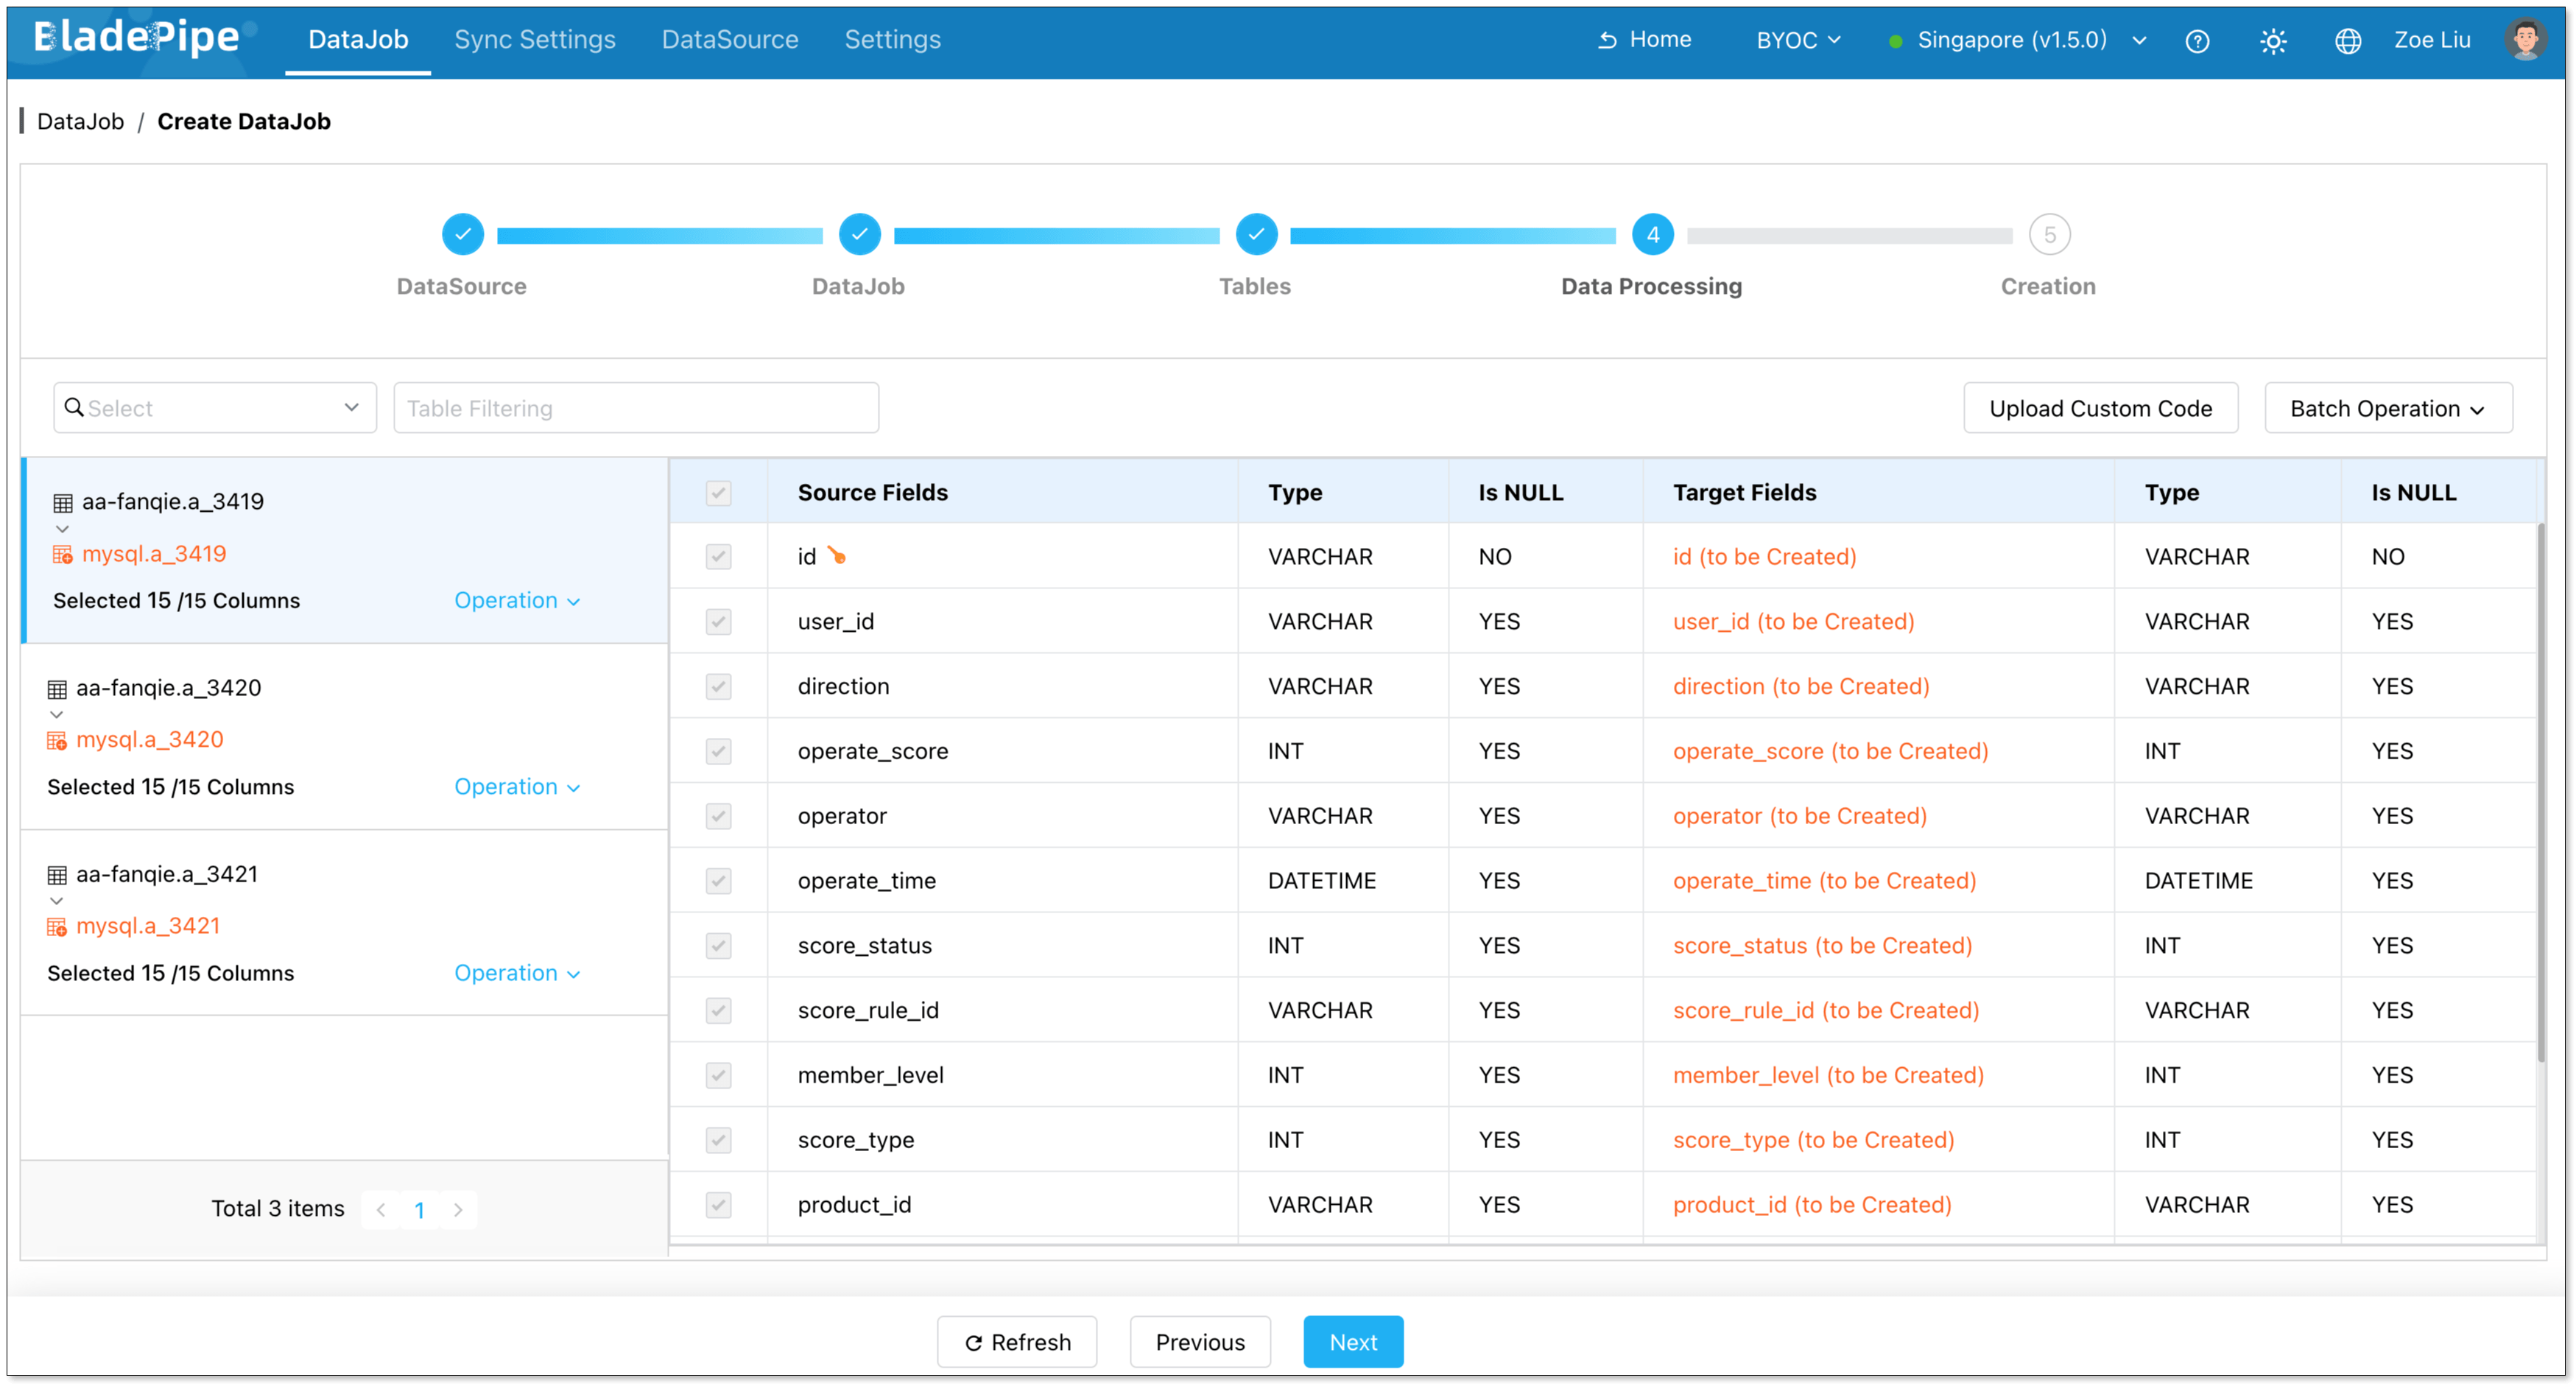
-
Click Create DataJob.
-
Navigate to the DataJob list page to monitor the progress of your DataJob.

Step 5: Verify the Data
- Perform insert, update, and delete operations in your source database.
- Verify that the changes dynamically replicate to the target database and ensure data consistency.