Quickstart (Managed)
BladePipe Cloud offers two modes: Managed and BYOC.
The Managed mode is a cloud-hosted SaaS service where both the Console and the Worker are fully managed by BladePipe. You only need to operate through the web interface. No deployment or system maintenance is required.
Follow this quickstart to create a BladePipe DataJob and run your first data synchronization task.
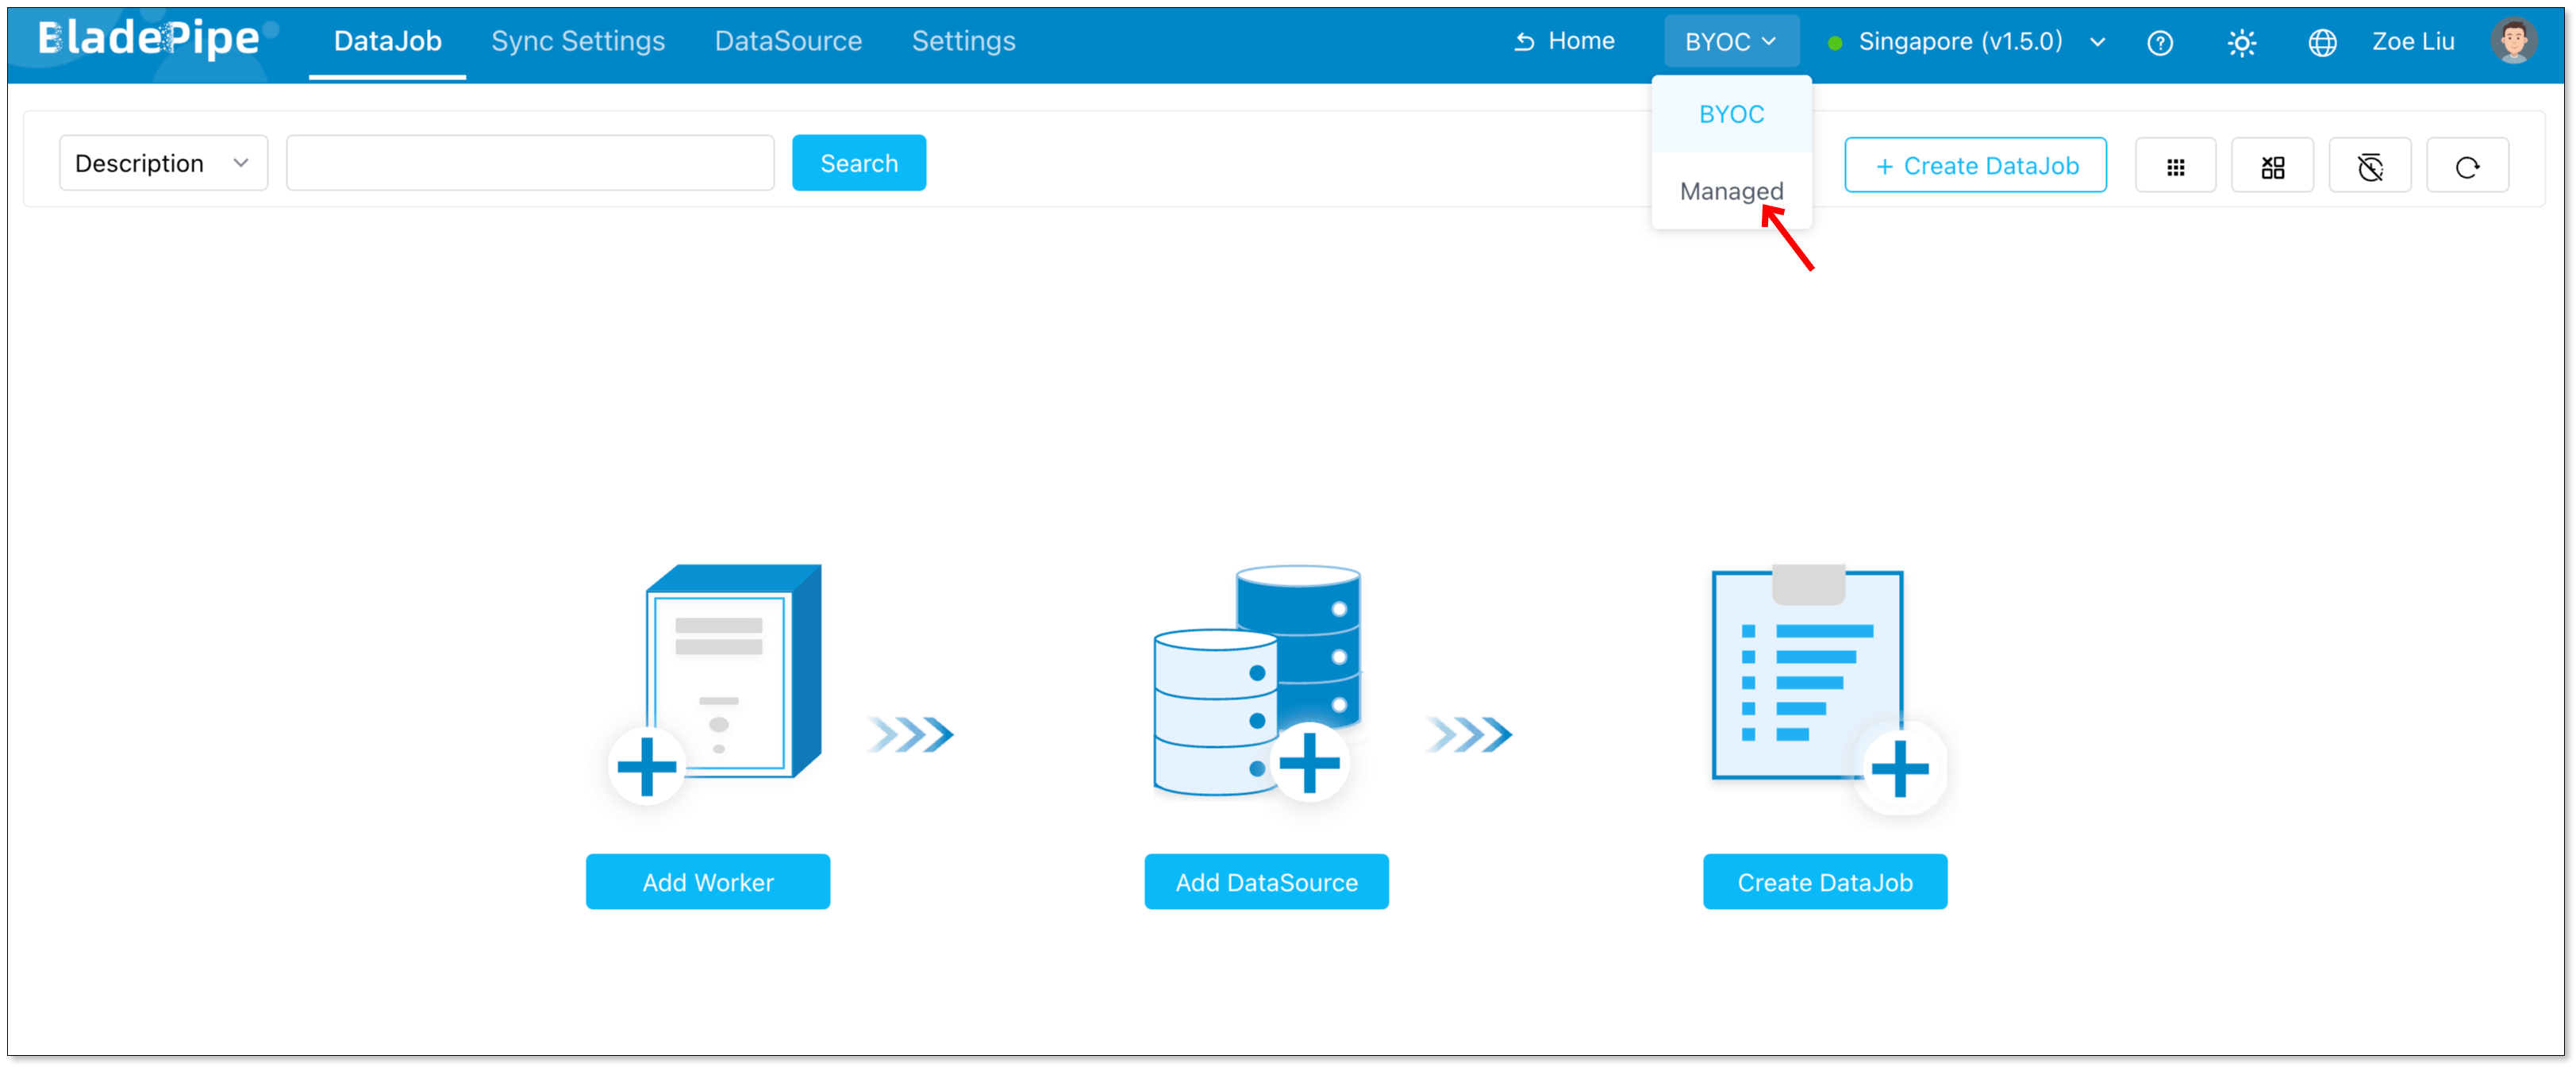
Step 1: Enable Managed Mode
-
Log in to the BladePipe SaaS Platform.
-
Select Managed.
Step 2: Add DataSources
-
Connect your database to BladePipe Managed using one of the following methods:
- Configure a connection using SSH tunneling.
- Enable public access for your data sources, navigate to Sync Settings > Sync Worker > Machine IP List to retrieve the worker’s IP, and add this IP to your whitelist.
- Connect via a Private Link provided by your cloud service provider.
-
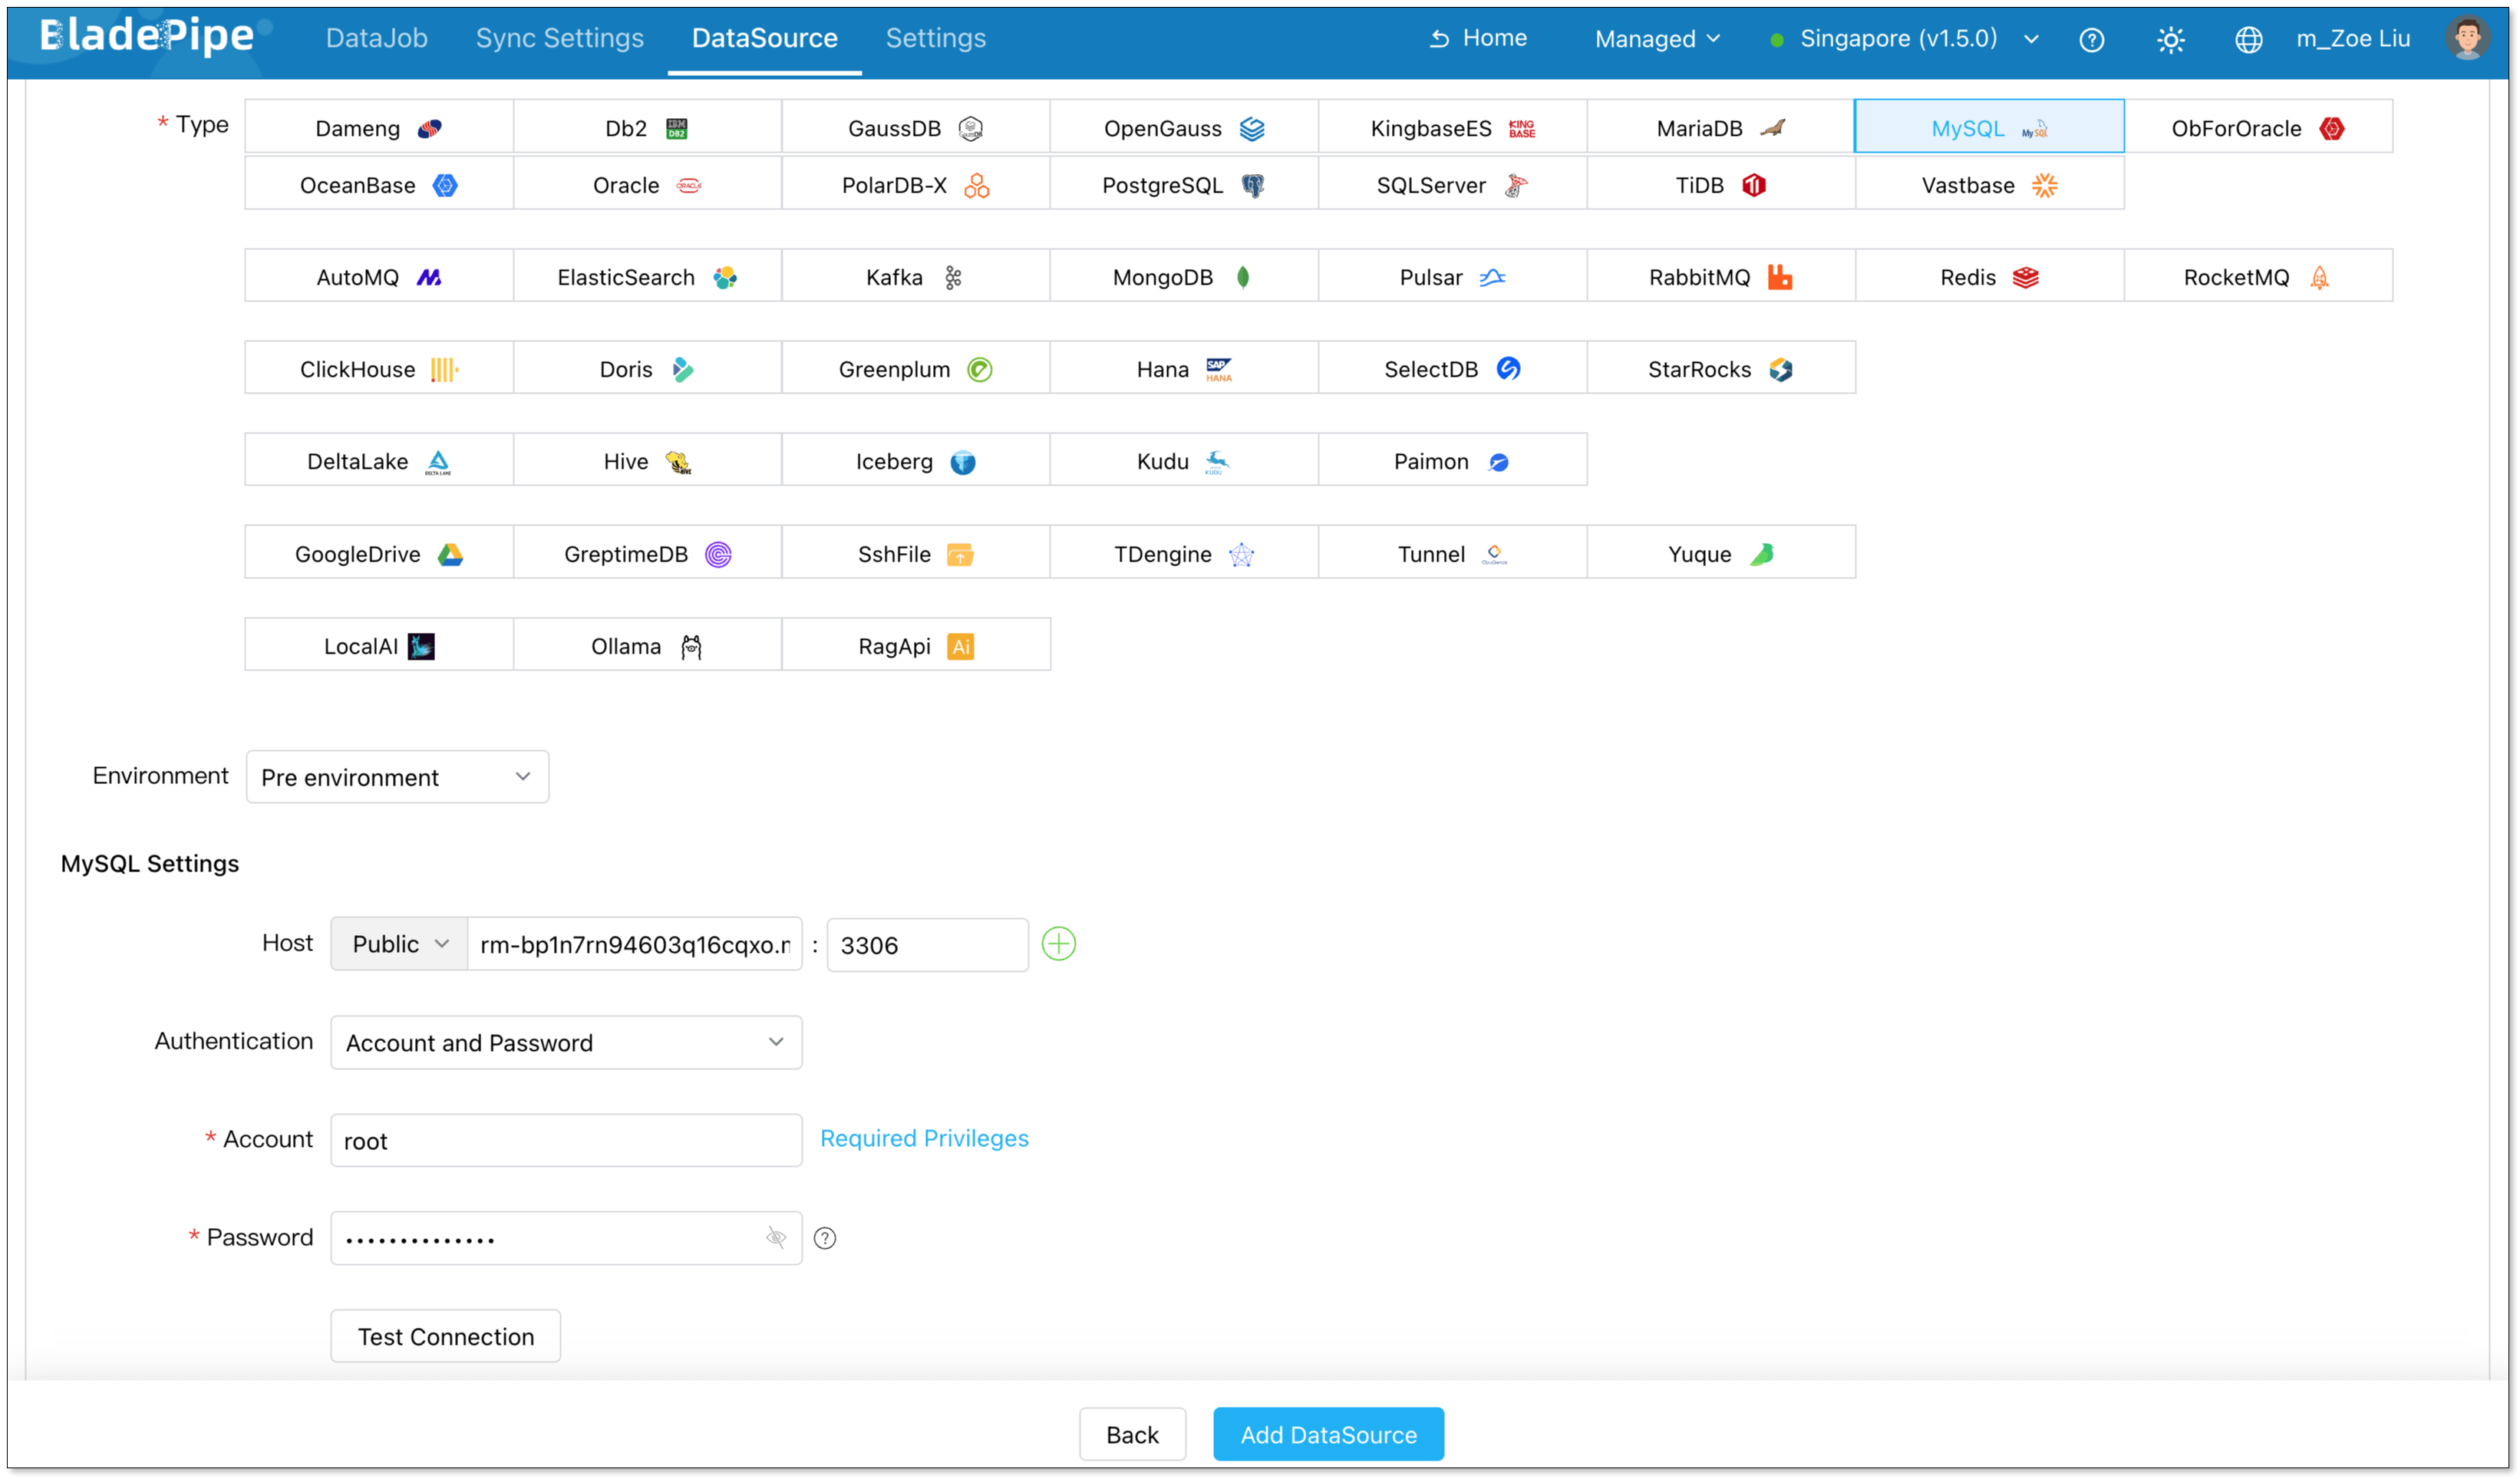
Return to the BladePipe Cloud platform and click DataSource > Add DataSource. Configure the required connection details to add your source and target databases.
-
Configure the following information:
- Deployment: Choose Self Maintenance or a cloud provider.
- Type: Select your database type.
- Host: Enter the IP Address and port necessary to connect to your DataSource.
- Account & Password: Enter the username and password.
-
Click Test Connection to verify your database connection.
-
Click Add DataSource.
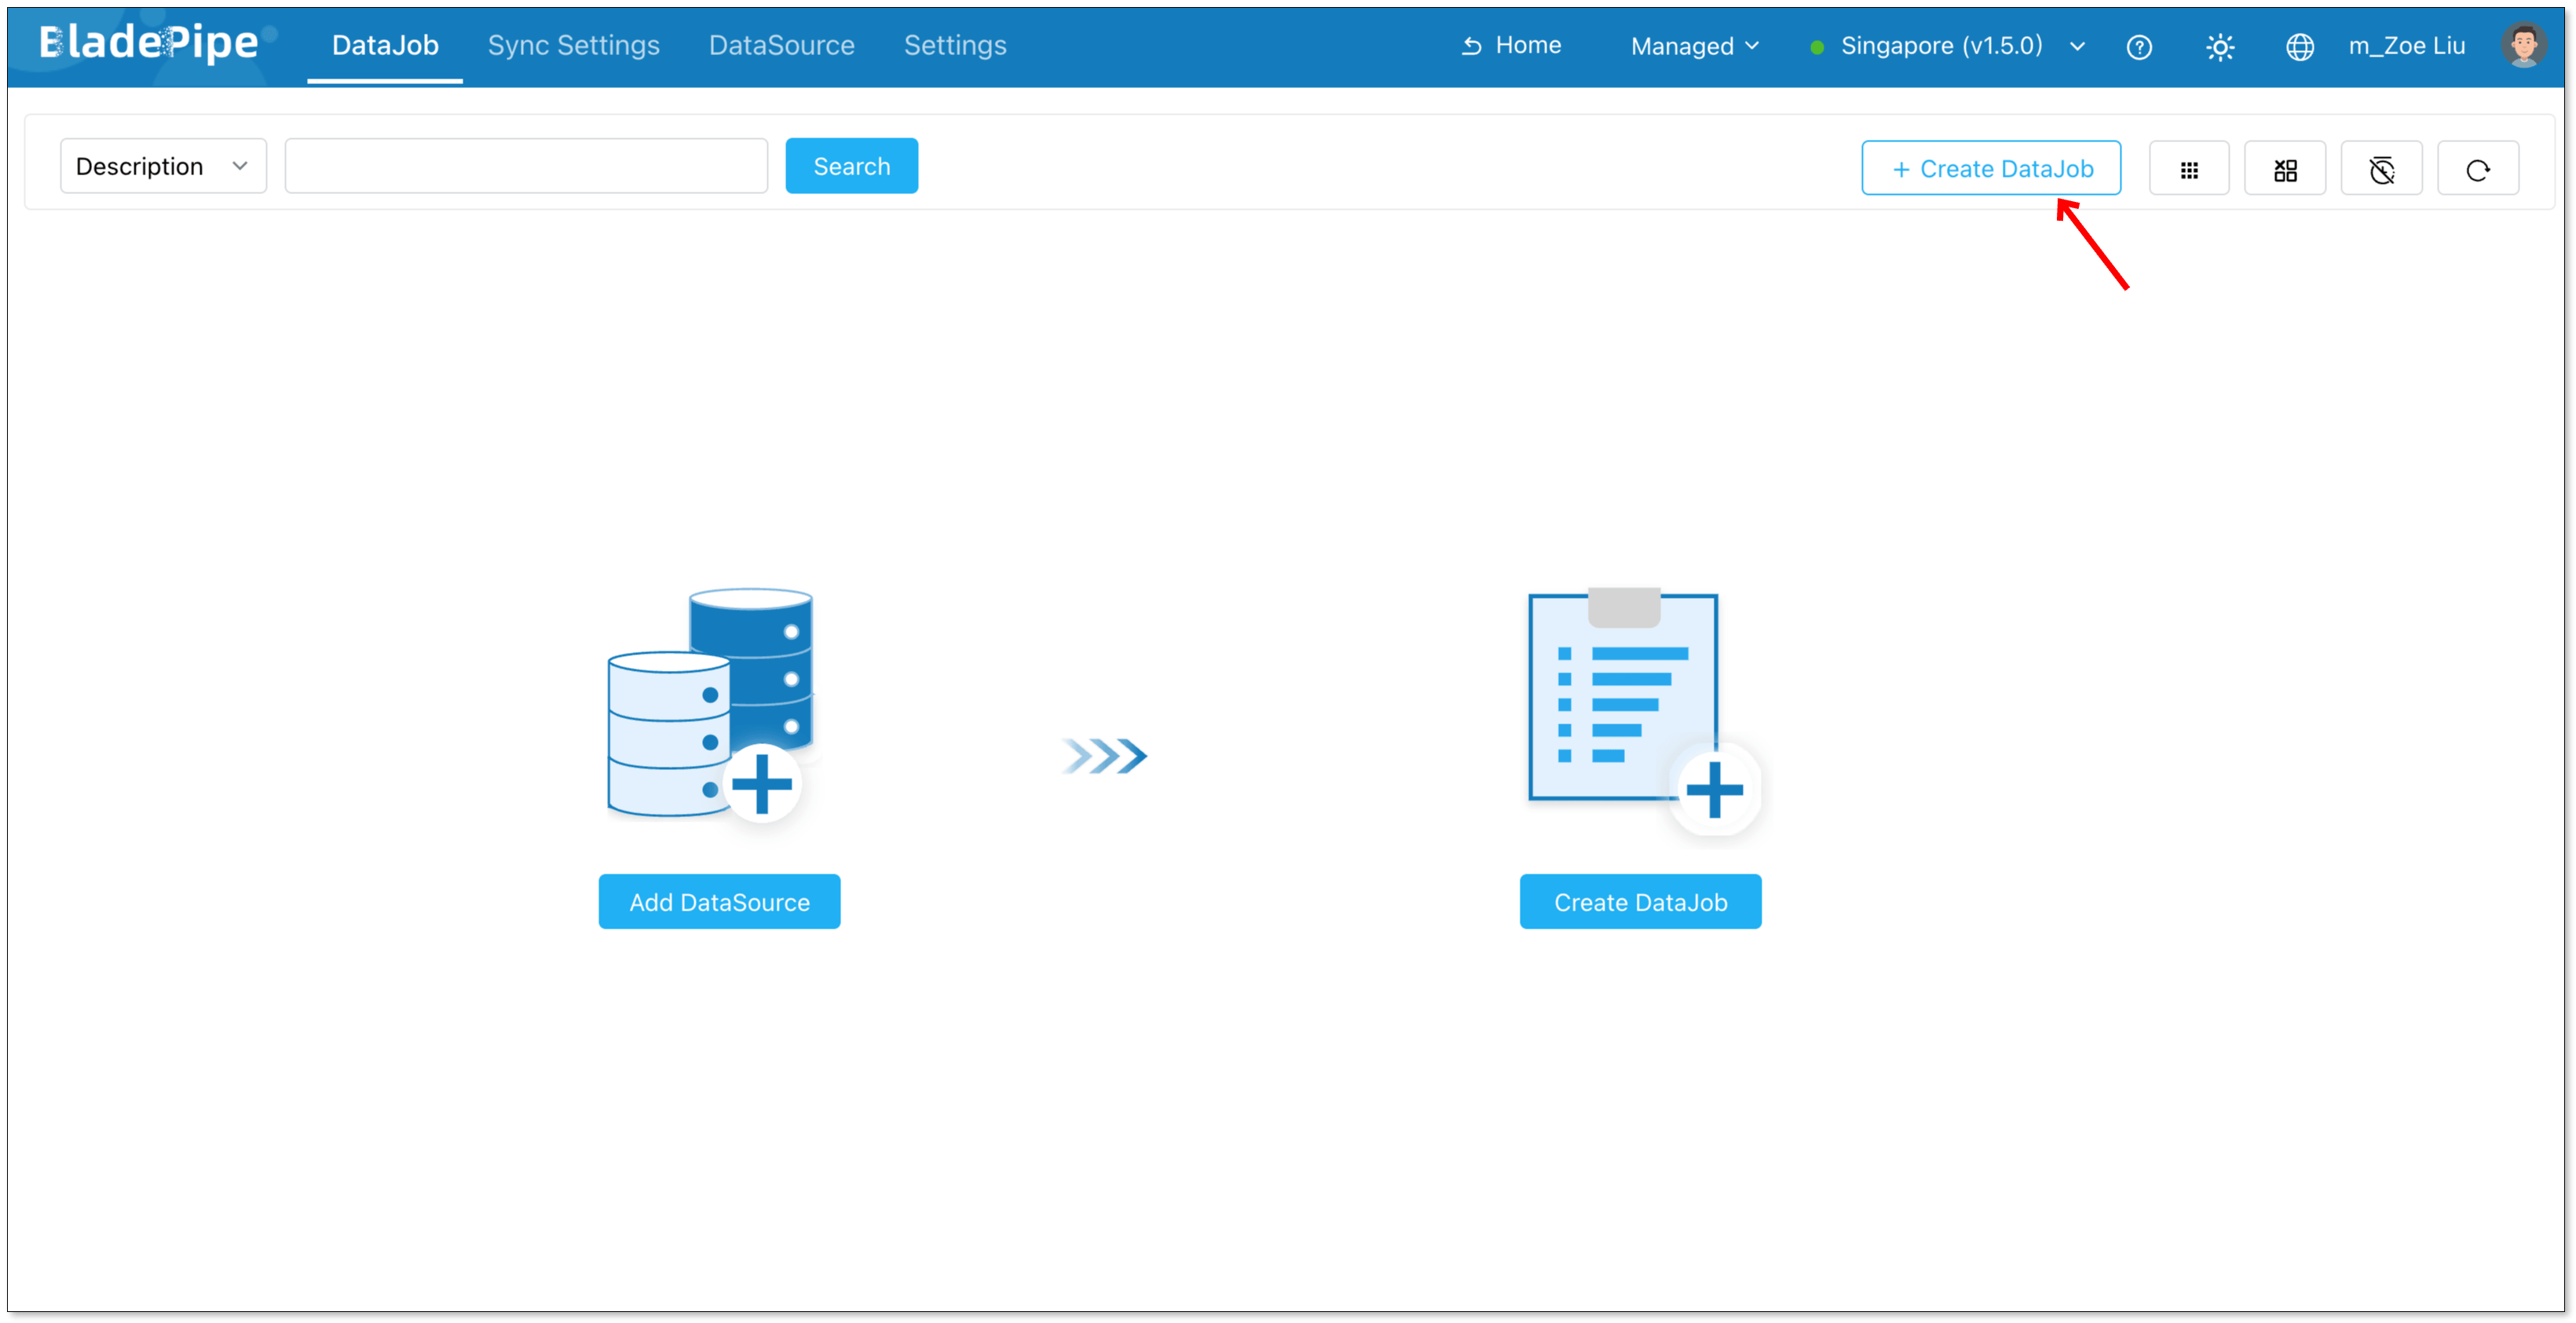
Step 3: Create a DataJob
-
Navigate to DataJob > Create DataJob.
-
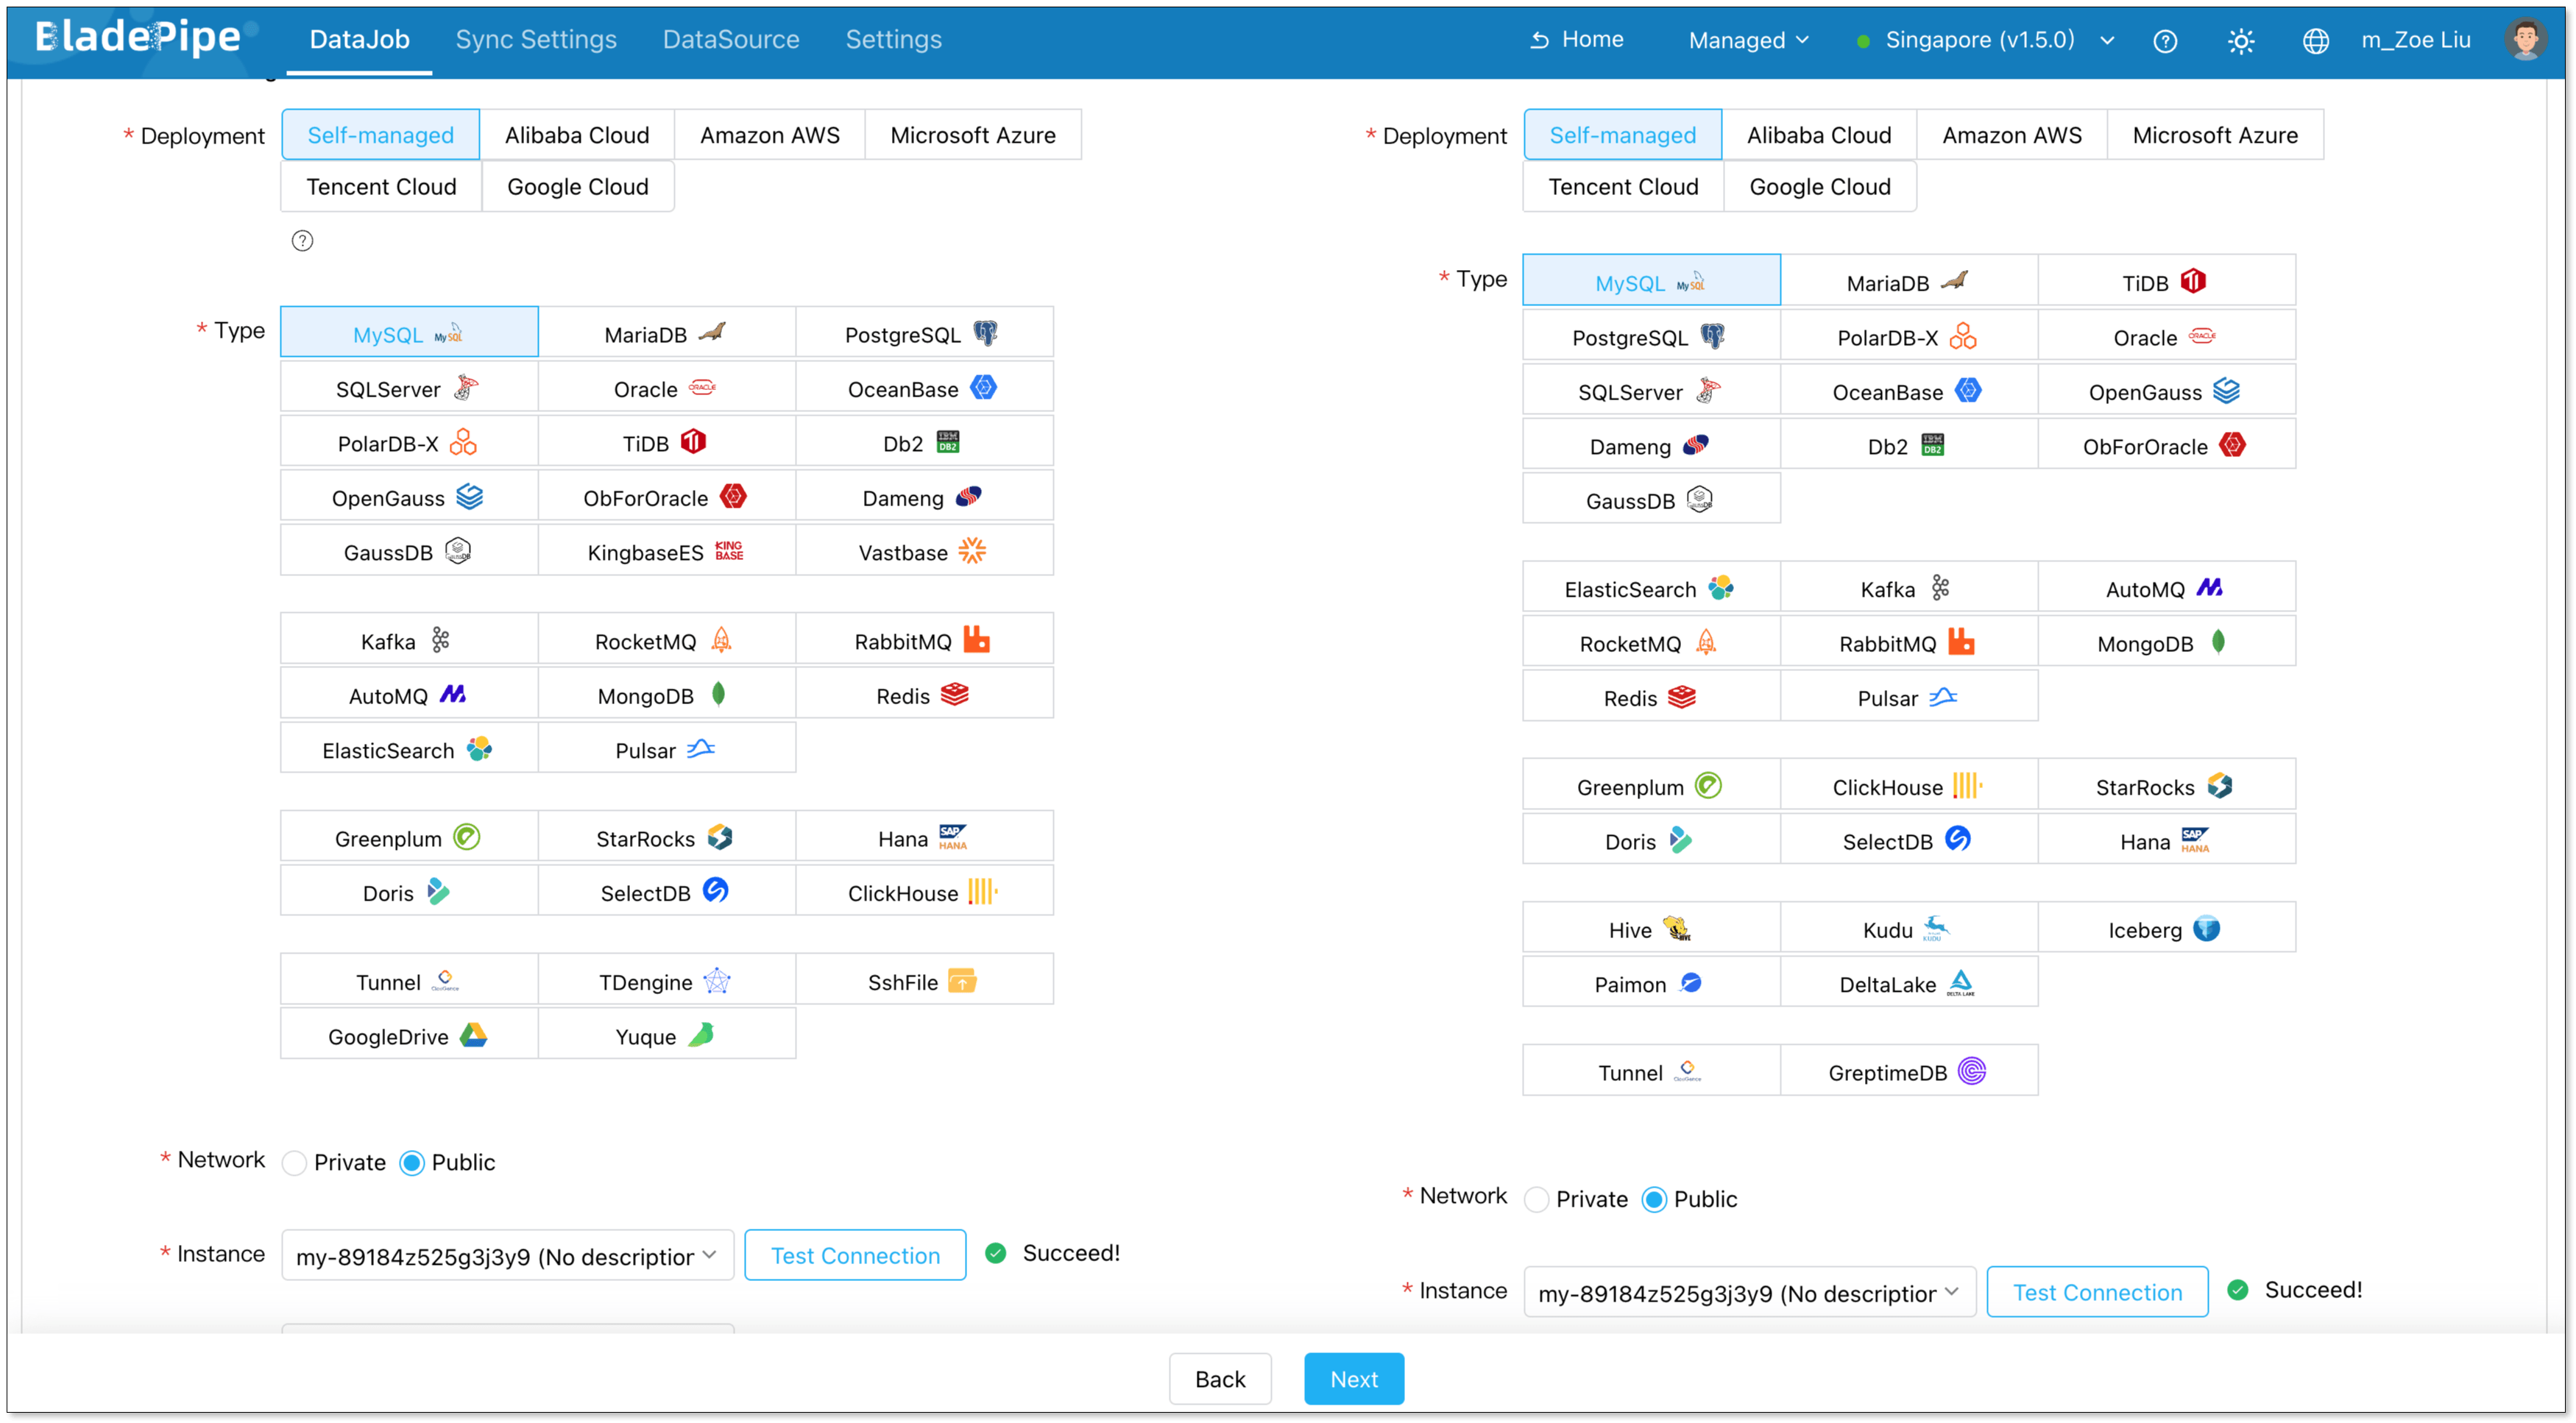
Select your configured Source and Target DataSources, click Test Connection to verify connection, and click Next.
-
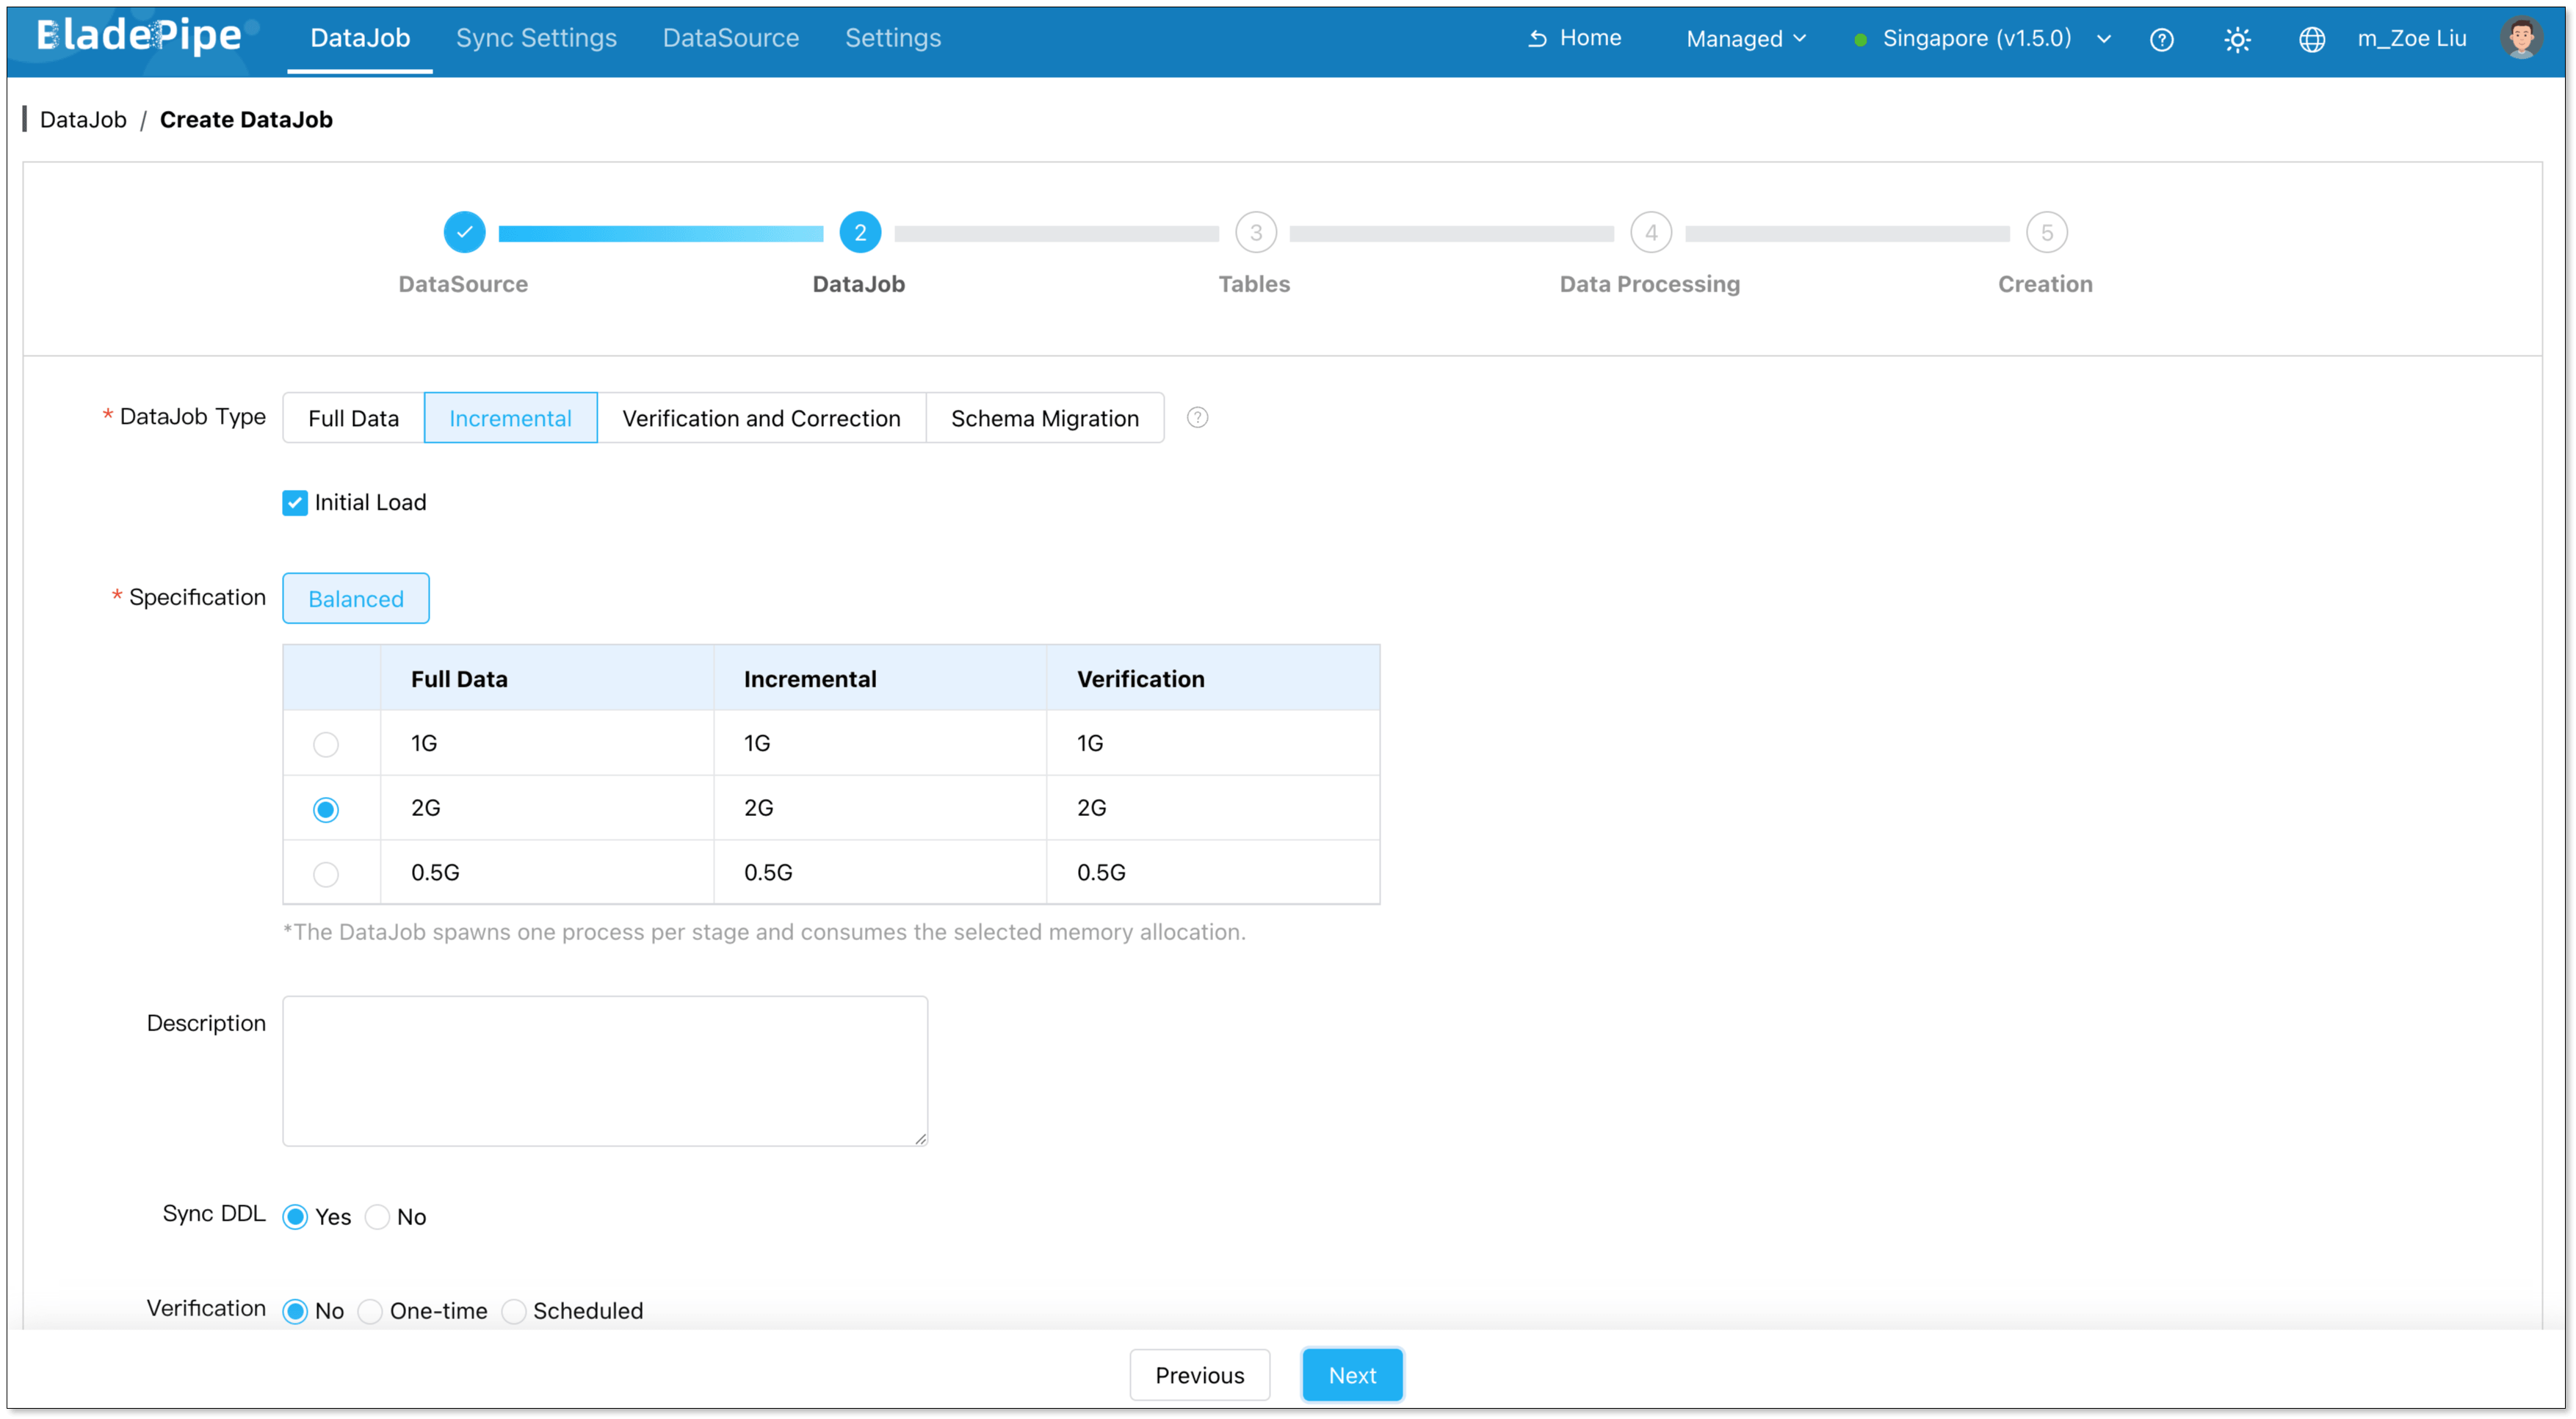
Choose Incremental as the DataJob type, and select Initial Load. Click Next.
-
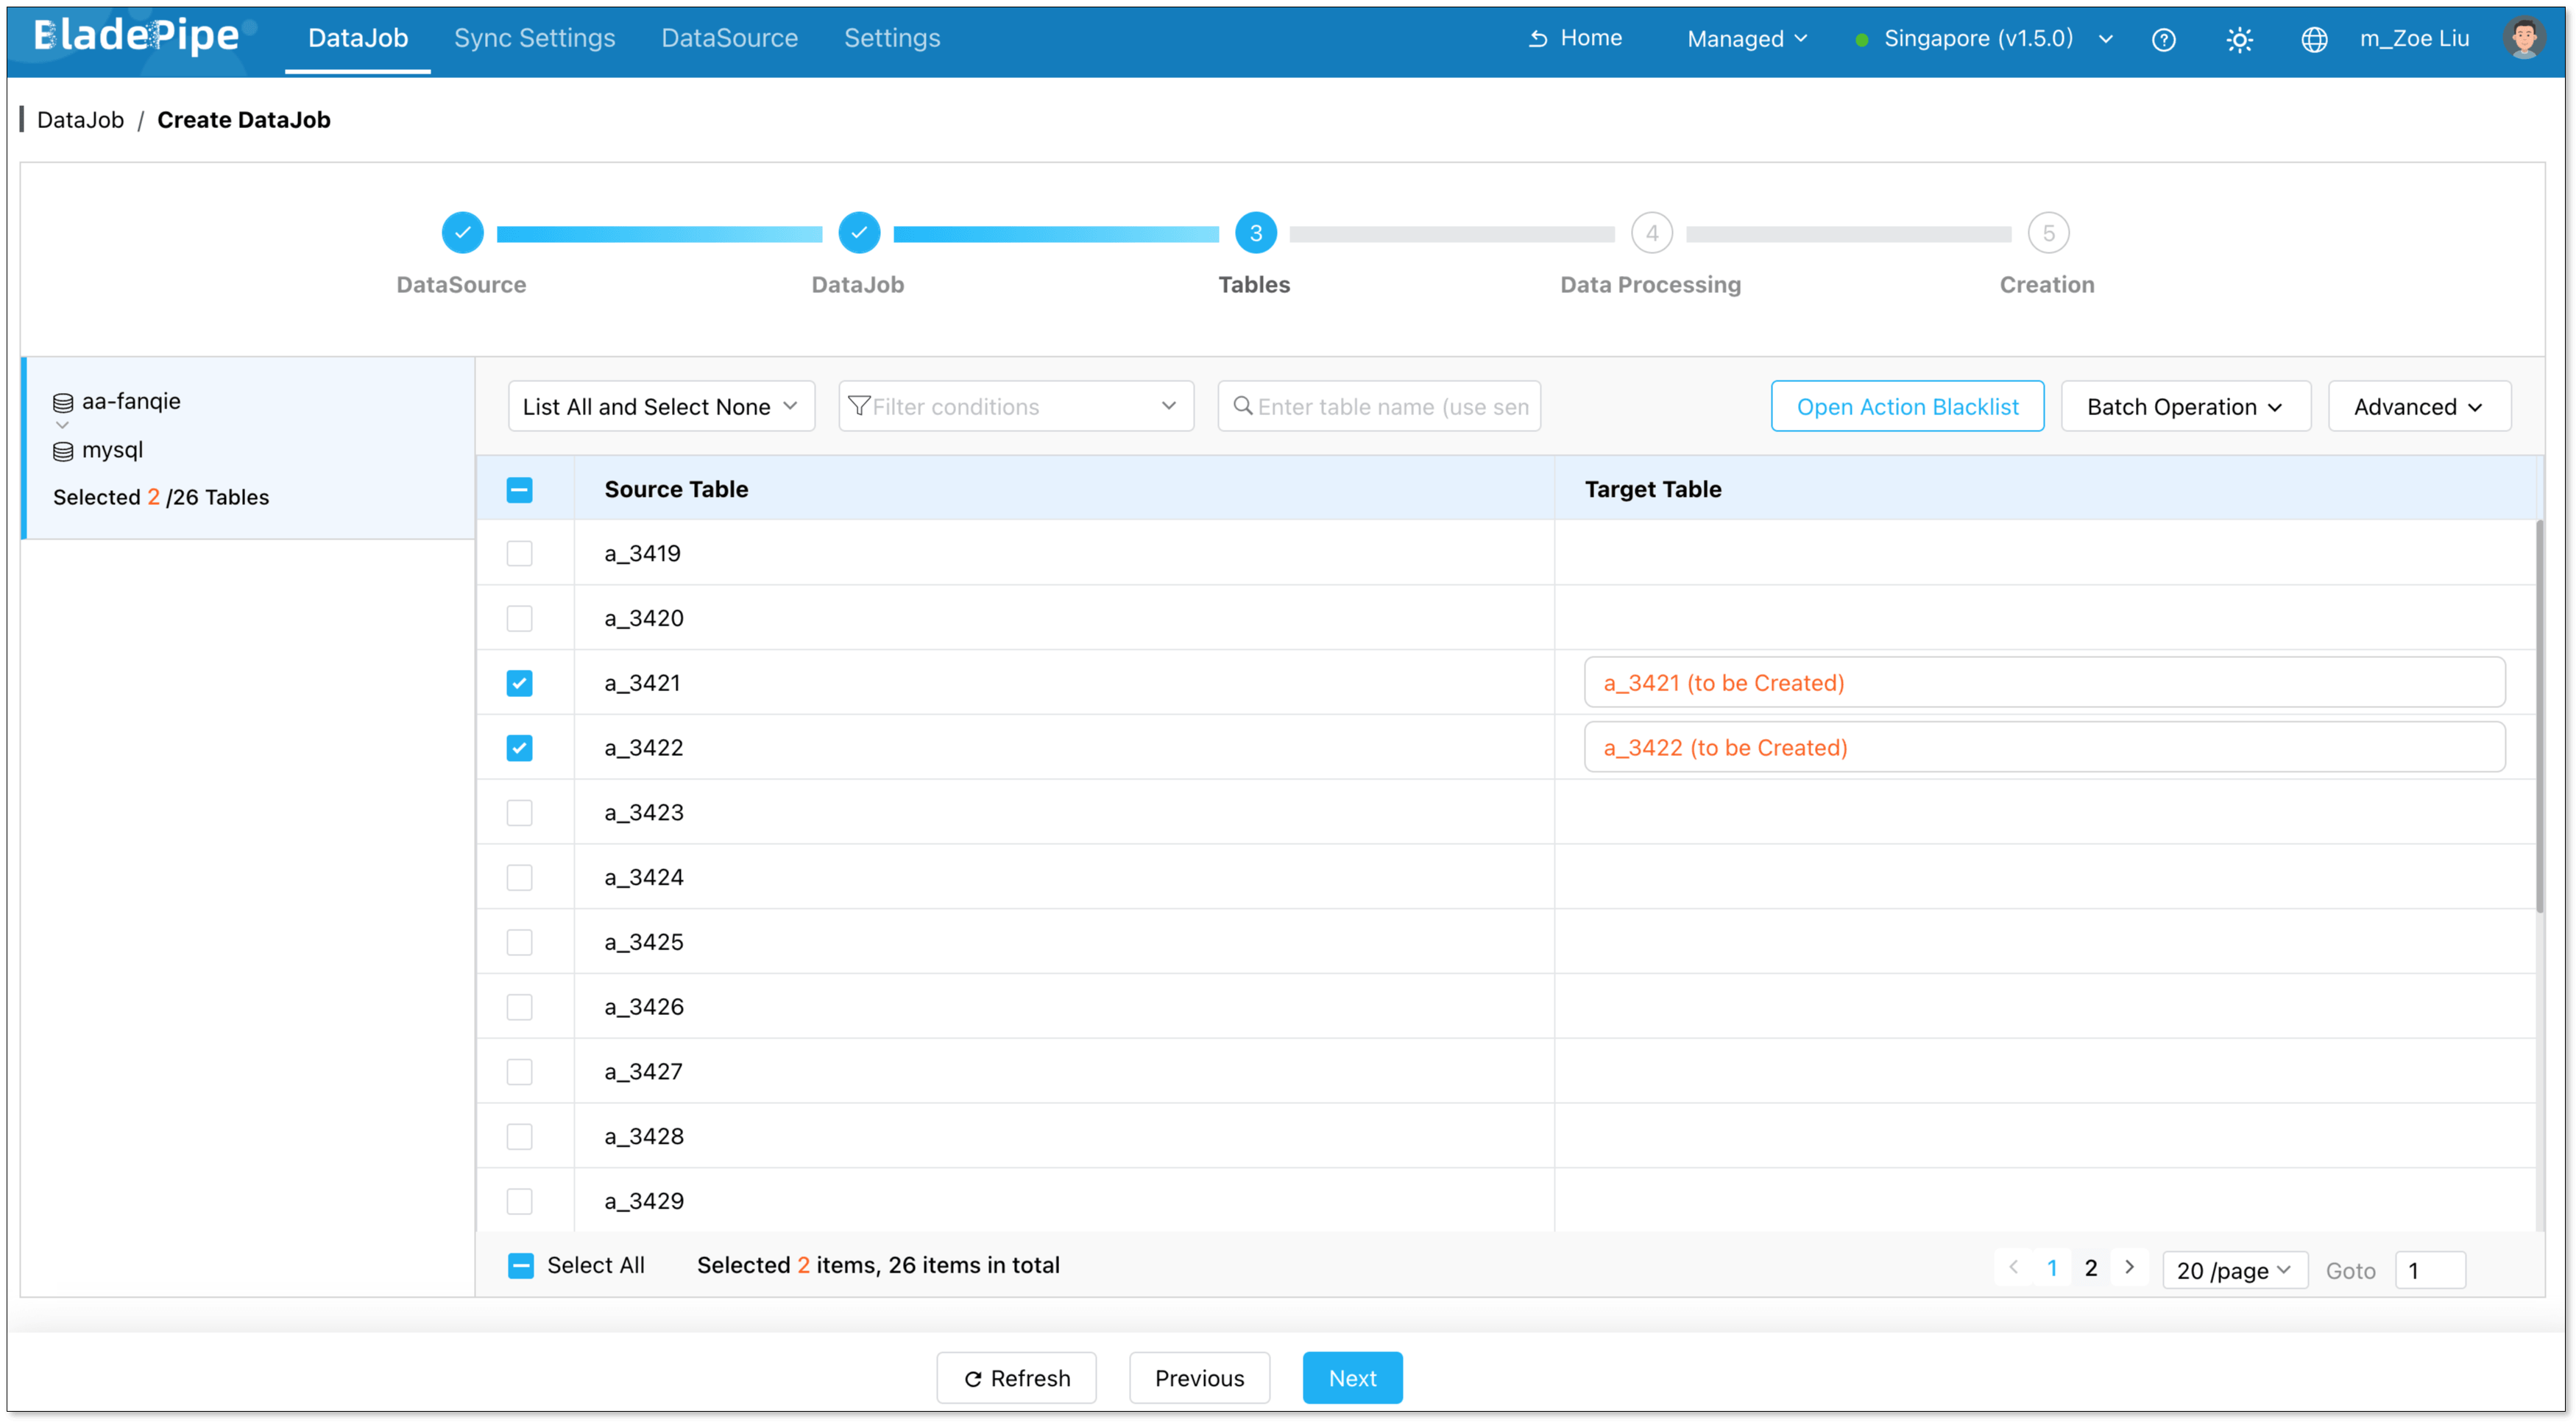
Select the tables you want to sync, and click Next.
-
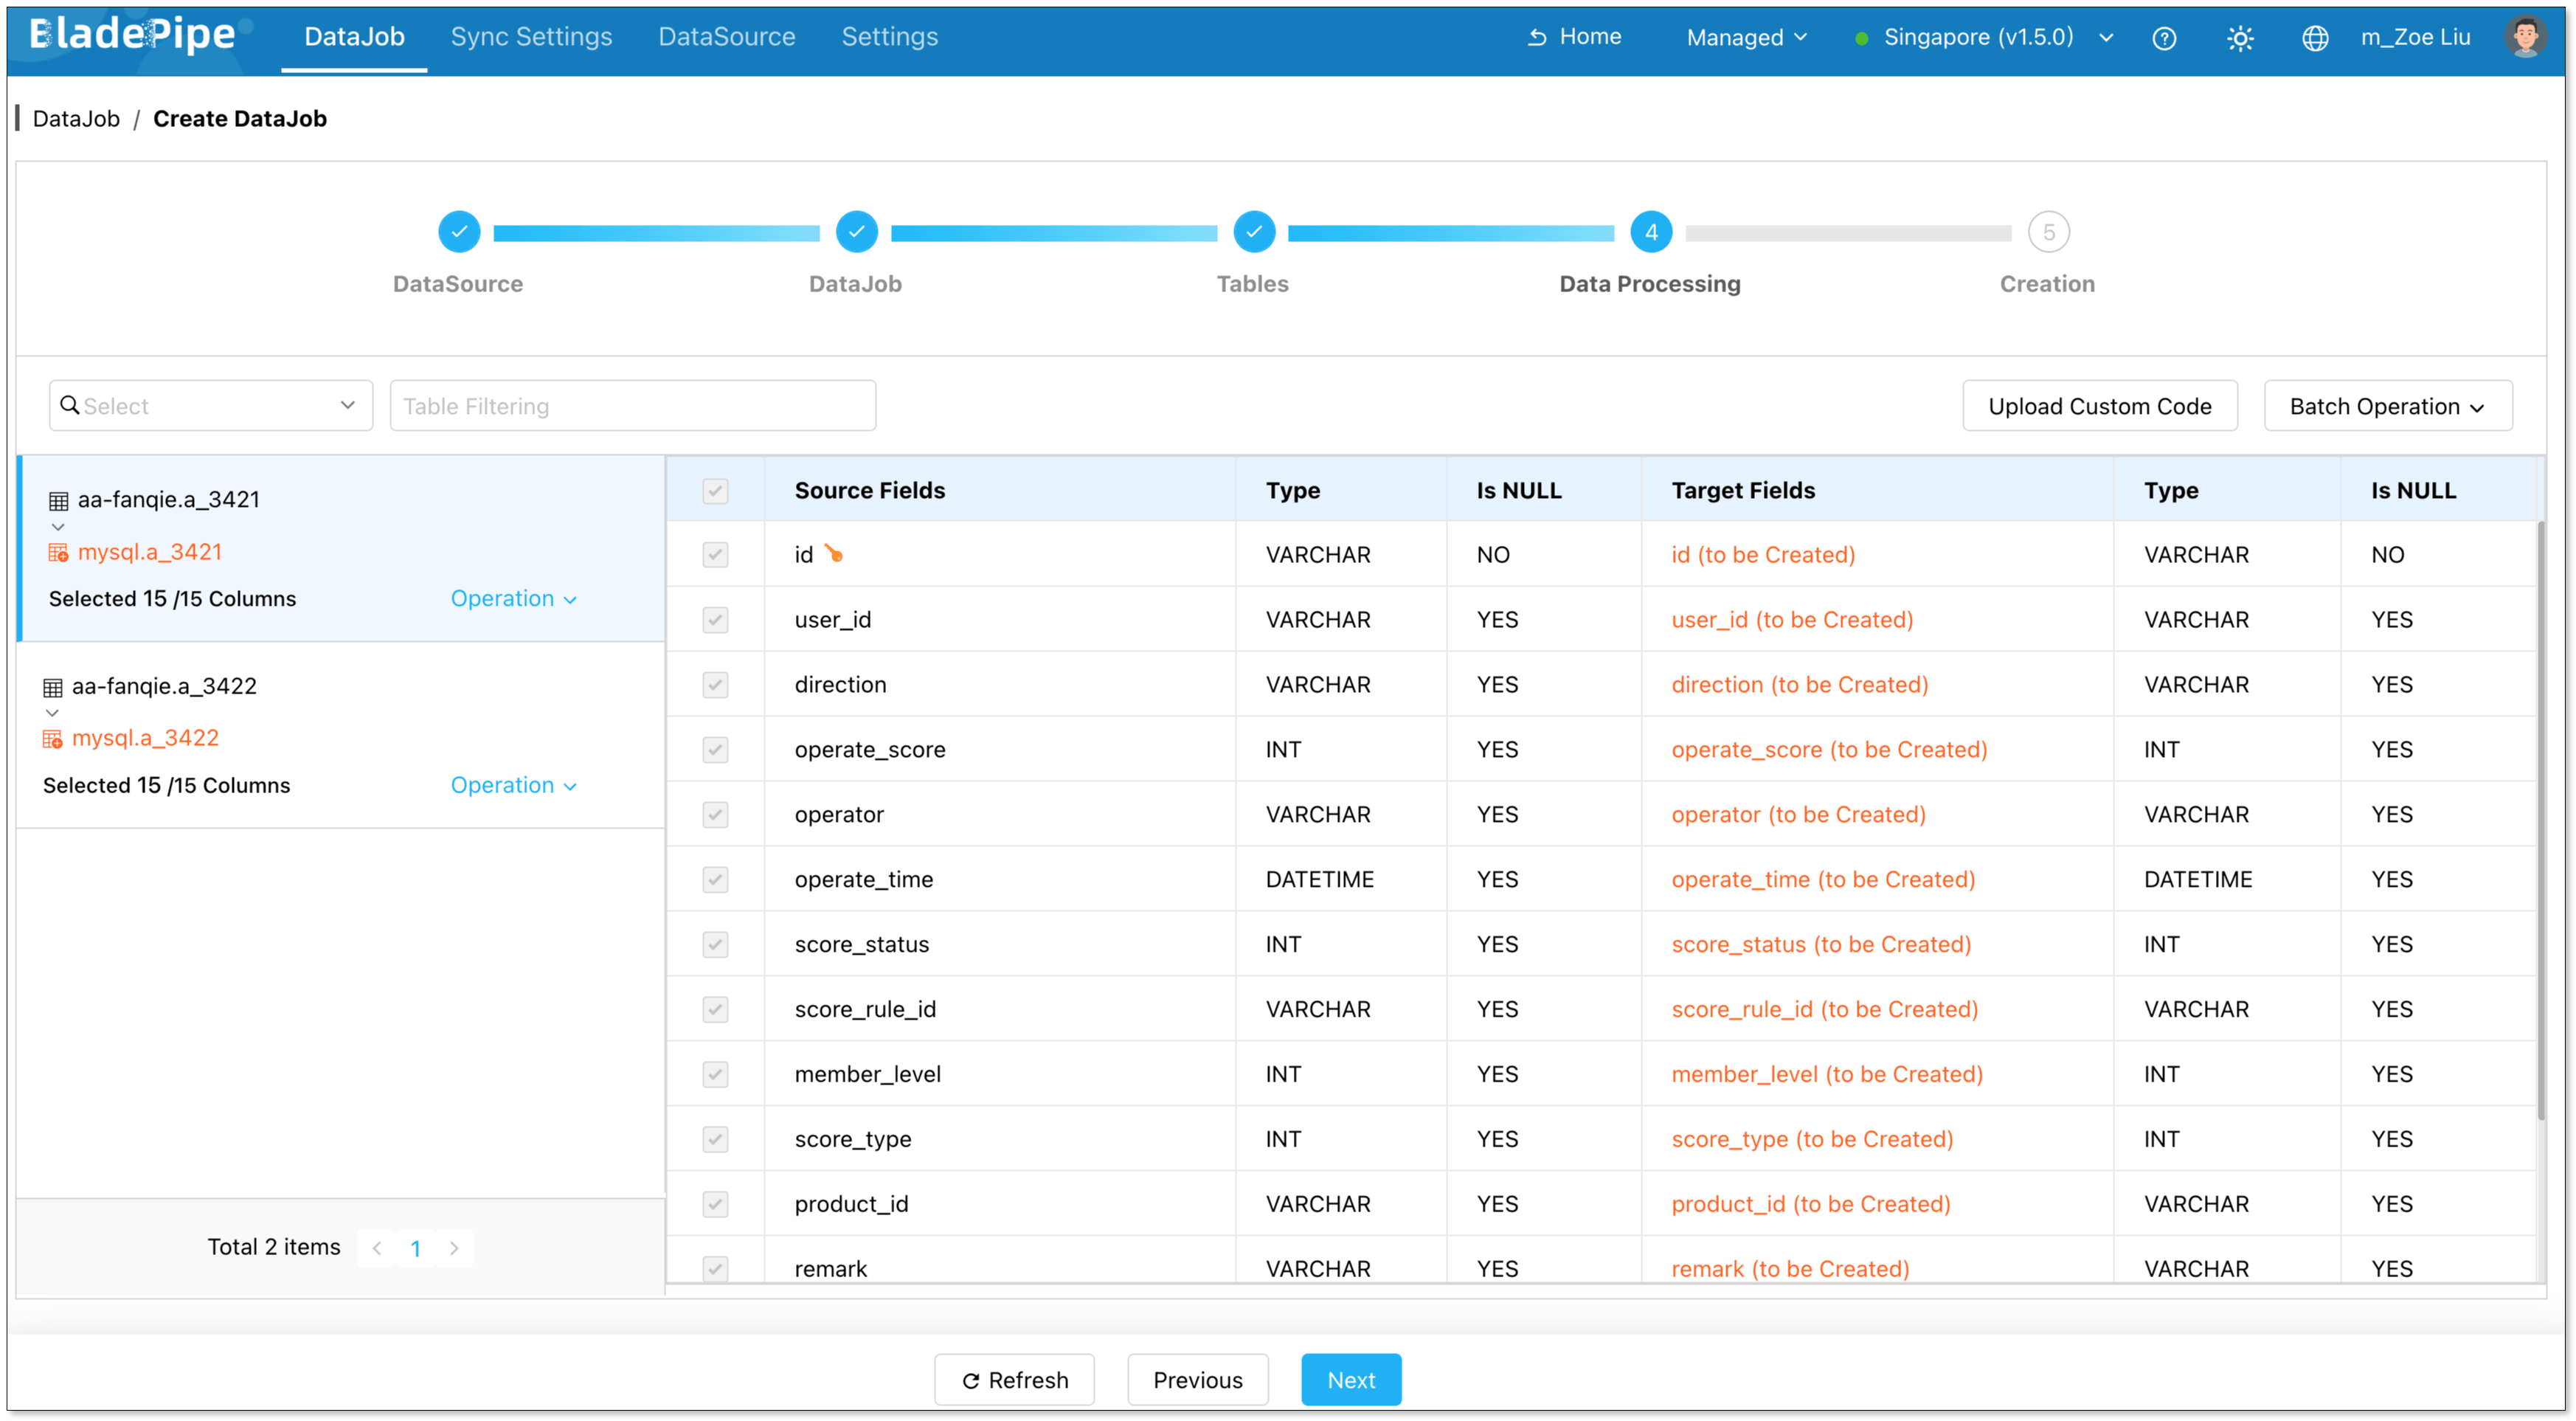
Select the required columns, and click Next.
-
Review your fully managed data pipeline configuration and click Create DataJob.

-
Navigate to the DataJob list page to monitor the progress of your DataJob.

Step 4: Verify the Data
- Perform insert, update, and delete operations in your source database.
- Verify that the changes dynamically replicate to the target database to ensure data consistency.